This excellent content from the Hackaday writing crew highlights recurring topics and popular series like Linux-Fu, 3D-Printering, Hackaday Links, This Week in Security, Inputs of Interest, Profiles in Science, Retrotechtacular, Ask Hackaday, Teardowns, Reviews, and many more.
Nerd Ralph loves cheap and dirty hacks, and for that we applaud him. His latest endeavor is a LiFePO4 battery charger that he made out of parts he had on hand for under $0.50 US. (Although we think he really made it for the fun of making it.)
The circuit is centered around a TL431 programmable shunt regulator, which is an awesome and underrated chip in its own right. If you don’t know the TL431 (aka LM431), you owe it to yourself to fetch the datasheet and pick up a couple with your next electronics part order. In fact, it’s such a great chip, we can’t resist telling you about it for a minute.
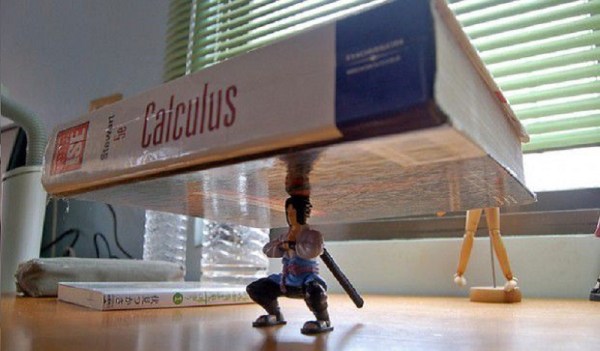
If I asked you to find the area of a square, you would have no problem doing so. It would be the same if I asked you to find the volume of a cone or rectangle or any other regular shape. You might have to turn to Google to get the proper formula, but it would be a trivial process nonetheless. But what if I asked you to find the volume of some random vase sitting on a kitchen counter? How does one go about finding the volume of irregular shapes?
One way would be to fill the vase with much smaller objects of a known volume. Then you could add up the smaller volumes to get an estimate of the total volume of the vase. For instance, imagine we fill the vase with marbles. A marble is a sphere, and we can calculate the volume of each marble with the formula 4/3πr3. We count all of our marbles and multiply the total by the volume of a single marble and arrive at our answer. It is not perfect, however. There is a lot of empty space that exists between the marbles as they fill the vase. We are forced to conclude that our estimated volume will be lower that the actual volume.
It would be about this time when our good friend Isaac Newton would ask the question “What if you made the marbles smaller?” Reducing the size of each marble would reduce the empty space that exists between them as they pile up in the vase, giving us a more accurate total volume. But how small? Is there a limit to how small we can make them? “Do not trouble yourself with the limit.” says [Newton]. “You will find that as you make the marbles smaller and smaller, you will begin to converge on a single number – and that number will be the exact volume of your vase.”
Reducing the size of the marble to get a more exact volume demonstrates the idea of the integral – one of the two fundamental principles of The Calculus. The other principle is known as the derivative, which we explained in our previous article by taking a very careful and tedious examination of an arrow in flight. In this article, we shall take the same approach toward the integral. By the end, you will have a fundamental understanding of what the integral is, and more importantly, how it works. Our vase example gives you a good mental image of what the integral is all about, but it is hardly a fundamental understanding of it. Just how do you make those marbles smaller? To answer this question, let us look again at one of Zeno’s moving arrows.
In the summer of 1929, it would probably have been hard for the average Joe to imagine the degree to which his life was about to change. In October of that year, the US stock market tumbled, which in concert with myriad economic factors kicked off the Great Depression, a worldwide economic disaster that would send ripples through history to this very day. At its heart, the Depression was about a loss of confidence, manifested in bank failures, foreclosures, unemployment, and extreme austerity. People were thrust into situations for which they were ill-prepared, and if they were going to survive, they needed to adapt and do what they could with what they had on hand. In short, they needed to hack their way out of the Depression.
Social Hacking: Welcome to the Jungle
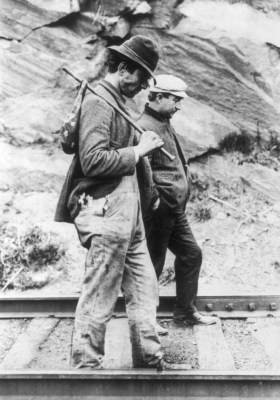
Bindlestiffs ambulating down the high iron. Source: Wikipedia
One reaction to the change in the social contract in the 1930s was increased vagrancy. While homelessness was certainly thrust upon some people by circumstances – in the depth of the Depression in 1933, something like 25% of men were unemployed, after all – life on the road was clearly a choice for millions. A typical story was that of the bored teenage boy, facing no prospects for a job and wishing to relieve his large family of the burden of one more mouth to feed. Hitting the road with a few possessions in his “bindle,” he learned the craft of life on the road from more experienced vagrants. And thus another hobo was created.
The popular image of the hobos as unique to the Depression is a little awry. Economic upheaval certainly swelled their ranks, but in America, hobos had first appeared after the Civil War, with war-weary veterans riding the rails looking for work. By the time the Depression hit, there was an extensive hobo culture in the United States, complete with its own slang and a rough code of ethics.
Hobos were top of the heap in the vagrant hierarchy, the “knights of the road.” They were migrant workers, generally unskilled, willing to stay in one place for a paying job but unwilling to commit to settling down. When the job was done or he had made enough money, he moved on. Tramps were the next step down – wanderers who were willing to work but only when absolutely necessary. Lowest in the pecking order were the bums who stayed put and relied on the kindness of strangers for their survival. Regardless of rank, all the vagrants had one thing in common – the road. More or less constantly on the move, they had to quickly learn how to provide for themselves without the creature comforts, which before the Depression hit had begun to include many modern conveniences.
Cooking arrangements were one thing hobos excelled at, whether on the road or in one of the many hobo camps, or jungles, that sprung up at railroad crossings outside of towns. A campfire in a ring of rocks is the traditional view of outdoor cookery, but the hobos quickly learned that it’s not terribly fuel-efficient. One solution to this problem was the hobo stove, an ancestor of the rocket stove. Relying on convection to draw a huge volume of air into a combustion chamber, hobo stoves were easily fabricated from tin cans and other metal scraps that were easy to come by in a world before recycling and large municipal landfills. Most were assembled on the spot and served for a meal or two before being abandoned, but some actually had insulation between double walls and clever arrangements of the fuel shelf to feed automatically as the fuel burned away. Scraps of wood, pinecones, newspapers and cardboard – a hobo stove will eat almost anything, and burn hot enough that even damp fuel isn’t a problem.
Often finding himself with time on his hands, many a hobo kept himself busy with arts and crafts projects in camp. Making hobo nickels was a popular way to pass the time, and often resulted in a trade item far more valuable than the base value of the starting material. The Indian head figure on the US Buffalo nickels of the day were modified with tools fabricated from old nails and files; metal was pushed around the coin to create features on the figure, usually a bowler hat and facial hair. A ‘bo could trade the miniature bas-relief sculpture for a good meal; today genuine hobo nickels from the Depression era command high prices from collectors.
Radio: Razor Blades and Copper Pipe
Unless the hobo was flopping in town or at a really well-equipped jungle, chances are pretty good he wasn’t listening to the radio too much. From our 21st century outlook, it’s sometimes hard to appreciate how new and exciting radio was and the impact it had on everyday life in America during the Depression. Radio connected the nation in a way no other medium ever had. That the Depression did not kill this infant technology in its cradle is a testament to both its power as a medium – families would stop making payments on almost everything else so they could keep their radio sets – and to the tenacity of early electronics hobbyists, who learned to keep radios alive and even to fabricate them from almost nothing.
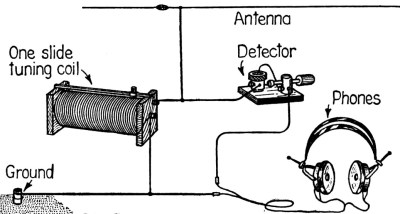
Although tube-type superheterodyne receivers were widely available all through the Depression, crystal sets were still a popular and sometimes necessary hacker project during the Depression. Relying on nothing more than a tuned circuit and a detector connected to an antenna and high-impedance headphones, a crystal set was able to pick up strong AM broadcasts and sometimes even shortwave stations. The earliest detectors were crystals of galena probed by a tiny “cat’s whisker” wire, but metal oxides could also form the necessary rectifying junction, leading to detectors built out of razor blades and safety pins. Crystal radio skills would serve many a Depression-era farm boy well during the next decade as they went off to war in Europe and the Pacific; there they created foxhole radios to listen in on broadcasts without the risk of a more sophisticated radio set, whose local oscillator could be detected by the enemy.
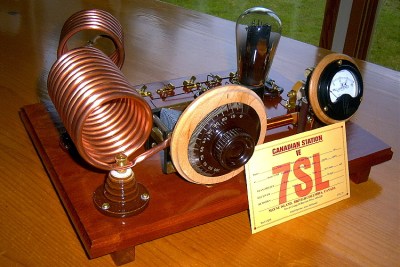
VE7SL’s replica 1929 TNT transmitter, a close relative of the Hartley. Source: The VE7SL Radio Notebook
Receivers weren’t the only area in which Depression-era hackers made an impact. As commercial broadcasting took off, so did amateur radio, and few commercial transmitters were available to satisfy the burgeoning ham market. Depression-era hams had to home-brew almost everything and came up with some beautiful designs that modern glowbug hams recreate with loving attention to detail. A popular transmitter back in the day was based on the Hartley oscillator (PDF link). Using only a single triode tube and a tuned circuit with coils wound from 1/4″ copper tubing, Hartley transmitters could be built on a literal breadboard from scraps and widely available parts. Tuned to the 40- or 80-meter band, or even down to the 160-meter band, a Hartley or the closely related Tuned-Not-Tuned (TNT) or Tune-Plate-Tuned-Grid (TPTG) continuous-wave (CW) transmitters could put out enough power to work coast-to-coast contacts, or QSOs. Modern hams pay homage to the Depression-era pioneers of amateur radio with regular “QSO Parties” using replica Hartleys – most with bypass capacitors to keep the lethal voltages their forebears had to deal with off the coils.
The Great Depression lasted through the 1930s in America, finally dissipating just before the country mobilized for World War II. With factories suddenly working beyond capacity to supply the war effort, unemployment figures quickly plummeted, and the austere practices of the Depression were generally rolled back. Hobo culture declined and amateur radio was shut down by the federal government for the duration of the war, but neither the war effort nor full employment could kill the hobo spirit — modern hobos still ply the rails to this day. And the skills and mindsets developed by Depression-era social and electronics hackers paved the way for a lot of what was to come in the post-war years.
CES, the Consumer Electronics Show, is in full swing. That means the Hackaday tip line is filled to the brim with uninteresting press releases, and notices that companies from the world over will be at CES.
3D printing has fallen off the radar of people who worship shiny new gadgets of late, and this is simply a function of 3D printing falling into the trough of disillusionment. The hype train of 3D printing is stuck on a siding, people are bored, but this is the time that will shape what 3D printing will become for the next ten years. What fascinating news from the 3D printing industry comes to us from CES?
We run a lot of posts on amateur radio here at Hackaday, and a majority of our writers and editors* are licensed hams. Why? Because playing around with radio electronics is fun, and because having a license makes a lot more experimentation legal. (*We’re sure you have good reasons for slacking, Szczys.)
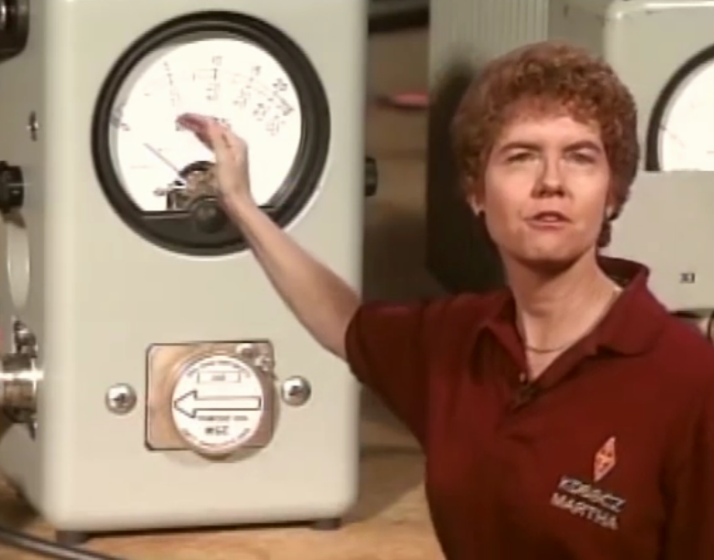
So let’s say that you want to get your “ticket” (and you live in the USA). It’s easy: just study for an exam or two, and take them. How to study? We’re glad you asked, because we just found this incredibly long video that’ll prep you for the exam.
At six and a half hours, we’ll admit that we haven’t watched the whole thing, but what we did see looks great. Admittedly, we were a little bit unnerved by [John (KD65CY)]’s overdone enthusiasm. But the content is fundamental, broad-ranging, and relevant. Heck, even a bit entertaining.
Even if you’re not interested in taking the exam, but are just interested in some radio basics, it’s worth looking. If you give it a shot, and like what you see, let us know in the comments what times stamps you found interesting.
In our experience, the Technician exam is easy enough that it’s probably worth your while to study up for the General exam as well. You have to take the former before the latter, but there’s nothing stopping you from taking them all in one sitting. (General gets you a lot more international shortwave frequencies, so it’s at least worth a shot.)
But don’t let that slow you down. Just getting the Tech license is easily worth studying up for a couple of hours or so. You have no excuses now. Go do it!
No doubt many of you have spent a happy Christmas tearing away layers of wrapping paper to expose some new gadget. But did you stop to spare a thought for the “sticky-back plastic” holding your precious gift paper together?
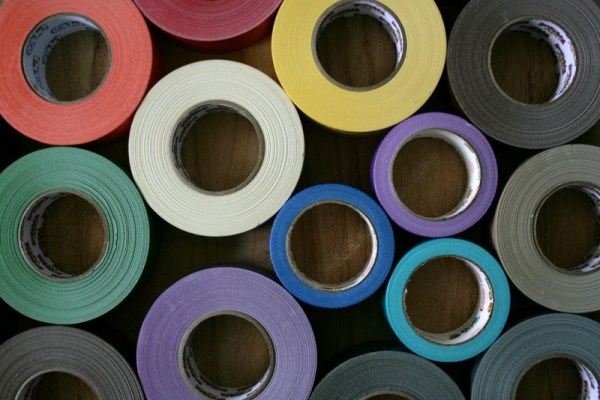
There are a crazy number of adhesive tapes available, and in this article I’d like to discuss a few of the ones I’ve found useful in my lab, and their sometimes surprising applications. I’d be interested in your own favorite tapes and adhesives too, so please comment below!
But first, I’d like to start with the tapes that I don’t use. Normal cellulose tape, while useful outside the lab, is less than ideally suited to most lab applications. The same goes for vinyl-based insulating tapes, which I find have a tendency to fall off leaving a messy sticky residue. When insulation is necessary, heatshrink seems to serve better.
The one tape I have in my lab which is similar to common cellulose tape however is Scotch Magic Tape. Scotch Magic tape, made from a cellulose acetate, and has a number of surprising properties. It’s often favored because of it’s matte finish. It can easily be written on and when taped to paper appears completely transparent. It’s also easy to tear/shape and remove. But for my purposes I’m more interested in it’s scientific applications.
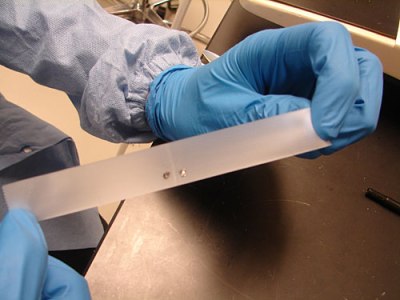
Here’s a neat trick you can try at home. Take a roll of tape (I’ve tried this with Scotch Magic tape but other tapes may work too) to a dark room. Now start unrolling the tape and look at interface where the tape leaves the rest of the roll. You should see a dim blue illumination. The effect is quite striking and rather surprising. It’s called triboluminescence and has been observed since the 1950s in tapes and far earlier in other materials (even sugar when scraped in a dark room will apparently illuminate). The mechanism, however, is poorly understood.
It was perhaps this strange effect that led researchers to try unrolling tape in a vacuum. In 1953 a group of Russian researchers attempted this and bizarrely enough, were able to generate X-rays. Their results were unfortunately forgotten for many years, but were replicated in 2008 and even used to X-ray a researcher’s finger! As usual Ben Krasnow has an awesome video on the topic:
In my lab however I mostly use Scotch tape to remove surface layers. In certain experiments it’s valuable to have an atomically flat surface. Both Mica and HOPG (a kind of graphite) are composed of atomically flat layers. Scotch tape can be used to remove the upper layers leaving a clean flat surface for experimentation.
Researchers have also modified this technique to produce graphene. Graphene is composed of single carbon layers and has a number of amazing properties, highly conductive, incredibly strong, and transparent. For years producing small quantities of graphene provided difficult. But in 2004 a simple method was developed at the University of Manchester using nothing but bulk ordered graphite (HOPG) and a little Scotch tape. When repeatedly pressed between the Scotch tape, the Graphite layers can be separated until eventually only a signal layer of graphene remains.
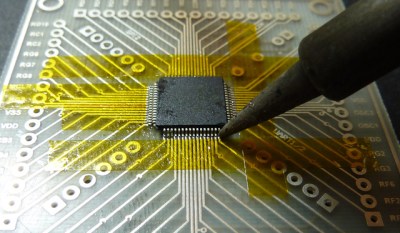
The other non-conductive tape I use regularly in my lab is of course Kapton tape. While Kapton is a Dupoint brand name, it’s basically a polyimide film tape which is thermally stable up to 400 degrees C. This makes it ideal for work holding in electronics (or masking out pins) when soldering. You can also use it for insulating (though it’s inadvisable for production applications). Typically polyimide tape is available under a number of dubious synonyms (one example is Kaptan) from a variety of Chinese suppliers at low cost.
Carbon tape is conductive in all axes. This means it you can create a electrical connection by simply taping to your devices. It’s resistance however is somewhat high. I’ve most commonly come across this when using electron microscopes. Carbon tape is used both to keep a sample in place and create an electrical connection between the sample and the sample mount.
Carbon tape, applied to a SEM mount.
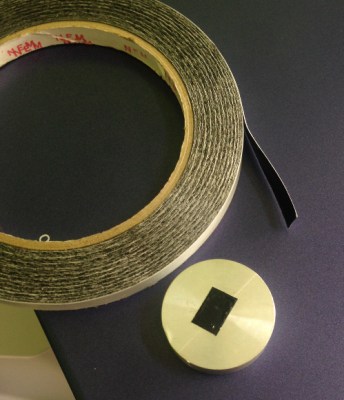
Other conducting tapes are available with lower resistance, creating a electrical connection without soldering is valuable in a number of situations. Particularly when heat might damage the device. One example of this is piezoelectric materials. Not only does solder often bond poorly to ceramic materials, but it may also depole the material removing its piezoelectric properties. I tend to use conductive epoxies in these situations, but conductive tapes appear to be an attractive option.
Aluminum tape is commonly used for (heat) insulation in homes. It’s therefore very cheap and easily available. As well as conducting heat aluminum tape of course also conducts electricity. Around the lab this can be pretty handy. While the adhesive is not conductive, making it less attractive for connection parts, I’ve found aluminum tape great of sealing up holes in shielded enclosures. It also makes a great accompaniment to aluminum foil which is used to provide ad-hoc shielding in many scientific environments. Copper tape is also easily obtained, though slightly more expensive.
Z tape under a microscope
A much less common, but far cooler conductive tape is so called Z tape. This tape is composed of regular double-sided tape impregnated with spaced conductors. The result is a tape that conducts in only one direction (from the top to the bottom). This makes it similar in structure to a zebra strip, commonly used to connect LCDs. Z tape is unfortunately pretty expensive, a short 100mm strip can cost 5 dollars. What exactly 3M had in mind when creating Z tape is unclear. But it can be used for repairing FPC connectors on LCDs or in other situations where soldering is impractical.
One of the more awesome applications is Jie and Bunnie’s circuit sticker project. The kits are designed to allow kids to assemble circuits simply by sticking components together. Z tape is ideal for this, as it allows multiple connections to be made using the same piece to tape.
I couldn’t write an article on tape without mentioning the somewhat apocryphal “Invisible Electrostatic Wall” incident. A report at the 17th Annual EOS/ESD Symposium describes a “force field” like wall that appeared during the production of polypropylene film. While the story seems slightly dubious, it reminds us of the surprising applications and utility of tapes.
Next time you’re sending off a package or ripping open a package, spare a thought for the humble tape that holds it together.
The Travelling Hacker Box is the physical implementation of the hackaday.io community. While most of what happens on hackaday.io happens online, sometimes the activities leak out to the real world. One such activity is a box, filled with random electronics stuff, shipped around to different members of the hackaday.io community.
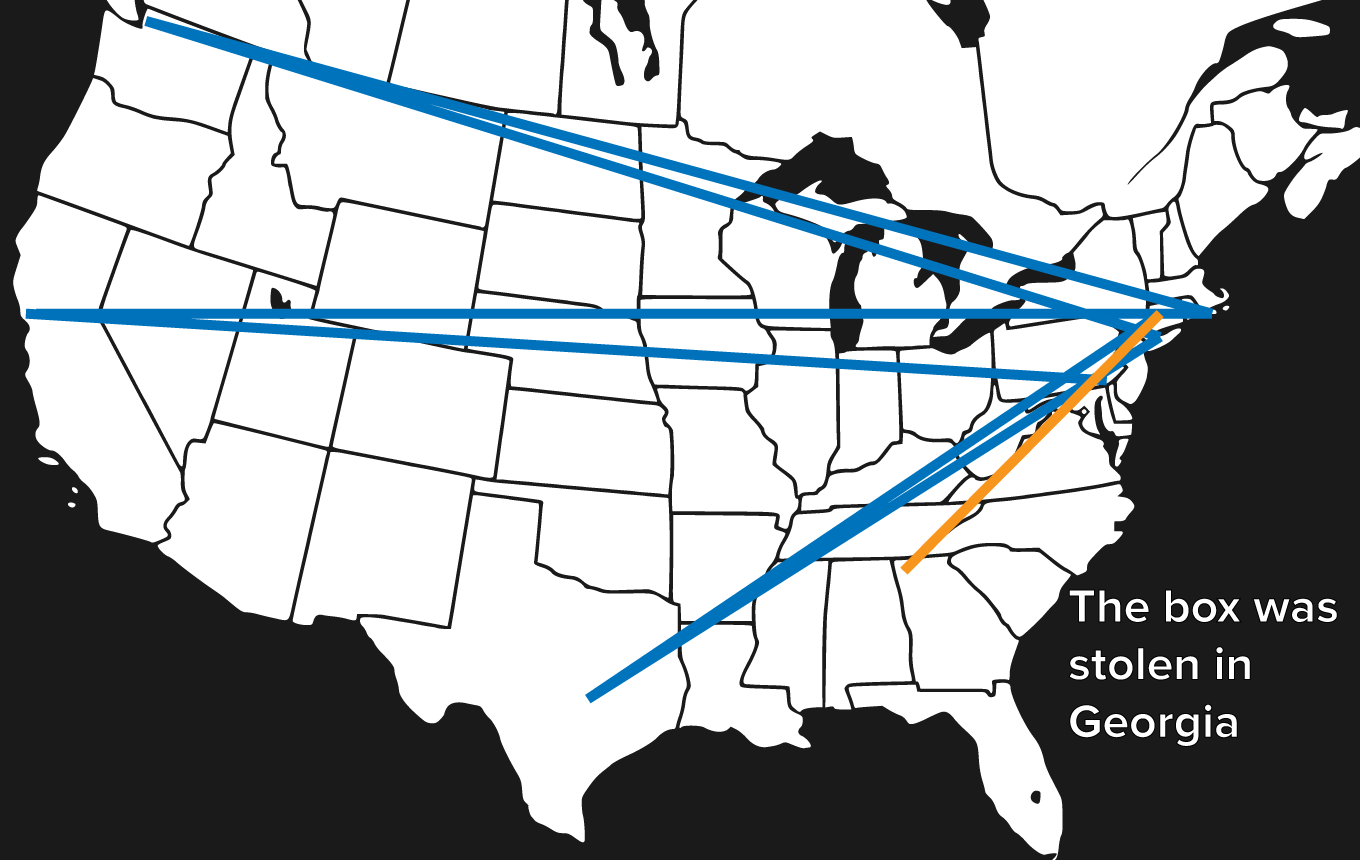
It’s a great idea in theory. In practice, people are bastards. The first Travelling Hacker Box was stolen by a member of the hackaday.io community. After travelling 14,167 miles through Philadelphia, San Francisco, Boston, Seattle, New York, Boston again, and the middle of Texas, the first travelling Hacker Box met its fate along the Georgia border, two hours outside of Atlanta. Who is responsible? We’re not going to talk about him. He knows who he is and what he did.
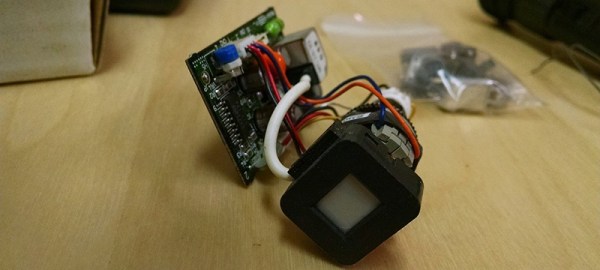
All is not lost, even though hundreds of dollars in electronic doo dads are. There’s a new Travelling Hacker Box already on its way around the US. It’s slowly being filled up with goodies, and has already visited Wyoming and upstate New York, and is currently somewhere around Anchorage, AK. The latest update shows this box is filled with goodies including a mini CRT assembly from an old camcorder, stepper motor drivers, and other weird electronics paraphernalia.
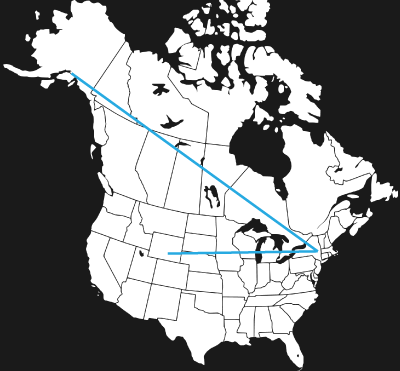
The travels of the current Travelling Hacker Box
The current plan for the Travelling Hacker Box is the same as the old box: put 25,000 miles on the odometer while taking advantage of the economics of a USPS flat-rate box. From there, it will go further afield, travelling the circumference of the Earth a second time, hitting stops in Europe, Africa, Asia, India, Australia, and South America. If you’re a subcontractor for Raytheon, part of the NY Air National Guard, or are otherwise able to receive mail in Antarctica, you are encouraged to email me.
Feel like you’re up for adding a few hundred miles to the Travelling Hacker Box? There’s no set process to get on the list; destinations are chosen by distance from the current node, trustworthiness, and distance to the next node, if planned. The best way to get on the list is to click the ‘Request to join this project’ link on the Travelling Hacker Box project. Then, hang out in the Hacker Box chatroom, and you might have a chance at receiving a magical box of random electronics.

 4/3πr3. We count all of our marbles and multiply the total by the volume of a single marble and arrive at our answer. It is not perfect, however. There is a lot of empty space that exists between the marbles as they fill the vase. We are forced to conclude that our estimated volume will be lower that the actual volume.