Sooner or later, all of us end up putting on our reverse engineering hats and digging in to a device. It might be that you’re trying to keep an old piece of equipment running – the manufacturer is long defunct, and parts are no longer available. It might be that sweet new router with locked down firmware. Or, it might just be that you’re curious. Whatever the reason, reverse engineering is a rewarding endeavor. Some of our favorite reverse engineering projects read like spy novels. Instead of cloak and dagger, it’s encryption and soldering iron. This week’s Hacklet focuses on some of the best reverse engineering projects on Hackday.io!
 We start with [Henryk Plötz] and Reverse-Engineering a low-cost USB CO₂ monitor. Carbon monoxide detection and measurement devices are household safety items these days, and have become rather cheap. Carbon dioxide measuring devices are less common, and as expected, more expensive. [Henryk] found a device for around 80€ which did what he needed. The included USB connector was supposedly just for power, but when plugging it in, the device enumerated on his Linux box. The accompanying windows software displayed live data from the detector, but there wasn’t much information on the protocol. Time to bust out Ida pro, and go to town on that software! [Henryk] did battle with his CO₂ monitor”s software and was justly rewarded.
 Next up is [Bob Blake] and Reverse Engineering the Maverick ET-732. [Bob] loves barbecue, but hates to babysit his smoker. Thankfully there are wireless temperature sensors out there built just for that purpose, but they have limited range and you can’t have multiple receivers around the house. [Bob] aimed to fix all of that by sending his Maverick wireless thermometer data to the web, so he could check in on his cooking from anywhere. First he had to reverse engineer the protocol used by the sensor. A spectrum analyzer told [Bob] that the sensor transmit frequency was 433.92 MHz, which is common for low-cost transmitters like this. [Bob] actually had some compatible receivers at his office, so he was quickly able to capture some data with his Saleae logic analyzer. The real fun came in figuring out exactly how the data was organized!
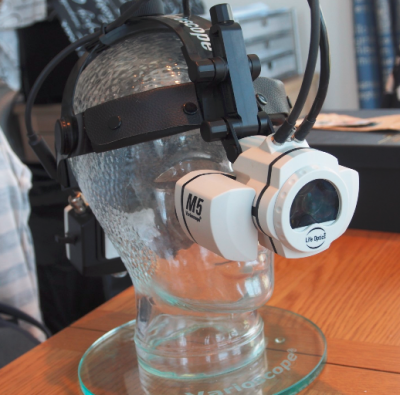 A chance Ebay sale netted [Technics] a sweet head mounted magnifier, but no way to control it. Reverse engineering a Life Optics M5 documents [Technics] efforts to get his new headgear working. The Life Optics M5 is actually a re-branded version of the Leica HM500 head mounted zoom microscope. These devices were originally designed for medical use. They provide a stereo view to the surgeon or dentist using them, as well as sending a video feed to be displayed for the rest of the team to use or record. Cracking open the M5’s head-mounted box revealed several modules, but no obvious means of controlling zoom or focus. Scoping out a few of the mystery wires did reveal what looks to be a 9600 baud serial data stream though. This is a brand new project, and we’re waiting for [Technics] next update to see if he gets to do some soldering with his new toy!
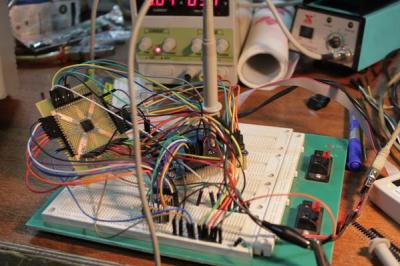 BIOS password protection – it’s the bane of any used laptop buyer’s existence. Sometimes removing these passwords are as easy as popping out the CMOS battery, other times, not so much. [q3k] found themselves in the latter situation with a bundle of Toshiba R100 laptops. and no way to start them up. [q3k] didn’t give up though – they broke out the soldering iron and started Reverse engineering Toshiba R100 BIOS. The R100 is a Pentium M era machine – old but still usable for many hacking purposes. Dumping the ROM BIOS of the laptop didn’t yield the information [q3k] needed, so they moved on to the TLCS-870 controller, and built a really nice board with a Xilinx Spartan6 FPGA to help with the effort. It turns out that the 870 is just used for power management. – [q3k] has now turned their attention to a Renesas microcontroller which might be just the droid they are looking for!
We think that reverse engineering projects are pretty darn cool, so we’ve created a Reverse Engineering List to keep them all organized.
That’s it for this Hacklet, As always, see you next week. Same hack time, same hack channel, bringing you the best of Hackaday.io!












 The Hackaday Retro Edition is our celebration of old computers doing something modern, in most cases loading