A disassembled Game Boy-shaped Hackintosh

This Big 3D-Printed Game Boy Actually Runs MacOS

While mobile gaming has largely moved to smartphones these days, the classic Game Boy remains a hugely popular platform for retro enthusiasts, owing in no small part to its enormous library of quality games. The original Game Boy hardware is pretty much bulletproof, but feels a bit outdated today because it lacks modern conveniences like a large, backlit display or a rechargeable battery.

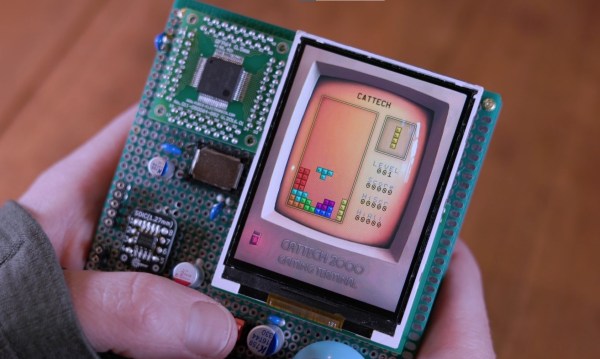
[iketsj] wanted to build a modern take on the Game Boy design and designed what’s in effect a 3D-printed, oversized copy of the classic handheld powered by a modern single-board computer. Most people would have gone for something obvious like a Raspberry Pi running Linux, but not [Ike]: he decided to go for a LattePanda Alpha board and run macOS Monterey on it. That makes this a Hackintosh, and probably one of the last ones as well since Apple is busy migrating all of its products onto its own proprietary CPUs.

The LattePanda also has an Arduino integrated on its board, which is used to read out the Game Boy’s buttons as well as the resistive touch screen. It communicates with the macOS system through a Python script that emulates mouse movements and keypresses. Sadly, the touch function is not working because [Ike] accidentally damaged the touch-sensitive system while trying to slim down the display module. Still, the seven pushbuttons are more than enough when running a Game Boy emulator, and there’s also a USB connector available to connect external peripherals like a keyboard, mouse or monitor.

We’ve seen several great Game Boy projects over the years: some made from brass, some very wide, and some that stuff modern computing platforms inside an original Game Boy case. Combining a Game Boy with a Hackintosh is definitely a new development, though it matches well with [Ike]’s history of unusual Hackintosh designs. Continue reading “This Big 3D-Printed Game Boy Actually Runs MacOS”

The hairclip-embedded tool being used on a Tiger 99x game console, clipped onto a spot where the plastic ribbon meets the LCD panel itself, heating it up

World’s Smallest Hair Straightener For Fixing Old LCD Ribbons

[Stephen] writes to us about an LCD repair tool he has created. We’ve all seen old devices with monochrome LCDs connected by thin film, where connections between the PCB and the LCD have deteriorated and the LCD would no longer show parts of the picture. This is a connection heating gadget, that [Stephen] affectionately dubs as World’s Smallest Hair Straightener, made specifically to bring cool old tech back to life.

A resin-printed mold houses a coil of Kanthal wire, easy to source and simple to make. He reuses a hair clip as a housing for the heating element, which also provides pressure needed to squish the film-printed conductive traces into the LCD as the adhesive melts. High-temperature epoxy brings the two together, and with a variable power supply, this tool successfully brought an old Tiger 99x handheld back to life.

This hack was made possible, in part, because of [JohnDevin Duncan] in Hackaday comment section sharing his experience on repairing LCD ribbons back in 2015, giving valuable insights on the problem that we initially thought would be solve-able with a soldering iron. The knowledge shared was distilled by [Stephen] into a tool that we all can now use when we encounter a device we really, really want to revive.

Last time we covered this topic, quite a few hackers popped up with their stories and suggestions. Old game console fix stories are a staple here on Hackaday, a few pop to mind – this high-effort trace repair of a water-damaged GameBoy cartridge, a badly designed NES cartridge socket reinvention, and this GameBoy LCD sunburn damage restoration guide.

Putting The ‘Go’ In Frisbee Golf With A Robot Launcher

If you’ve gone to a local city park lately, you might have noticed strange metal baskets on poles with chains dangling free. These baskets are spread out throughout the park seemingly at random. For the uninitiated, Frisbee golf (sometimes known as disc golf) is a confusing concept. You might not think it, but Frisbee golf can be a very big deal to some people. [Stuff Made Here] is back with a disc launcher that he hopes will put all the disc golfers to shame.

It’s no secret that we here at Hackaday are big fans of [Stuff Made Here], or [Shane] (he has his own tag after all), and for obvious reasons — the CAD design process, the careful machining and testing, and the extremely high bar that [Shane] sets for his projects. This one is no different, and it is a tale of iteration and scaling. He started out with a simple goal: break the speed record for a thrown Frisbee.

An initial design was decided upon based on high-pressure air pushing a piston to throw the Frisbee off of an arm. Initially, the arm was way too slow as the airflow was severely restricted due to air solenoids and pressure regulators. After fixing all those problems by fabricating his own solenoid and adding a secondary tank with no regulator, the arm started really moving. However, [Shane] wanted it to be able to be arm-mounted, so making sure the torque wouldn’t melt his arm bones was an important priority.

A counterbalance was added to cancel it out, but that ended up causing additional problems down the road, so the throwing arm had to be made as light as possible. The gripper mechanism had to be redesigned again and again as each time the speed was increased, a new problem arose. Turns out that small plastic discs being accelerated at many G’s tend to deform and slip out of their holders, no matter how well engineered. So [Shane] switched to a clever new design to pull the Frisbee along rather than push. It was too dangerous to really be handheld, and the only tests while he was wearing it were at very low amounts of pressure and power.

Testing it in a wide-open field at full power showed promise and while he had plenty of speed, he wasn’t able to beat the distance record. Breaking the distance record is much harder as Frisbees aren’t really designed with the sheer acceleration that [Shane] is subjecting them to, and they want to flip. Additionally, the Frisbees are lacking the spin that would keep them more stable, and what we do as humans is quite difficult to reproduce. Maybe a larger-scale version of this disc launcher could be made that accepts Frisbees?

It’s incredible to watch this contraption come together as each part needs to be designed and machined first by [Shane]. Video after the break.

Continue reading “Putting The ‘Go’ In Frisbee Golf With A Robot Launcher”

Review: DevTerm Linux Handheld Has Retro-Future Vibe

It’s not every day that an open-source, portable Linux handheld computer gets announced, so I couldn’t resist placing an order for the DevTerm by ClockworkPi back when we first learned about the stylish little terminal, which includes a 1280 x 480 screen (double-wide VGA) and a modular little thermal printer.

Of course, the global semiconductor shortage combined with shipping slowdowns led to delays, but things did ultimately come together for the project. I’ve always been a sucker for small-format machines, especially ones that come as a well-designed kit, and that means I can tell you all about what it was like to put it together and turn it on. There’s a lot to look at, so let’s get started.

Continue reading “Review: DevTerm Linux Handheld Has Retro-Future Vibe”

Two revisions of Wenting's custom SSD board - earlier revision on the left, later, sleeker and more complete, on the right.

Custom SSD Gives New Life To Handheld Atom PC

People don’t usually go as far as [Wenting Zhang] has – designing a new IDE SSD board for a portable x86 computer made in 2006. That said, it’s been jaw-dropping to witness the astounding amount of reverse-engineering and design effort being handwaved away.

The Benq S6 is a small MID (Miniaturized Internet Device) with an Atom CPU, an x86 machine in all but looks. Its non-standard SSD’s two gigabytes of storage, however, heavily limit the OS choice – Windows XP would hardly fit on there, and while a small Linux distro could manage better, it’s, and we quote, “not as exciting”. A lot of people would stop there and use an external drive, or a stack of adapters necessitating unsightly modifications to the case – [Wenting] went further and broke the “stack of adapters” stereotype into shards with his design journey.

Tracing quite a few complex multi-layer boards into a unified and working schematic is no mean feat, especially with the SSD PCB being a host to two BGA chips, and given the sheer amount of pins in the IDE interface of the laptop’s original drive. Even the requirement for the SSD to be initialized didn’t stop him – a short fight with the manufacturer’s software ensued, but was no match for [Wenting]’s skills. The end result is a drop-in replacement SSD even thinner than the stock one.

This project is well-documented for all of us to learn from! Source code and PCB files are on GitHub, and [Wenting] has covered the journey in three different places at once – on Hackaday.io, in a YouTube video embedded down below, and also on his Twitter in form of regular posts. Now, having seen this happen, we all have one less excuse to take up a project seemingly so complex.

Hackers play with SSD upgrades and repurposing every now and then, sometimes designing proprietary-to-SATA adapters, and sometimes reusing custom SSD modules we’ve managed to get a stack of. If case mods are acceptable to you aesthetics-wise, we’ve seen an SSD upgrade for a Surface Pro 3 made possible that way.

Continue reading “Custom SSD Gives New Life To Handheld Atom PC”

A USB interface connected to a Psion Organiser II

Arduino Nano Adds USB Interface To The Psion Organiser II

Introduced in 1984, the Psion Organiser series defined the first generation of electronic organizers or PDAs (personal digital assistants). Even though these devices are now over 30 years old, the Psion Organiser scene is alive and well: with new hardware and software is still being developed by enthusiasts the world over.

A USB interface connected to a Psion Organiser II
The Organiser II, with its brand-new USB interface

One of those enthusiasts is [James Stanley], who designed and built a USB interface for the Psion Organiser II. Although a “CommsLink” module providing an RS-232 port was available back in the day, it’s become hard to find, inspiring [James] to design a completely new module based on an Arduino Nano. Hooking it up to the Psion’s data bus was a simple matter of wiring up the eight data lines to the Nano’s GPIO ports. A set of series resistors served to prevent bus contention without having to add glue logic.

Getting the software working was a bit more difficult: the Organiser’s native OPL programming language doesn’t allow the user to directly access the expansion port’s memory address, so [James] had to write a routine in HD6303 machine code to perform the read, then call that routine from OPL to display the result on the screen. Currently, the routine only supports reading data from the Arduino, but extending it to a bidirectional interface should be possible too.

Finally, [James] designed and 3D printed a neat enclosure for the Arduino-USB interface, which makes it look almost as sleek as the original CommsLink module. Perhaps with a bit of further development, this could turn into another way to connect old Psions to the internet. We’ve also featured a new type of Datapak to enhance the Organiser’s memory. Continue reading “Arduino Nano Adds USB Interface To The Psion Organiser II”

The PawPet board in a 3D-printed case, with a d-pad on the right and four buttons on the left. On its small monochrome screen, there's a cat-like pet looking at you.

Reject Modernity; Return To Tamagotchi

Browsing through the recent projects on Hackaday.io, we’ve found this entry by [NanoCodeBug]: a single-PCB low-power trinket reviving the “pocket pet” concept while having some fun in the process! Some serious thought was put into making this device be as low-power as possible – with a gorgeous Sharp memory LCD and a low-power-friendly SAMD21, it can run for two weeks on a pair of mere AAA batteries, and possibly more given a sufficiently polished firmware. The hardware has some serious potential, with the gadget’s platform lending itself equally well to Arduino or CircuitPython environments, the LCD being overclock-able to 30 FPS, mass storage support to enable pet transfer and other PC integrations, a buzzer for all of your sound needs, and an assortment of buttons to help you create mini-games never seen before. [NanoCodeBug] has been working on the hardware diligently for the past month, having gone through a fair few revisions – this is shaping up to be a very polished gadget!

There’s no wonder that people love to start Tamagotchi-like projects – something special happens when an electronic device invokes the same feelings that we’d get while caring for our own pet, and this project does justice to the idea. With homebrew Tamagotchi projects, there’s a trend – once hardware is finished, the software doesn’t always get to a usable stage, feeling more like an afterthought. There’s a hacker twist that should help us subvert this trend, however – [NanoCodeBug] has shared all sources with us in a GitHub repository! If you would like to help with the “software” part, you can start working on that with just a few breakouts. The board files are also there, if you feel like the boards are marvelous enough for your liking to go through modern-day component sourcing pains.

Hackers have been playing with the “pocket pet” concept here and there, to delightful and unconventional results. If you’re on the lookout for other serious Tamagotchi recreation projects, this one takes the cake – otherwise, check out this furry Tamagotchi-like Tribble pet, disarming in its cuteness! If you’re one of our mischief-minded hackers, we have two posts to keep you entertained – one about dumping ROM on newer Tamagotchi toys, and another about building a WiFi-cracking one. And when it comes to the spirit of “what we have on hand” builds, this giant desktop-sized LED matrix Tamagotchi fits the bill pretty well!