The 8-bit Arduboy isn’t exactly a powerhouse by modern gaming standards, or even really by old school standards for that matter. But for the talented developers that produce software for the system, that’s just part of the challenge. To date the monochromatic handheld has seen miniaturized takes on many well-known games, with several taxing the hardware beyond what most would have assumed possible.
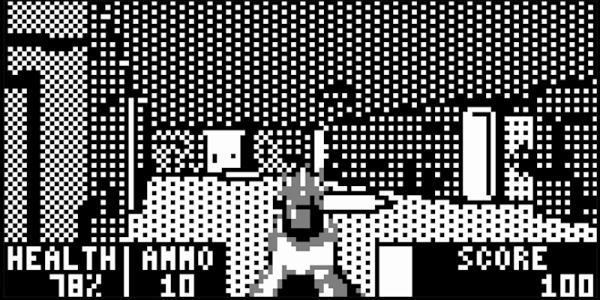
But the latest entry into this catalog of improbable software, WolfenduinoFX, is easily the most technically impressive. As the name implies, this is a “demake” of 1992’s iconic Wolfenstein 3D. It features 10 levels based on the original game’s shareware release, with the enemies, weapons, and even secret rooms lovingly recreated for the Arduboy’s 128 x 64 OLED display.
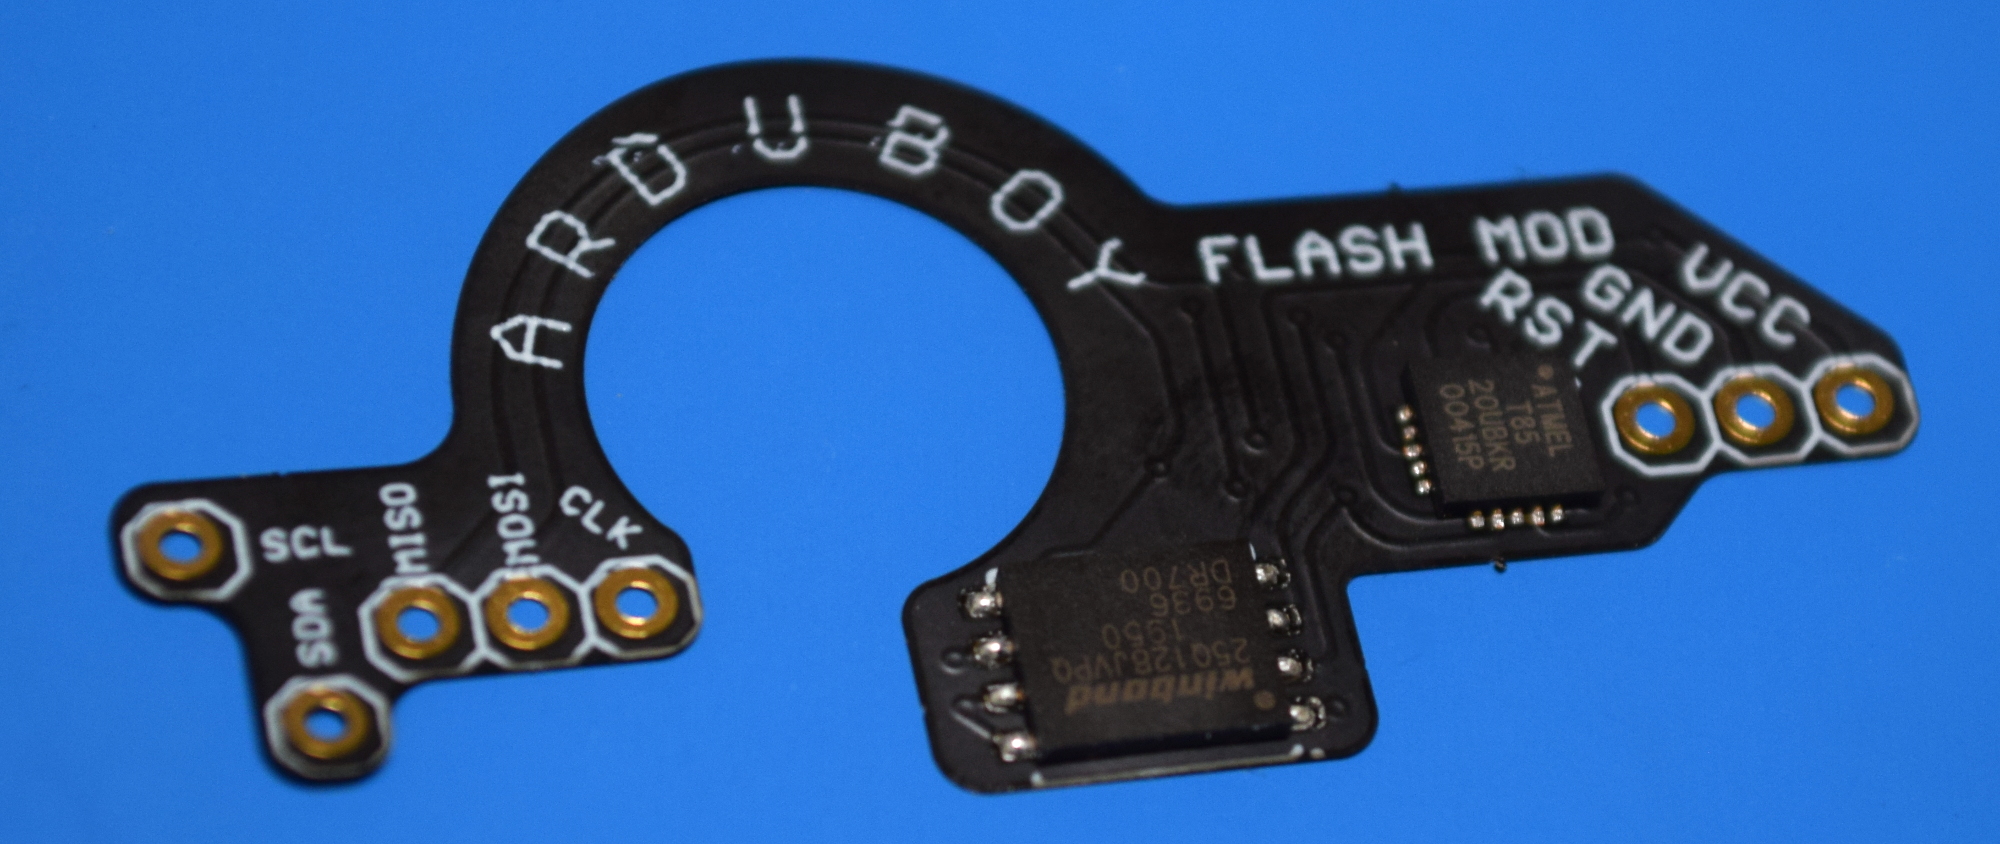
Now, those of you who have experience working with the ATMega32u4 microcontroller at the heart of the Arduboy might think this is impossible…and you’d be right. The only way developer [James Howard] was able to pull this feat off was by leveraging the extended flash memory offered by the Arduboy FX.
This upgrade, which was developed in conjunction with the community, allows the handheld to hold hundreds of games by loading them from an SPI flash chip. For WolfenduinoFX, that flash chip is used to hold graphical assets for the game that would otherwise be too large to fit on the MCU alone.
When we looked at the Arduboy FX back in 2021, it was clearly a must-have upgrade, so it’s no wonder that the newest version of the handheld has the capability built-in. Now that games are actually requiring the expanded flash to function, it seems we’ve officially entered into a new era for the quirky little handheld that [Kevin Bates] first sent our way nearly a decade ago. Long live the Arduboy!