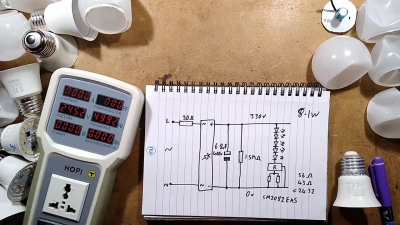
After accidentally crushing the plastic envelope on a cheap LED light bulb, [bigclivedotcom] figured out he could make custom ones using OpenSCAD in any shape he wants. He previously hacked a bunch of these inexpensive LED bulbs last month, discovering they all shared a similar circuit topology. All the ones he experimented with drove the LEDs hard, something that’s bound to reduce bulb lifetime. By reverse engineering the current control regulator, it turns out it is easy to adjust the drive current by changing a resistor or two. Reducing the current should not only increase lifetime, but could allow repurposing the bulb for other uses, such as decorative lighting.
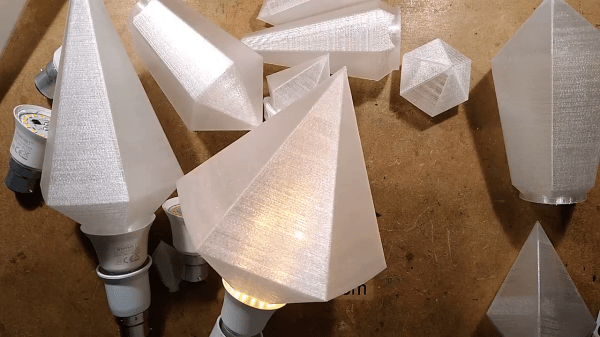
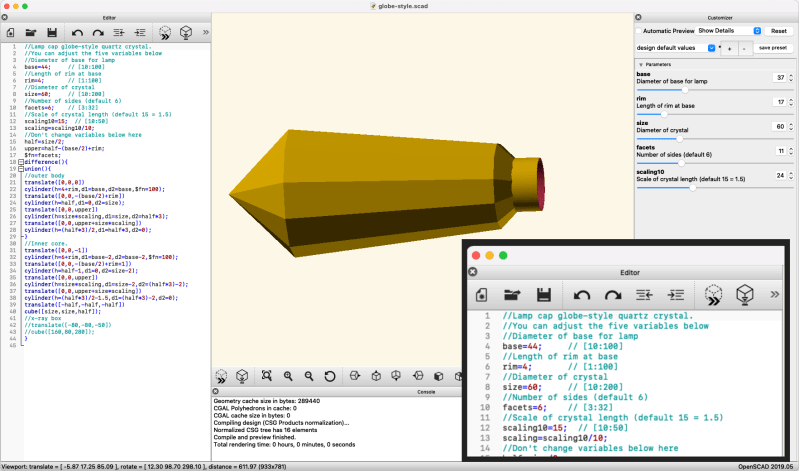
Three OpenSCAD scripts are provided which generate what he calls diamond, obelisk, and globe styles. Basic parameters for each style can be tweaked by the user, such as feature sizes and number of facets. He mentions the lack of OpenSCAD customizers in his script — this can easily be added as shown in the following example (this section of the User Manual on customizers explains the syntax). Note that you can’t make the slider generate real numbers, only whole numbers, which is why the scaling factor is multiplied by 10.
These fancy globes can be used as night lights and possibly outdoor lighting, if you can make a good seal with the base. Custom chandeliers, anyone? Indicator lamps for very large panels? Any other ideas? If you want to explore the LED lifetime issue further, inveterate tinkerer Ted Yapo wrote a deep dive into the mythical 100,000 hour LED bulb. Thanks to [Cliff Claven] for the tip.