Homebrew Ball Drop Machine Rings In The New Year

The New Year’s Ball Drop in New York City stems from an old English naval tradition. These days, it’s more of a celebratory thing, and [Jon Gonzalez] wanted to bring a bit of that joy to his own celebrations. Thus enter the Ball-Drop-O-Matic 3000.

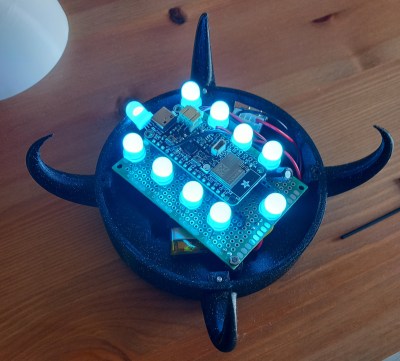
The ball itself consists of two 3D printed halves assembled together with a linear bearing in the middle. It’s loaded up with a ton of addressable LEDs to give it plenty of flash, pomp, and circumstance as it rides down the flagpole. Animations are coded in to the K-1000C display controller using LEDEdit2014, an older piece of software which can turn Flash animations into commands to run WS2812B LED strips.

Lowering the ball is handled by a motorized winch. The winch is mounted at the base of the flagpole for aesthetic reasons, with the cable travelling up to the top of the pole, over a pulley, and back down to the ball. The descent speed is set to countdown the last minute of the year, with numbers animated on the ball itself.

The build was clearly a great addition to [Jon’s] New Years celebrations, even if it wasn’t quite finished until 9:35 PM on the big night. We’ve seen other fun ball drop builds before, too.

Continue reading “Homebrew Ball Drop Machine Rings In The New Year”

LED Displays May Get Vertical Integration

If you zoom into the screen you are reading this on, you’d see an extremely fine pattern of red, green, and blue emitters, probably LEDs of some kind. This somewhat limits the resolution you can obtain since you have to cram three LEDs into each screen pixel. Engineers at MIT, however, want to do it differently. By growing thin LED films and sandwiching them together, they can produce 4-micron-wide LEDs that produce the full range of color, with each color part of a vertical stack of LEDs.

To put things in perspective, a standard TV LED is at least 200 microns across. Mini LEDs measure upwards of 100 microns, and micro LEDs are the smallest of all. A key factor for displays is the pitch — the distance from the center of one pixel to the center of the next. For example, the 44mm version of the Apple Watch has a pitch of around 77 microns. A Samsung Galaxy 10 is just over 46 microns.  This is important because it sets the minimum size for a high-resolution screen, especially if you are building large screens (such as when you build custom video walls (see the video below for more about that).

Continue reading “LED Displays May Get Vertical Integration”

Build A Circuit Sculpture-Style VU Meter For Music

One of the coolest things any sound system can have is some kind of musical visualization. Thumping level meters that pump with the volume are a great example, and were particularly popular in the 1980s. Now, you can build a rainbow set with great response, thanks to this guide from [Invexlab World].

The build relies on a very simple circuit that relies entirely on analog electronics in lieu of the usual digital signal analysis usually employed for the job. It’s a barebones design that’s assembled using a jig to create the attractive circuit sculpture structure. It uses simple colored LEDs, assembled in a line with red at the bottom, stepping through yellow and green, to blue and white at the top. A series of diodes is placed in series, with the sound level having to exceed the voltage drop of successive diodes to light the higher LEDs. It’s intended to be directly connected to a speaker’s audio input, and thus likely does load down the amplifier output slightly.

The result is an attractive rainbow VU meter display that would look great as a part of any old-school stereo setup. We can imagine it would look even better if it was cast in clear resin. Video after the break.

Continue reading “Build A Circuit Sculpture-Style VU Meter For Music”

Surgery On An LED To Preserve Vintage Aesthetics

[Chris Jones] recently found himself in a pickle. An indicator LED off an old piece of stereo equipment had failed. It was a strange rectangular type for which he could source no modern substitute. Using a different LED would ruin the aesthetic. Thus, what else was [Chris] to do, but attempt surgery on an LED!

The first attempt was the simplest. [Chris] tried soldering a small SMD LED between the legs of the existing part, which was open circuit. It worked, but the light didn’t really propagate to the top of the LED’s plastic. It was too dim to do the job.

Unperturbed, [Chris] instead elected to cut the LED apart. he soldered the SMD LED to the original LED’s leads, inside its body this time. The top part of the plastic lens was then notched to fit snugly over the new SMD part. A bit of superglue then joined everything back together. The finished product looks a touch messy on the PCB. However, installed back inside the stereo, it’s a perfectly stealth fix that looks great.

Some will consider this fix frivolous and a waste of time. Others will appreciate the way it preserved the attractive retro look of a piece of vintage audio gear. In any case, we can all agree that modern LEDs are often a great replacement for older parts in many cases. If you’ve pulled off your own weird, oddball repair hacks, don’t hesitate to share us with them on the tipsline!

A montage of a "death stranding" lamp in two different color modes, purple on the left and blue on the right

Illuminate Your Benched Things With This Death Stranding Lamp

[Pinkman] creates a smart RGB table lamp based off of the “Odradek device” robot arm from the video game “Death Stranding”.

[Pinkman] adds a XIAO BLE nRF52840 Sense device, with Bluetooth support, microphone and TinyML capability. The nRF52840 is used to push data to the five WS2812 strips, one for each “blade” of the lamp, and also connects to a TTP223 capacitive touch controller to add touch input detection. The TinyML portion of the nRF52840 allows for custom keyword training to turn on the lamp with voice commands ([Pinkman] uses “Bling Bling”). [Pinkman] has also provided Bluetooth control, allowing the color and pattern to be changed from a phone application.

The lamp is 3D printed with the build being based off of [Nils Kal]’s Printables files. Each of the five blades has a white 3D-printed diffusor plate to help ease out the hot spots for the LED strip. The lamp is fully adjustable in addition to having cavities, channels and access points for “invisible” wiring. [Pinkman] has also upgraded the original 3D files to allow for the three wires needed to drive the WS2812, instead of the two wires that [Nils] had allotted in the original.

[Pinkman] has all of the code, STL files and training data available for download, so be sure to check it out. Lamps are a favorite of ours and we’ve featured our fair share, including 3D printed Shoji lamps and RGB wall lamps.

Video after the break!

Continue reading “Illuminate Your Benched Things With This Death Stranding Lamp”

Creative Vandalism The KITT Way

It’s probable that most of us have at some time dreamed up a witty and subversive way to deface our city, but that few of us will have followed through on the idea. [Matt Gray] then is something of a modern-day urban hero for doing just that. Who couldn’t walk past Knightrider Court, EC4, in the City of London, without thinking of the 1980s TV series featuring David Hasselhoff and a talking car? [Matt] couldn’t, and so of course he simply had to upgrade the street sign with the signature LED scanner.

At its heart is an Adafruit Gemma ATtiny85 board in a 3D-printed case attached to a length of aluminium extrusion holding a strip of addressable LEDs. When attached to the sign it looks the business, and while the late-night crowd showed it little interest the Londoners passing in the morning were much more enthusiastic. We applaud him for the idea.

As occasional students of medieval history here at Hackaday, of course we couldn’t let this go without asking where the unexpected London street name came from. Sadly for fans of the Hoff it has nothing to do with the small screen, instead it appears to have a much earlier origin having been first recorded in 1322. The knightriders in question are reputed to have been real medieval knights, or at least horsemen. Pay it a visit, should you ever find yourself in the British capital.

Continue reading “Creative Vandalism The KITT Way”

Addressable LEDs From A Z80

If you buy WS2812s under the Adafruit NeoPixel brand, you’ll receive the advice that “An 8 MHz processor” is required to drive them. “Challenge Accepted!“, says [ShielaDixon], and proceeded to first drive a set from the 7.3 MHz Z80 in an RC2014 retrocomputer, and then repeat the feat from a 3.5 MHz Sinclair ZX Spectrum.

The demos in the videos below the break are all programmed in BASIC, but she quickly reveals that they call a Z80 assembler library which does all the heavy lifting. There’s no microcontroller behind the scenes, save for some glue logic for address decoding, the Z80 is doing all the work. They’re all implemented on a pair of RC2014 extension cards, a bus that has become something of a standard for this type of retrocomputer project.

So the ubiquitous LEDs can be addressed from some surprisingly low-powered silicon, showing that while it might be long in the tooth the Z80 can still do things alongside the new kids. For those of us who had the Sinclair machines back in the day it’s particularly pleasing to see boundaries still being pushed at, as for example in when a Z80 was (almost) persuaded to have a protected mode.

Continue reading “Addressable LEDs From A Z80”