DJ Light Box Grooves To The Beat

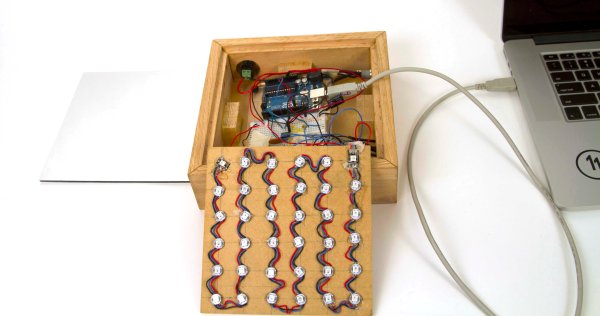
During a Product Design class, [Oscar de la Hera] designed and built an LED light box that responds to music — and looks good doing it!

He carefully constructed the box out of Oak with a one-way mirror top, enclosing a 6 x 6 matrix array of NeoPixels. Behind the panel is an Arduino Uno which uses an MSGEQ7 chip and two audio jacks to take in an audio signal and create a light show. When the lights are off, it looks like a fancy little mirror — but when you turn on the music it becomes alive.

If you’re curious on how it was made, or if you want to make your own, there’s a full tutorial on how to make your own over at Instructables — and don’t forget to take a look at it in action after the break!

Continue reading “DJ Light Box Grooves To The Beat”

SuperBowlLamp

Super Bowl Football Lamp Keeps You Informed

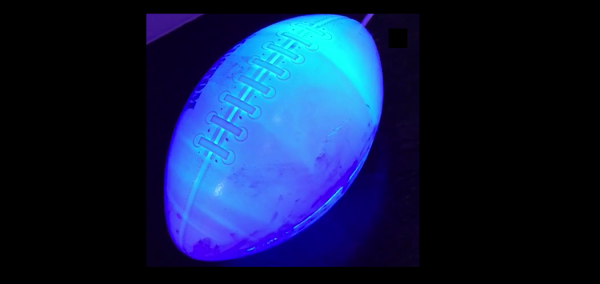
[David] loves to watch football. After his preferred team lost the playoffs, he wanted another reason to watch the big game last Sunday. He ended up building himself a football-shaped lamp that changes color based on who scored last.

[David] started with a Spark Core and a Spark Button. The Spark is the primary microcontroller and includes WiFi. The Spark Button is essentially a shield for the Spark that includes an accelerometer, some LEDs, and a few push buttons. The other part of this build was the housing. [David] used a toy football he got for free as swag from a parade.

As for the code, [David] started by first learning how to control the LEDs on the Spark Button. Then he wrote his own touchdown function to illuminate the football a specific color. Since the Spark uses the REST API, [David] is able to trigger this function by simply visiting the URL of his Spark. This makes it very simple to trigger the event.

The final part of this build was made easy thanks to IfThisThenThat (IFTTT). This is a web service that allows you to monitor and interact with various online web services. It can monitor one service, and then interact with another based on events that happen in the first service. In this case, [David] is using a “channel” added to IFTTT by ESPN. This channel can trigger when certain events happen for whatever team you specify. For this project [David] is monitoring touchdowns.

After combining all of these various services, [David] had a working light that would change colors based on which team scored. He did notice that IFTTT has anywhere between a 1 and 15 minute delay, and he hopes to improve upon this design by hooking directly to an API and skipping the extra service altogether.

CNCs And Acrylic And LEDs Oh My!

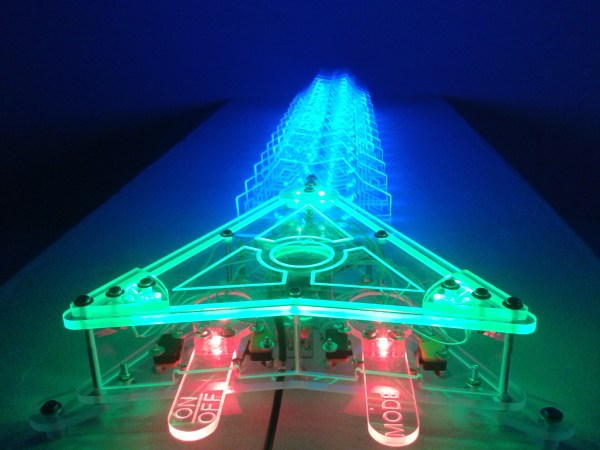
Looking for something unique to spice up his music room [Est] decided he wanted to try making a light that responds to the music — kind of like a VU meter, but a little different. He calls it the Light Effect Tower.

The main structure of the tower was cut out of 6mm acrylic using [Est’s] homemade CNC router. He used a V router bit to do the engraving, which when combined with light, produces a high contrast dynamic with the plastic.

He designed the circuit to fit into the triangular base, which uses a PIC micro controller to sample a microphone to produce the lighting effect. The cool thing is, he’s designed it to calculate the max level of noise, to scale the sample accordingly — that way if you’re playing loud music or quiet music, it’ll still work without any adjustments to the microphone gain.

Oh yeah, did we mention this thing is big? It’s actually 1.5 meters tall! Check out the different modes he programmed in — it’s pretty bumping.

Continue reading “CNCs And Acrylic And LEDs Oh My!”

Tetris

Arduino Tetris On A Multiplexed LED Matrix

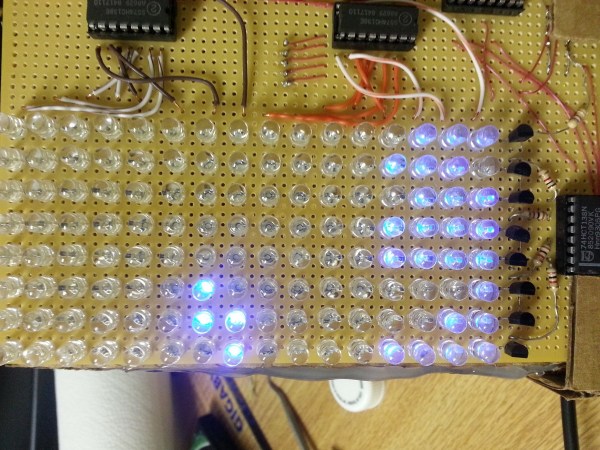
[Alex] needed a project for his microcomputer circuits class. He wanted something that would challenge him on both the electronics side of things, as well as the programming side. He ended up designing an 8 by 16 grid of LED’s that was turned into a game of Tetris.

He arranged all 128 LED’s into the grid on a piece of perfboard. All of the anodes were bent over and connected together into rows of 8 LED’s. The cathodes were bent perpendicularly and forms columns of 16 LED’s. This way, if power is applied to one row and a single column is grounded, one LED will light up at the intersection. This method only works reliably to light up a single LED at a time. With that in mind, [Alex] needed to have a very high “refresh rate” for his display. He only ever lights up one LED at a time, but he scans through the 128 LED’s so fast that persistence of vision prevents you from noticing. To the human eye, it looks like multiple LED’s are lit up simultaneously.

[Alex] planned to use an Arduino to control this display, but it doesn’t have enough outputs on its own to control all of those lights. He ended up using multiple 74138 decoder/multiplexer IC’s to control the LED’s. Since the columns have inverted outputs, he couldn’t just hook them straight up to the LED’s. Instead he had to run the signals through a set of PNP transistors to flip the logic. This setup allowed [Alex] to control all 128 LED’s with just seven bits, but it was too slow for him.

His solution was to control the multiplexers with counter IC’s. The Arduino can just increment the counter up to the appropriate LED. The Arduino then controls the state of the LED using the active high enable line from the column multiplexer chip.

[Alex] wanted more than just a static image to show off on his new display, so he programmed in a version of Tetris. The controller is just a piece of perfboard with four push buttons. He had to work out all of the programming to ensure the game ran smoothly while properly updating the screen and simultaneously reading the controller for new input. All of this ran on the Arduino.

Can’t get enough Tetris hacks? Try these on for size.

LED Matrix Infinity Mirror

[Evan] wrote in to let us know about the LED matrix infinity mirror he’s been working on. [Evan] built a sizable LED matrix out of WS2812B LEDs and mounted them to a semi-reflective acrylic sheet, which makes a pretty awesome infinity mirror effect.

Instead of buying pre-wired strands of serial LEDs like we’ve seen in some other projects, [Evan] purchased individual WS2812 LEDs in bulk. Since the LEDs just had bare leads, [Evan] had to solder wires between each of his 169 LEDs (with some help from a few friends). After soldering up hundreds of wires, [Evan] drilled out holes for each LED in a piece of semi-reflective acrylic and inserted an LED into each hole.

To create the infinity mirror effect, [Evan] mounted the LED matrix behind a window. [Evan] put some one-way mirror film on the outside of the window, which works with the semi-reflective acrylic to create the infinity mirror effect. The LEDs are driven by an Arduino, which is controlled by a couple of free programs to show a live EQ of [Evan]’s music along with patterns and other effects.

Ice Clock

Binary Clock Fit For Queen Elsa’s Ice Palace

When life gives you lemons, you make lemonade. When life gives you freezing cold temperatures and a yard full of snow, you make binary clocks out of ice. At least that’s what [Dennis] does, anyway.

[Dennis’] clock is made from several cylindrical blocks of ice stacked on top of one another. There are six columns of ice blocks. The blocks were made by pouring water into empty margarine containers and freezing them. Once they were frozen, [Dennis] bore a 5/16″ hole into the bottom of each block to house an LED. Wires ran from the LEDs back into the drainage port of a cooler.

The cooler housed the main electronics. The LED controller board is of [Dennis’] own design. It contains six TLC59282 chips allowing for control of up to 96 LEDs. Each chip has its output lines running to two RJ45 connectors. [Dennis] couldn’t just use one because one of the eight wires in the connector was used as a common power line. The main CPU is an Arduino. It’s hooked up to a DS3234 Real Time Clock in order to keep accurate time. The oscillator monitors temperature in order to keep accurate time even in the dead of winter. Continue reading “Binary Clock Fit For Queen Elsa’s Ice Palace”

TweetHeart Shows You Some Love

[Stacey] wanted a more interesting way to monitor events related to her Twitter account. What she ended up with is a beautiful animated heart light.

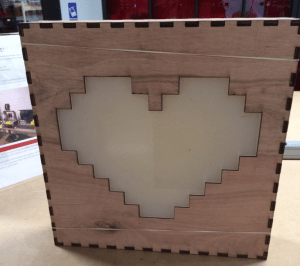
TweetboxShe started out by designing the enclosure. Having access to a laser cutter, she opted to make it out of thin plywood. [Stacey] used an online tool called BoxMaker to design the actual box. The tool is very simple to use. You simply plug in the dimensions of the box and it will provide you with a two dimensional template you can use with your laser cutter. The resulting plywood pieces fit together like a puzzle. The heart piece is made from frosted acrylic and was also cut by the laser.

To light up the heart, [Stacey] opted to use NeoPixels. These are like many of the RGB LED strips we’ve seen in the past, though the pixel density is higher than most. She cut up the LED strip into the appropriate sizes and glued them to a piece of plywood in a rough heart shape. She tested the lights during each step so she would know exactly when any errors were made.

[Stacey] opted to use a SparkCore to control the LEDs. This had the advantage of including WiFi connectivity out of the box.  [Stacey] started with NeoPixel example programs, but quickly realized they all relied on the Delay function. This was a problem for her, because she needed to constantly watch for new Twitter events. She ended up having to write her own functions that relied on interrupts instead.

[Stacey] then wrote a Node.js script to monitor twitter and control the Spark. The script watches for specific events, such as one of [Stacey’s] tweets being re-tweeted, or a user unfollowing [Stacey]. The script then sends a message to the Spark to tell it which event just occurred. The Spark will then repeat the event until a new one occurs. Check out the demonstration video below. Continue reading “TweetHeart Shows You Some Love”