For many of us, the most difficult aspect of a project comes when it’s time to document the thing. Did you take enough pictures? Did you remember all the little details that it took to put it together? Should you explain those handful of oddball quirks, even though you’re probably the only person in the world that knows how to trigger them?
Well, we can’t speak to how difficult it was for [Mangy_Dog] to put together this training video for his incredible Star Trek: Voyager tricorder replica, but we certainly approve of the final product. Presented with a faux-VHS intro that makes it feel like something that would have been shown to cast members during the legendary run the franchise had in the 1990s, the video covers the use and operation of this phenomenal prop in exquisite detail.
Now to be fair, [Mangy_Dog] has sold a few of his replicas to other Trek aficionados, and we’re willing to bet they went for a pretty penny. As such, maybe it’s not a huge surprise he’d need to put together a comprehensive guide on how to operate the device’s varied functions. Had this been a personal project there wouldn’t have been the need to record such a detailed walk-through of how it all works — so in that regard, we’re fortunate.
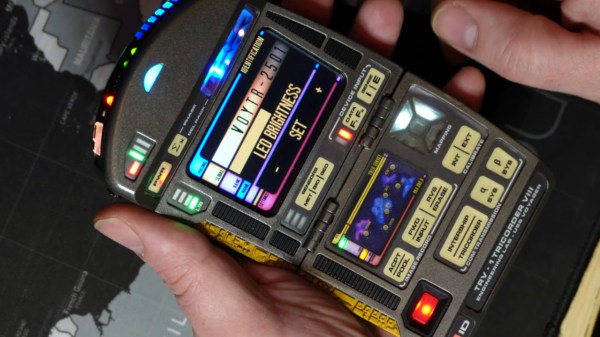
One of the most interesting things demonstrated in this video is how well [Mangy_Dog] managed to implement mundane features such as brightness and volume control without compromising the look of the prop itself. Rather than adding some incongruous switches or sliders, holding down various touch-sensitive buttons on the device brings up hidden menus that let you adjust system parameters. The project was impressive enough from the existing images and videos, but seeing just how deep the attention to detail goes is really a treat.
Previously we took a look at some of the work that [Mangy_Dog] has put into these gorgeous props, which (unsurprisingly) have taken years to develop. While they might not be able to contact an orbiting starship or diagnose somebody’s illness from across the room, it’s probably fair to say these are the most realistic tricorders ever produced — officially or otherwise.
Continue reading “Tricorder Tutorial Isn’t Just For Starfleet Cadets”