Persistence Of Vision On An Old Fan

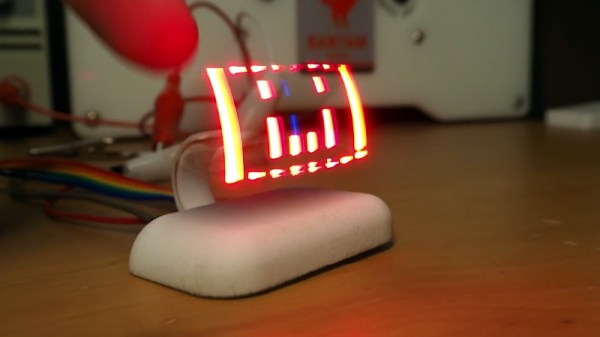
Persistence of vision is a fun feature of the human visual system, which allows us to blink a bunch of spinning LEDs at the right time to spell out messages that appear to hang in the air. [TN_Inventor] took a stab at his own POV build, using an old desk fan as a base.

The initial build relied on a rotor made of MDF and some very old-school LEDs. The rotor was heavy and unbalanced, causing issues for the motor, and the dim LEDs weren’t visible in normal daytime conditions. Like any good maker, [TN_Inventor] persevered and iterated the design.

The next revision instead relied on protoboard itself for the rotor, greatly reducing the weight and making it easier to balance. The problem of getting power to a rotating mechanism was sidestepped entirely, with a small lipo battery being mounted on the rotor itself. High-brightness white LEDs were employed, making the effect much more visible. This was helped further thanks to the use of transistors to run the LEDs directly from battery voltage, rather than obeying the current limits of the Arduino Nano’s output pins.

The build presents well, with the final POV board being built into the chassis of an old desk fan. Rather than use the original motor, instead a smaller 12 volt geared device was used, powered separately from the main board. The familiar form factor of the desk fan is a great way to finish the project off, and gives it an interesting industrial aesthetic.

POV builds can go a long way – we’ve even seen volumetric displays built in this way. Video after the break. Continue reading “Persistence Of Vision On An Old Fan”

Breathing LED Done With Raw Logic Synthesized From A Verilog Design

Breathing LEDs are an attractive adornment on many electronic devices. These days they’re typically controlled by software but of course there were fading effects back in the days of analog too. [Pepijn de Vos] mixes a little of the new and the old by building a hardware-based fader from a Verilog design and even too the time to explain the process in depth.

Rather than using a microcontroller and software, [Pepijn] wrote the logic required to make the LED “breathe” in the hardware description language, Verilog. You may be familiar with this for FPGAs, but using it to plan out a build with logic chips is just as apt a use. The Verilog was synthesized into a circuit using 74-series logic chips, with the help of work by [Dan Ravensloft] who has made a library for the Yosys Open Synthesis Suite. With the addition of a basic clock circuit, the LED is made to breathe and the rate can be controlled by changing the clock speed.

It’s a fun way to experiment with both Verilog and old-school logic, albeit one that may not scale well. An interesting side note from the Twitter thread, [Dan] estimates that with current settings the PicoRV32 CPU would require over 2000 chips to build. Regardless, it’s an interesting tool and one that likely has further scope for experimentation.

First patented by Apple way back in 2002, the breathing LED has been a popular project for those learning electronics. We’ve even seen it on motorbikes. Video after the break.

Continue reading “Breathing LED Done With Raw Logic Synthesized From A Verilog Design”

A Multi-Layered Spin On Persistence Of Vision

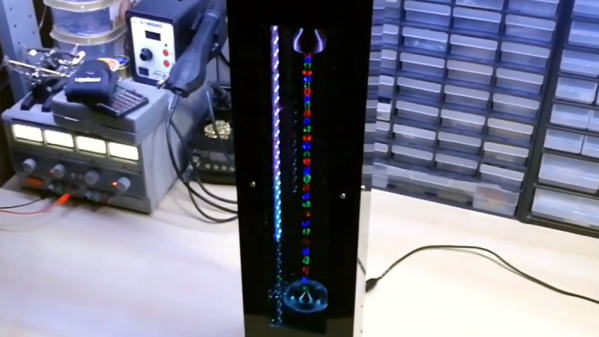
By taking advantage of persistence in human vision, we can use modest bits of hardware to create an illusion of a far larger display. We’ve featured many POV projects here, but they are almost always an exploration in two dimensions. [Jamal-Ra-Davis] extends that into the third dimension with his Volumetric POV Display.

Having already built a 6x6x6 LED cube, [Jamal] wanted to make it bigger, but was not a fan of the amount of work it would take to grow the size of a three-dimensional array. To sidestep the exponential increase in effort required, he switched to using persistence of vision by spinning the light source and thereby multiplying its effect.

The current version has six arms stacked vertically, each of which presents eight individually addressable APA102 LEDs. When spinning, those 48 LEDs create a 3D display with an effective resolution of 60x8x6.

We saw an earlier iteration of this project a little over a year ago at Bay Area Maker Faire 2018. (A demo video from that evening can be found below.) It was set aside for a while but has now returned to active development as an entry to Hackaday Prize 2019. [Jamal-Ra-Davis] would like to evolve his prototype into something that can be sold as a kit, and all information has been made public so others can build upon this work.

We’ve seen two-dimensional spinning POV LED display in a toy top, and we’ve also seen some POV projects taking steps into the third dimension. We like where this trend is going.

Continue reading “A Multi-Layered Spin On Persistence Of Vision”

Custom Bases Make LEGO Spacecraft Even Cooler

If you’re reading Hackaday, we’re willing to bet that you either own the LEGO Saturn V and Lunar Module models, or at the very least know somebody who does. Even if you thought you’d finally outgrown playing with little plastic bricks (a critical mistake, but one we’ll ignore for now), these two kits just have an undeniable appeal to them. You might never get a chance to work for NASA, but you can at least point to the Saturn V rocket hanging on your wall and say you built it yourself.

[Ben Brooks] thought these fantastic models deserved equally impressive stands, so he built “exhaust plumes” that both craft could proudly perch on. With the addition of some RGB LEDs and a Particle Photon to drive them, he added incredible lighting effects that really bring the display to life. There are also sound effects provided by an Adafruit Audio FX board, and for the Lander, an LCD display that mimics the Apollo Guidance Computer DSKY that astronauts used to safely navigate to the Moon and back.

In his write-up on Hackaday.io, [Ben] makes it clear that he was inspired by previous projects that added an illuminated column of smoke under the LEGO Saturn V, but we think his additions are more than worthy of praise. Playing real audio from the Apollo missions that’s synchronized to the light show honestly makes for a better display than we’ve seen in some museums, and he even rigged up a wireless link so that his neighbor’s kids can trigger a “launch” that they can watch from their window.

For the Lunar Module, he 3D printed an enclosure for the Photon and Adafruit quad alphanumeric display that stands in for the DSKY. There’s even lighted indicators for the 1201/1202 program alarms that popped up as Neil Armstrong and Buzz Aldrin descended to the lunar surface 50 years ago.

While many of us aren’t old enough to have our own first hand memories of the Moon landing, projects like this prove that the incredible accomplishments of the Apollo program never fail to inspire. Who knows? Those kids that are watching [Ben]’s Saturn V from next door might one day get to make the trip themselves.

Continue reading “Custom Bases Make LEGO Spacecraft Even Cooler”

Hacking This Smart Bulb Is Almost Too Easy

The regular Hackaday reader no longer needs to be reminded about how popular the ESP8266 is; they see the evidence of that several times a day. But what might not be quite so obvious is that it isn’t just us hacker types that are in love with the inexpensive IoT microcontroller, it’s also popping up more and more frequently in commercial products.

As [Majenko] demonstrates, one of those ESP-powered devices is the LOHAS Smart LED Bulb. Upon cracking one open, he found that these relatively low-cost bulbs are little more than a standard ESP8266 chip and a couple of LED drivers. He wanted to see how hard it would be to get his own code running on the bulb, and by the looks of it, it took longer to get the thing open then it did to load it up with a custom firmware.

The bulb’s PCB features the aforementioned ESP8266, a 1MB 25Q80 flash chip, and MY9231 LED drivers. Whoever put the board together was nice enough to label the RX, TX, and GPIO test points, though [Majenko] notes that what’s labeled as 3.3 V appears dead. With a ESP-01 programmer wired up to the board and the appropriate board settings (which he provides), you can use the Arduino IDE to upload whatever you like to it.

Running “Hello World” on a smart bulb is fun and all, but what about kicking on those LEDs? [Majenko] found a library that works with the MY9231 drivers, and it didn’t take long to figure out which of the ESP’s pins were used to communicate with them. All in all, he said it was far easier than he expected.

You’ll probably want to put this bulb back into service after reprogramming, so [Majenko] advises caution when cracking open the shell. There are clips holding on the diffuser which he assures us are going to break no matter what you do, plus some silicone adhesive. He suggests super glue to hold it together when you’re done programming it, and using an OTA firmware so you don’t need to get back in there.

In the past we’ve shown how some hackers are rolling their own smart bulb hardware, but with cheap commercial offerings that are so easily hackable, it frankly doesn’t seem worth the effort. On the other hand, an influx of cheap ESP-powered bulbs isn’t all good news.

New Part Day: Two Millimeter Addressable LEDs

The WS2812, or “Neopixels”, or whatever you want to call them, are the standard when it comes to adding blinky to anything. These chips are individually addressable RGB LEDs, which you’ve seen in many LED strips and a thousand other products. These LEDs are rather big compared to normal, dumb LEDs, measuring 5 mm on each side. Here are WS2812s packed into a 2 mm x 2 mm square package. It’s the smallest and brightest blinky that works the same as the WS2812s you know and love.

This is the latest product from Worldsemi. We’ve heard of these before, but damned if we could find a supplier or even a price. Now they’re on AliExpress, at a price of $8 USD per 100, shipping not included.

Electrically, these appear to have the same properties of the normal, 5050-size WS2812 LEDs. Apply power and ground to two pins, send data in on one pin, and connect the next LED in the strand to the remaining pin. Yes, it requires a bit of work to turn this into a display, but microcontrollers are very fast now and have plenty of RAM. Attach a BeagleBone and you’ll be able to drive as many as your glowing heart desires.

If you’re wondering what the coolest project imaginable for these LEDs is, here’s the math: the largest (common) PCB panel for your random board house is 16 by 22 inches. Assuming a 3 mm pixel pitch, that means the largest PCB display you can make with these LEDs is 135 by 186 pixels, call it 120 by 180 just to make things easy. That’s 21,600 LEDs, at a cost of about $2,000. I would not recommend reflowing these, and assuming soldering a LED every thirty seconds, it will take about a month to solder them all by hand. There’s your project, now get to it.

Epoxy LED Cube Looks Sleek, And Flashes To The Beat

If there’s one thing that’s universally popular in these polarizing times, it’s colorful glowing objects. LEDs reign supreme in this area, and we’re accustomed to seeing all manner of fun flashy devices hit the tips line. Today is no different, and we’ve been looking at [Modustrial Maker]’s stylish epoxy LED cube.

The build starts with the casting of a black epoxy cube, with a cutout near the top in which the LEDs will be installed. A melamine form is used, with aluminium foil tape, caulk and paste wax to help seal it up. After releasing the cast from the form, there were some unsightly voids which were swiftly dispatched, by trimming the block down with a table saw. With the block cut to size, LED strips were installed, and the light cavity sealed with hot glue before white epoxy was poured in as a diffuser. All that’s left was a simple matter of polishing the cube and installing electronics.

The cube runs from a single-cell LiPo battery, and there’s a wireless power receiver and charging module to keep the power flowing. The cube can be used on most wireless phone chargers, as well as its own dedicated charging base. The LEDs are controlled by an off-the-shelf module, which offers a variety of flashing displays as well as a music-reactive mode.

While the electronics side is done with off-the-shelf parts, the real art in this piece is in the build of the cube. Its glossy, attractive form would look stunning on any coffee table or bedside shelf.

LED cubes are a great rabbit hole to go down on your lunch break. This OpenGL-enabled build is particularly impressive. Video after the break.

Continue reading “Epoxy LED Cube Looks Sleek, And Flashes To The Beat”