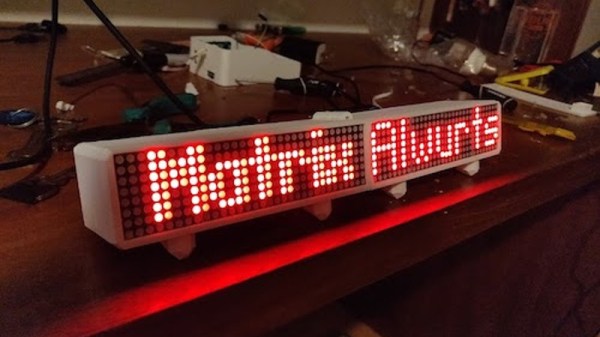
Jumbo LEDs Make For A Handy ATtiny Beacon

Inspiration can come from anywhere. Sometimes it’s just a matter of seeing an interesting part that you want to fiddle around with badly enough that you end up developing a whole idea, and potentially product, around it. That’s how [Bobricius] found himself creating this very slick little warning beacon, and looking at the end result, we think he made the right decision.

The Kingbright DLC-6SRD “jumbo” LED is actually six individual emitters built into a plastic diffuser. Interfacing with the device is simple enough; each LED has its normal anode and cathode leg, all you need to do is power them up. What [Bobricius] has created is a simple PCB design that the DLC-6SRD can plug right into, complete with a 2032 coin cell holder on the opposite side.

Of course, just lighting up all six elements at the same time wouldn’t be very interesting. [Bobricius] is controlling them individually right off of the digital pins of an ATtiny10 with the help of some Charlieplexing. This makes all kinds of interesting patterns possible, and as demonstrated in the video after the break, the current iteration of the project uses some very simple code to “rotate” the LED as if it was the flasher on an emergency vehicle.

The addition of a few blinking LEDs can make a world of difference in terms of nighttime visibility, so a cheap stick-on module that adds such a distinctive light pattern could be a very important safety device. It could also be useful for UAVs, following the FAA’s new rules which would mandate anti-collision lights for night flying.

Continue reading “Jumbo LEDs Make For A Handy ATtiny Beacon”

OpenGL Shaders And An LED Cube

Back in February at the Hacker Hotel camp in the Netherlands, among the many pieces of work around the venue was a rather attractive LED cube. Very pretty, but LED cubes have been done many times before.

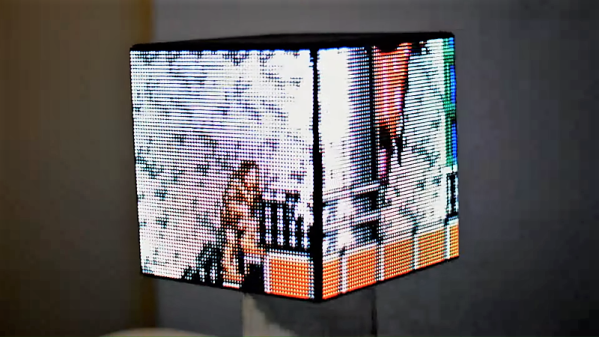
If a casual attendee had taken the time to ask though, they might have found something a little more interesting, for while the cube in question might have had the same hardware as the others it certainy didn’t have the same software. [Polyfloyd] had equipped his LED cube with OpenGL shaders to map arbitrary images to the cube’s pixels in 3D space.

Hardware-wise it’s the same collection of AliExpress LED panels and Raspberry Pi driver board that the other cubes use, in this case mounted on a custom laser-cut frame. Driver software comes from an open-source library round which he’s put a wrapper allowing input through a UNIX pipe. This can take the RGB output of an OpenGL shader, of which he has created both 2D to 3D and spherical projection versions. The must-see demo is a global map of light pollution, and the result is a rather impressive piece of work.

If LED cubes are your thing, don’t forget this recent Hackaday Prize entry.

A Chrome Extension For Configuring RGB LEDs

Like pretty much all of us, [Andy Schwarz] loves RGB LEDs. Specifically he likes to put them on RC vehicles, such as navigation lights on airplanes or flashers and headlights on cars. He found himself often rewriting very similar Arduino code for each one of these installations, and eventually decided he could save himself (and all the other hackers in the world) some time by creating a customizable Arduino firmware specifically for driving RGB LEDs.

The software side of this project, which he’s calling BitsyLED, actually comes in two parts. The first is the firmware itself, which is designed to control common RGB LEDs such as the WS2812 or members of the NeoPixel family. It can run on an Arduino Pro Mini with no problems, but [Andy] has also designed his own open hardware control board based on the ATtiny84 that you can build yourself. Currently you need a USBASP to program it, but he’s working on a second version which will add USB support.

With your controller of choice running the BitsyLED firmware, you need something to configure it. For that, [Andy] has developed a Chrome extension which offers a very slick user interface for setting up colors and patterns. The tool even allows you to create a visual representation of your LEDs so you can get an idea of what it’s going to look like when all the hardware is powered up.

RGB LEDs such as the WS2812 are some of the most common components we see in projects today, mainly because they’re so easy to physically interface with a microcontroller. But even though it only takes a couple of wires to control a large number of LEDs, you still need to write the code for it all. BitsyLED takes a lot of the hassle out of that last part, and we’re very interested to see what the hacker community makes of it.

Continue reading “A Chrome Extension For Configuring RGB LEDs”

Resistance Is Futile, You Want This LED Cube

We’re suckers for a good desk toy here at Hackaday, so this 2019 Hackaday Prize entry from [Jack Flynn] certainly caught our eye. The idea is that by using professionally manufactured dual layer PCBs and only surface mount components, you can create a cube that has an LED matrix on each face and all of the electronics hidden within. We’re not entirely sure if there’s any practical application for such a device, but we know we’d certainly like to have one blinking madly away on our shelf regardless.

Before having any of the PCBs manufactured, [Jack] is putting a considerable amount of thought into the design so he doesn’t end up painting himself info a corner (which is of course eight times as bad when you’re building a cube). By importing the PCB files into OnShape, he’s able to “assemble” a virtual representation of the final product to better understand how everything will fit together. He wants to limit the amount of times the cube will need to be pulled apart, so everything from how it will sit in its 3D printed cradle to the placement of breakaway tabs that ensure the internal power switch is accessible are being carefully planned out.

The current design puts the “brains” on the bottom board, with every other panel holding a daisy-chained MAX7219 to drive its own individual 64 LED matrix. Initially the dimensions of the ATmega328p powered cube will be 42 x 42 x 42 mm, with a total of 384 LEDs. Ultimately, [Jack] hopes the modular nature of the design could allow the size of the cube to be increased, or perhaps even take on a different shape entirely.

Generally the LED cubes we see are of the more wiry variety, so it’s particularly interesting when they take on solid forms like this one. Given the nearly universal popularity of blinking LED gadgets, we think this particular project is well positioned to make the leap from one-off hack to a commercial product.

Continue reading “Resistance Is Futile, You Want This LED Cube”

Give Your Solar Garden Lights A Color Changing LED Upgrade

White LEDs were the technological breakthrough that changed the world of lighting, now they are everywhere. There’s no better sign of their cost-effective ubiquity than the dollar store solar garden light: a complete unit integrating a white LED with its solar cell and battery storage. Not content with boring white lights on the ground, [Emily] decided to switch up their colors with a mix of single-color LEDs and dynamic color-changing LEDs, then hung them up high as colorful solar ornaments.

The heart of these solar devices is a YX8018 chip (or one of its competitors.) While the sun is shining, solar power is directed to charge up the battery. Once the solar cell stops producing power, presumably because the sun has gone down, the chip starts acting as a boost converter (“Joule thief”) pushing a single cell battery voltage up high enough to drive its white LED. Changing that LED over to a single color LED is pretty straightforward, but a color changing LED adds a bit of challenge. The boost converter deliver power in pulses that are too fast for human eyes to pick up but the time between power pulses is long enough to cause a color-changing circuit to reset itself and never get beyond its boot-up color.

The hack to keep a color-changing LED’s cycle going is to add a capacitor to retain some charge between pulses, and a diode to prevent that charge from draining back into the rest of the circuit. A ping-pong ball serves as light diffuser, and the whole thing is hung up using a 3D-printed sheath which adds its own splash of color.

Solar garden lights are great basis for a cheap and easy introduction to electronics hacking. We’ve seen them turn into LED throwies, into a usable flashlight, or even to power an ATTiny microcontroller.

Continue reading “Give Your Solar Garden Lights A Color Changing LED Upgrade”

Mini Flickering Torch Effect Uses Neither Wires Nor Solder

Cross section of pillar model.

[ROBAGON] makes miniature, 3D-printable gaming terrain and features like these stone pillars with flickering torch. His model isn’t free to download (though it’s under $2 at the time of writing), but the part that impressed us was his clever way of using electric tea lights to create a flickering torch effect without needing any soldering or wiring whatsoever.

His solution was to make the base of the pillar large enough to fit an electric tea light, which uses a flickering LED to simulate a candle flame. The molded plastic “flame” is removed from the tea light and placed in the torch sconce, while the tea light itself goes into the base. A short segment of clear acrylic rod is used as a light pipe, running from the tea light’s LED to the base of the torch.

It’s a simple, effective, and economical solution that doesn’t require running or soldering a single wire and you can see it work in the brief video embedded below. Now all that’s missing for those Dungeons & Dragons sessions is this custom calculator.

Continue reading “Mini Flickering Torch Effect Uses Neither Wires Nor Solder”

Replicating 1970s LED Displays

In 1971, Texas Instruments released something no one else had ever seen before. The TIL305 was an alphanumeric display, powered by LEDs. Sure, the technology of the early 70s meant the LEDs weren’t very bright, and the displays were expensive, but if you want a display that’s simply classic, and relatively low-power, you won’t be able to do better than a vintage alphanumeric LED display.

As you would expect, new old stock TIL305s are still pricey, and now everybody has access to cheap PCB manufacturing capabilities and really small LEDs. The DIYTIL305 is an attempt to replicate the vintage stuff, and it looks great.

The vintage, TI-made TIL305 is a printed circuit board that clips into a DIP-14 socket. The LED array is 5×7 pixels, with an extra dot for a decimal point, set on a 0.05″ grid, and a translucent red diffuser. A PCB is easy, and with 0201 LEDs you can get the LED pitch you need. Turning a PCB into a DIP-14 only requires a few machine pin headers, and for the diffuser, this project is using laser cut cast acrylic. It’s simple if you have a pick and place machine or a steady hand, and assembly is a snap.

The final DIYTIL305 boards are being tested right now, but so far the results are great. With the right code on a microcontroller, these displays will blink through the digits 0 through 9, and the alphabet is just a little more code. Since this project is using 0201 LEDs, it also means green, white, blue, orange, and yellow displays are possible, something no one could have dreamed of in 1971.