In an era where we can see the current temperature with just a glance at our smartphones, the classic “Time and Temp” gadget sitting on the desk doesn’t have quite the same appeal. The modern weather fanatic demands more data, which is where this gorgeous full-day temperature display from [Richard] comes in.
The display, built inside of a picture frame, shows the temperature recorded for every hour of the day. If the LED next to the corresponding hour is lit that means the value displayed is from the current day, otherwise it’s a holdover from the previous day’s recordings. This not only makes sure all 24 LED displays have something to show, but gives you an idea of where the temperature might be trending for the rest of the day. Naturally there’s also a display of the instantaneous temperature (indoor and outdoor), plus [Richard] even threw in the current wind speed for good measure.
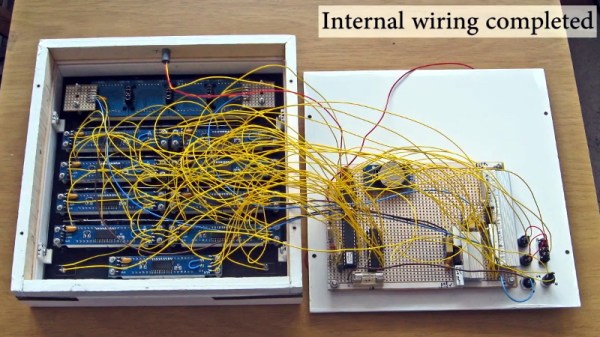
 In the video after the break, [Richard] briefly walks us through the construction of his “Thermo Logger”, which reveals among other things that the beautiful panel art is nothing more exotic than a printed piece of A4 paper. The video also features a 3D model of the inside of the device which appears to have been created through photogrammetry; perhaps one of the coolest pieces of project documentation we’ve ever seen. We’ll just throw this out there: if you want to ensure that your latest build makes the front page of Hackaday, pop off that back panel and make some decent quality 3D scans.
Given the final result, it should come as no surprise to find that this isn’t the first incredible weather display that [Richard] has built. We previously covered another weather monitoring creation of his that needed two seperate display devices to adequately display all the data it was collecting.