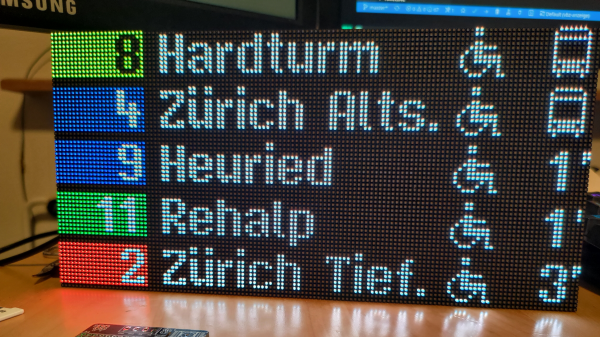
an RGB LED display showing expected arrival times of trams and buses sitting on a table

A Private View Of A Public Transport Sign

[Stefan Schüller] was a fan of the LED signs that display arrival information for the trams and buses in their city of Zürich. [Stefan] was having trouble finding a source to purchase the signs so, instead, decided to build one himself.

[Stefan] decided to recreate the 56×208 single color 2mm dot pitch display with an 128 x 64 P2 RGB LED screen respecting the same 2 mm pitch. The display is driven by an ESP32 DMA RGB LED matrix shield utilizing a HUB75 RGB LED matrix library, all being powered from a 5 V 4 A power supply.

In addition to driving the LED matrix display, the ESP32 polls Zürich’s public transportation API and then parses the XML for the relevant information. Since [Stefan] wanted to match the fonts as closely as possible,
he created a new font from scratch, including the bus and accessibility icons. The new font was encoded into a glyph bitmap distribution format (BDF) that was then converted to work with Adafruit’s GFX library, with [Stefan] creating a custom conversion tool, called bdf2adafruit, to do the last leg of the conversion.

Since the LED matrix had full color capability, [Stefan] decided to add a little extra flourish and color code the transportation lines with the official tram colors. All source code is available on his GitHub repository for the project, for those looking for more detail.

We’ve featured DIY builds of public transportation feeds before. With the ubiquity of low cost RGB LED displays and public APIs, hopefully we’ll see many more!

Lo-Fi Art On A 32×32 Matrix

Display technology has improved by leaps and bounds over the last few years, thanks in no small part to the smartphone revolution. High-resolution LCD panels are dirt cheap and easy to interface with. There’s absolutely no logical reason to try and show images on a 32×32 array of RGB LEDs. But that didn’t stop [Felix Spöttel] from doing it anyway.

The project, which he calls thirtytwopixels, was designed to work in conjunction with MPD (Music Player Daemon) to show the album art for whatever is currently playing. The ultra-low resolution display added a certain element of abstractness to the artwork, which [Felix] said made it an interesting conversation starter. Guests would try and guess what the album art was depicting given the sparse rendition shown on the matrix.

[Felix] gives an excellent explanation of how to get the server and client-side software up and running should you want to recreate his setup, but his Python scripts also have a function where you can push an arbitrary image to the display if you don’t want to connect everything up to the MPD backend.

On the hardware side, thirtytwopixels uses the Raspberry Pi Zero W, a Adafruit RGB Matrix Bonnet, and a 32×32 LED matrix that uses the HUB75 interface. Even a relatively small LED matrix like this can get pretty thirsty, so [Felix] is using a 5 volt power supply that can deliver 4 amps to keep the electronics happy.

If you wanted to keep the low resolution aesthetic but make the display larger, we’ve seen WS2812B LED strips and 3D printed frames used to make a custom jumbo matrix which could surely be adapted for this concept.

LED Art Reveals Itself In Very Slow Motion

Every bit of film or video you’ve ever seen is a mind trick, an optical illusion of continuous movement based on flashing 24 to 30 slightly different images into your eyes every second. The wetware between your ears can’t deal with all that information individually, so it convinces itself that you’re seeing smooth motion.

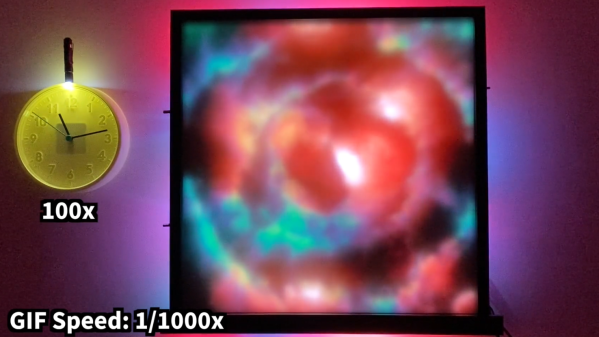
But what if you slow down time: dial things back to one frame every 100 seconds, or every 1,000? That’s the idea behind this slow-motion LED art display called, appropriately enough, “Continuum.” It’s the work of [Louis Beaudoin] and it was inspired by the original very-slow-motion movie player and the recent update we featured. But while those players featured e-paper displays for photorealistic images, “Continuum” takes a lower-resolution approach. The display is comprised of four nine HUB75 32×32 RGB LED displays, each with a 5-mm pitch. The resulting 96×96 pixel display fits nicely within an Ikea RIBBA picture frame.

The display is driven by a Teensy 4 and [Louis]’ custom-designed SmartLED Shield that plugs directly into the HUB75s. The rear of the frame is rimmed with APA102 LED strips for an Ambilight-style effect, and the front of the display has a frosted acrylic diffuser. It’s configured to show animated GIFs at anything from 1 frame per second its original framerate to 1,000 seconds per frame times slower, the latter resulting in an image that looks static unless you revisit it sometime later. [Louis] takes full advantage of the Teensy’s processing power to smoothly transition between each pair of frames, and the whole effect is quite wonderful. The video below captures it as best it can, but we imagine this is something best seen in person.

Continue reading “LED Art Reveals Itself In Very Slow Motion”

Reverse Engineering Saves Trashed LED Panels

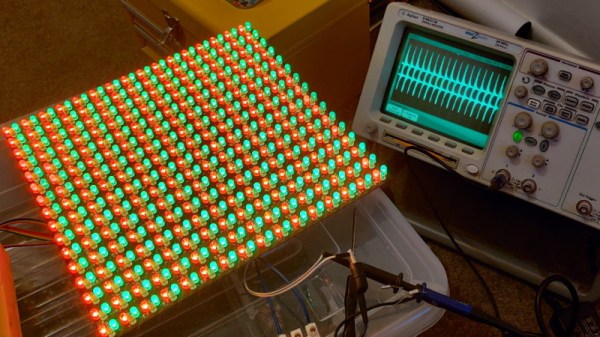
While out riding his bike, [Hammond Pearce] came across a dumpster overflowing with large LED panels. Despite the fact that the model numbers didn’t reveal anything helpful after some online searching, he decided to pedal off with as many as he could safely carry. The COVID-19 lockdown left him with only a limited set of tools, be he still managed to crack the protocol used to control his e-waste score and document it for our reading pleasure.

Between the helpful labels on the PCB silkscreen and the advice of a friend that used to work on digital road signs, it didn’t take [Hammond] long to get a general idea of what the panels were looking for in terms of power and control. Especially once he noticed the MBI5024 shift registers dotting the board.

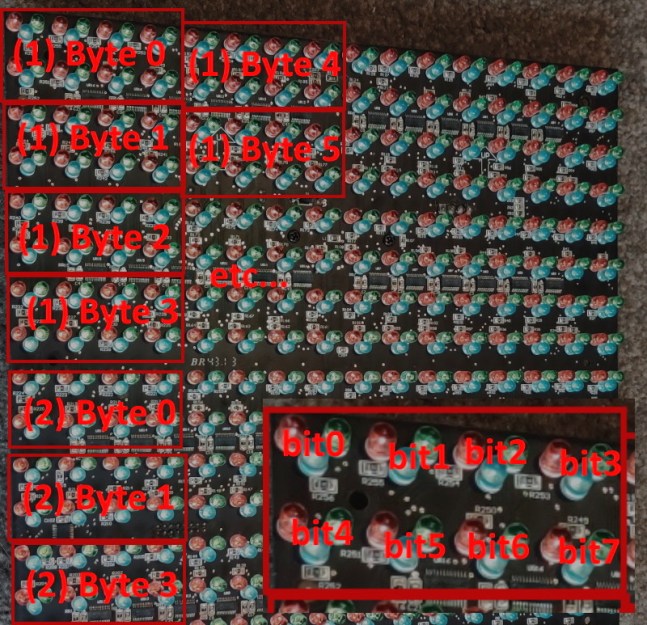
The next step was to take an ATmega328PB based development board and start throwing data at the panel’s input lines to see if he could elicit a response. With careful attention and some custom code, he eventually figured out that each byte of data sent down the line would control a 4 x 2 section of LEDs.

Once he had the basics down, the next step was to start expanding his code to handle things like shapes, text, and daisy-chained panels. After posting some of his work to Reddit, cyber-sleuths determined that the protocol appeared to be some variation of HUB75, which gave [Hammond] hints on what some of the other pins in the connector might be used for. He’s released all of his code online for anyone who might find it useful, but since he still doesn’t know who made these panels and why there’s really no telling how many of them are actually floating around out there.

Figuring out how to talk to an unknown or undocumented piece of hardware can be intimidating, but success stories like these are reminders of why it’s worth putting the effort in. As we’ve seen, the difference between trash and treasure is often a keen eye and a few lines of code.

Arcade With LED Marquee Shows Off Your Game

We’ve seen a lot of arcade machine builds here on Hackaday. Seriously, a lot. Even more so since the Raspberry Pi took over the world and made it so you didn’t have to cannibalize an old laptop to build one anymore. It’s one of those projects with huge appeal: either you’re somebody who’s built their own arcade, or you’re somebody who wishes they had. But even after seeing all these builds, we occasionally come across a specimen that deserves special recognition.

LED display controller

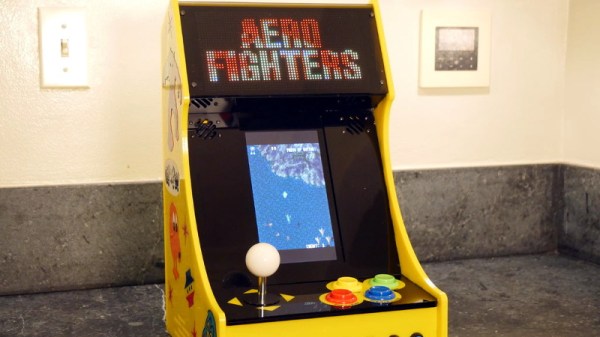
[Al Linke] recently wrote in to tell us about his arcade build, which we think you’ll agree is worth a closer look. The core build is actually a modification of a previously published design, but what makes this one unique is the addition of a programmable LED matrix in the top that actually shows the logo and artwork for whatever game you’re currently playing. This display really helps sell the overall look, and instantly makes the experience that much more authentic. Sure you don’t need the marquee of your home arcade machine to show era-appropriate artwork…but we know you want it to.

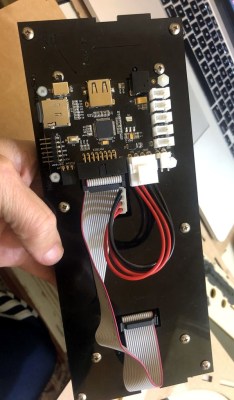
So how does one interface their Raspberry Pi with this beautiful 64×32 LED marquee display? Well it just so happens that [Al] is in the business of making cool LED displays, and even has a couple successful Kickstarter campaigns under his belt to prove it. He’s developed a board that lets you easily connect up to low-cost HUB75 LED panels such as the one used in the arcade. It’s been a few years since we’ve last seen a project that tackled these specific LED displays, and it’s encouraging to see how far things have come since then.

Even if you’re somehow not in love with the LED marquee, this build really does stand on its own as a fantastic example of a desktop arcade machine. [Al] went to great length to document his build, including putting together several videos during different phases of construction. If you’re curious about the start of the art for home arcade builds, this project would be a pretty good one to use as a barometer.

Whether it’s a full-size replica of the machine you spent your youth standing in front of, or an entirely new design made to your exacting specifications, there’s few projects that are a better conversation starter than one of these beauties blinking away in your living room.

Continue reading “Arcade With LED Marquee Shows Off Your Game”

RGB LED Matrices With The STM32 And DMA

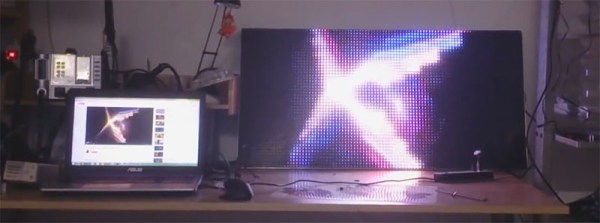
A few years ago, [Frans-Willem] bought a few RGB LED panels. Ten 32×16 panels is a lot of LEDs, and to drive all of these panels requires some sufficiently powerful hardware. He tried working with an FPGA development board, but that didn’t have enough memory for 24-bit color. The microcontroller du jour – a TI Stellaris – couldn’t get more than 16 bits of color without flickering. With a bunch of LEDs but no way to drive them, [Frans-Willem] put the panels in a box somewhere, waiting for the day they could be used to their fullest capacity.

This day came when [Frans-Willem] was introduced to the STM32 series of chips with the F1 Discovery board. While looking for some electronic playthings to use with this board, he stumbled upon the LED panels and gave them one more try. The results are spectacular, with 33 bits of color, with animations streamed over a router over WiFi.

The panels in question are HUB75 LED panels. In the 32×8 panels, there are six data pins – two each for each color – four row select pins, and three control pins. The row select pins select which row of pixels is active at any one time. Cycle through them fast enough, and it will seem like they’re all on at once. The control pins work pretty much like the control pins of a shift register, with the data pins filling in the obvious role.

The code that actually drives the LEDs all happens on an STM32F4 with the help of DMA and FSMC, or the Flexible Static Memory Controller found on the chip. This peripheral takes care of the control lines found in memory, so when you toggle the write strobe the chip will dump whatever is on the data lines to a specific address in memory. It’s a great way to take care of generating a clock signal.

For sending pixels to this display driver, [Frans-Willem] is using the ever-popular TP-Link WR703N. He had originally planned to send all the pixel data over the USB port, but there was too much overhead, a USB 1.1 isn’t fast enough. That was fixed by using the UART on the router with a new driver and a recompiled version of OpenWRT.

All the software to replicate this project is available on Github, and there’s a great video showing what the completed project can do. You can check that out below.

Continue reading “RGB LED Matrices With The STM32 And DMA”