Learning To Use The V-USB (AVR USB Firmware) Library

The V-USB library is a pretty handy piece of code that lets you add USB connectivity to ATtiny microcontrollers (it was previously named tinyUSB). But if you’ve ever looked into adding the library to your own projects you may have been stymied by the complexity of the code. There are many examples, but there’s a lack of a concise quick-start for the uninitiated. [Joonas Pihlajamaa] has been working to correct that shortfall with his four-part V-USB tutorial series. It’s not for the absolute newbie; you should already be comfortable working with AVR chips but that’s the only real prerequisite we can see.

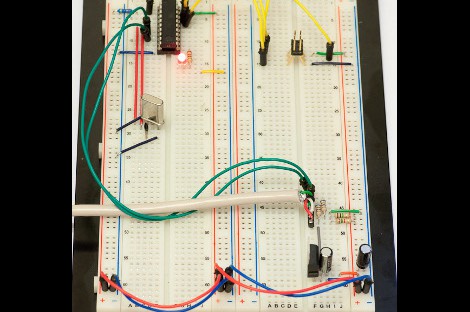
He starts the series with a look into the hardware considerations. USB provides a 5V power rail but the data lines expect 3.3V logic so this must be accounted for. With the test rig built on a breadboard he moves on to pick apart the code, covering various user-defined variables that you’ll need to set based on your project’s needs. We’re going to keep this on the back burner and hopefully the Troll Sniffing Rat will get a makeover (although we must say comments have been a lot nicer as of late… keep it up!).

We’ve embedded links to all four tutorial parts after the break.

Continue reading “Learning To Use The V-USB (AVR USB Firmware) Library”

Bring Your Own Name Badge

It used to be that the contents of your pocket protector directly mirrored your geek level. But that just doesn’t cut it in our fast-paced digital age. We think [Jonathan] is headed down the right track though, by creating a scrolling LED name badge which he takes to conventions with him. With the right enclosure this could reach the same geek level as Woz’s watch. There’s a lot packed into the little device, but readability at close range doesn’t look like one the features so make sure you glance at the tag before you approach him for a conversation.

As you can see, the PCB for the project is the same form factor as a landscape ID card. It hosts an 8×5 LED matrix, which meshes nicely with the registers of the MSP430 chip which runs it. He admits that the hardware may not last very long as the chip is multiplexing the display directly, with no resistors or LED drivers for current protection. But there is potential in the design. It uses a rechargeable battery (which we like) and he included a QR code in the board artwork for easy exchange of contact information. We’ve embedded his description of the project after the break. Continue reading “Bring Your Own Name Badge”

WiFi Experiments With ATtiny Microcontrollers

[Quinn Dunki] got some free stuff from Element14 to evaluate, including this Mircrochip WiFi module. It’s been used as the centerpiece of an Arduino shield in the past, and she grabbed a copy of that library to see if it would play nicely with an ATtiny chip. What follows is a struggle to de-Arduino the code so that it’s portable for all AVR controllers.

This module is one of the least expensive ways to add WiFi to a project, coming in at around $23. But it’s not really an all-in-one solution as there’s still a huge software hurdle to cross. The hardware provides access to to radio functions needed to communicate with the network, but you need to supply the TCP/IP stack and everything that supports it. Hence the re-use of the Arduino library.

Battling adversity [Quinn] fought the good fight with this one. Switching from an ATtiny to the ATmega168, compiling more code, and troubleshooting the process. She used a single LED as feedback, and can get some connectivity with her hotspot. But to this point she hasn’t gotten everything up and running.

We’re hot for an AVR WiFi solution that is cheap and easy to use. But as we see here, the software is complex and perhaps best left up to beefier hardware like the ARM controllers. What do you think?

Electronic Candle Protects Sleeping Infant

[William] developed this temperature candle as a tool to help keep babies safe as they sleep. It seems that ambient temperature has an effect on Sudden Infant Death Syndrome (SIDS). This device is meant to alert you when room temperature is outside of the recommended envelope.

The board hosts an eight-pin PIC microcontroller (12F683P), a temperature sensor, RGB LED, and a push button. The round PCB is the same size as a votive candle, which is nice except that you’re going to have to drill a hole in your candle holder to accommodate that barrel jack.

The temperature sensor is read by the microcontroller and used to determine the color of the LED. Red is hot, blue is cold, and just right is somewhere in between. But if you’d rather know the exact current temperature you can press the button and it’ll blink out the Celsius reading using blue for 10 degree increments (three blinks is 30 degrees, etc.) and red for single degrees. Don’t miss the demo of the candle in the video after the break.

Continue reading “Electronic Candle Protects Sleeping Infant”

Fractal Viewer Can Zoom And Enhance Like On CSI

This fractal viewer is a great way to get your feet wet with Field-Programmable Gate Arrays. The project will give you some experience working with video output, user input, and a whole bunch of math and memory management. [Hamster] built it using the Papilio Plus board which hosts a Spartan 6 FPGA. This continues his odyssey into the realm of hardware design; part of which we looked at back in December.

The arcade Megawing for the dev board gives him easy access to the controls needed to scroll and zoom on the fractal design. Calculations to generate the shape are being run at 240 MHz, with the VGA output running at 80 MHz. The device has enough horse power and SRAM to show an 800×600 pixel output with a 60 Hz refresh rate.

We really liked the logic diagram that [Hamster] drew up when planning how the calculations would be handled. It’s not overly complex, but it took us a while to conceptualize how everything fits together. It’s certainly an improvement from his last attempt as we couldn’t make heads or tails out of that flow chart.

If you’re just interested in the pretty shapes and colors there’s a demo embedded after the break.

Continue reading “Fractal Viewer Can Zoom And Enhance Like On CSI”

Modular Controllers You Can’t Wait To Show Off To Your Friends

Let’s get this straight, [Alex] is going to show us how to make controllers like this one? Where do we sign up? Even without seeing it in action we want one, but the urge to build is even greater after he shows it off (check the clip after the break). He’s a design student who made an open source project aimed at making it easier to build hardware controllers that pair with just about any software application.

The need for external controllers is on the rise, starting with music-based applications like DJ tools, and Midi controllers for musicians (we’re thinking Monome clones). But anything that can take input from a USB HID can be controlled with something like this. That’s because [Alex] is using the Teensy controller board as an interface. Just select the input types you want – sliders, potentiometers, buttons, switches – then wire them up to the microcontroller pins. If you start to run out of inputs he also discusses some add-on chips to use as port expanders.

Of course there’s a lot to be said for the physical appearance as well. Even though he used point-to-point connections for all of the controls, that wiring is hidden behind the aesthetically pleasing laser-cut dashboard. Follow his advice for layout and find a friend with access to a sweet laser cutter and you’re in business. Continue reading “Modular Controllers You Can’t Wait To Show Off To Your Friends”

Custom Microcontroller Using Only A Dremel

Check out this 6-pin MSP430 microcontroller. What’s that you say? TI doesn’t make a 6-pin MSP430? True, Texas Instruments doesn’t make one, so [Greg] grabbed his Demel and a cutoff wheel, and chopped up a larger uC to arrive at this package.

It may sound a bit crazy at first, but when you think about it there’s nothing really all that special about this. The plastic package on DIP components these days is mostly empty. The silicon die which does the computing is quite small in comparison, and usually mounted in the very center of the part. [Greg] simply cut off eight of the unneeded pins (four from each end).

Well, it might be a stretch to call them unneeded since he cut the ground and voltage pins. He gets around this issue by taking advantage of the same properties of the I/O pins used in this barebones RFID tag. You can inject power through the I/O and we’d bet you could easily use this chopped-up MSP430G2211 as an RFID tag if you wanted to.

[Thanks Ian]