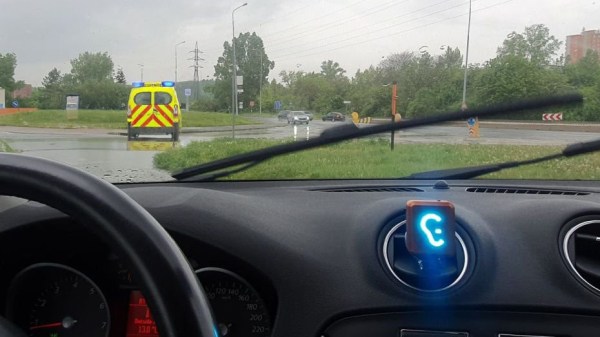
[Jan Říha]’s PionEar device is a wonderful entry to the Assistive Tech portion of the 2023 Hackaday Prize. It’s a small unit intended to perch within view of the driver in a vehicle, and it has one job: flash a light whenever a siren is detected. It is intended to provide drivers with a better awareness of emergency vehicles, because they are so often heard well before they are seen, and their presence disrupts the usual flow of the road. [Jan] learned that there was a positive response in the Deaf and hard of hearing communities to a device like this; roads get safer when one has early warning.
 Deaf and hard of hearing folks are perfectly capable of driving. After all, not being able to hear is not a barrier to obeying the rules of the road. Even so, for some drivers it can improve awareness of their surroundings, which translates to greater safety. For the hearing impaired, higher frequencies tend to experience the most attenuation, and this can include high-pitched sirens.
The PionEar leverages embedded machine learning to identify sirens, which is a fantastic application of the technology. Machine learning, after all, is a way to solve the kinds of problems that humans are not good at figuring out how to write a program to solve. Singling out the presence of a siren in live environmental audio definitely qualifies.
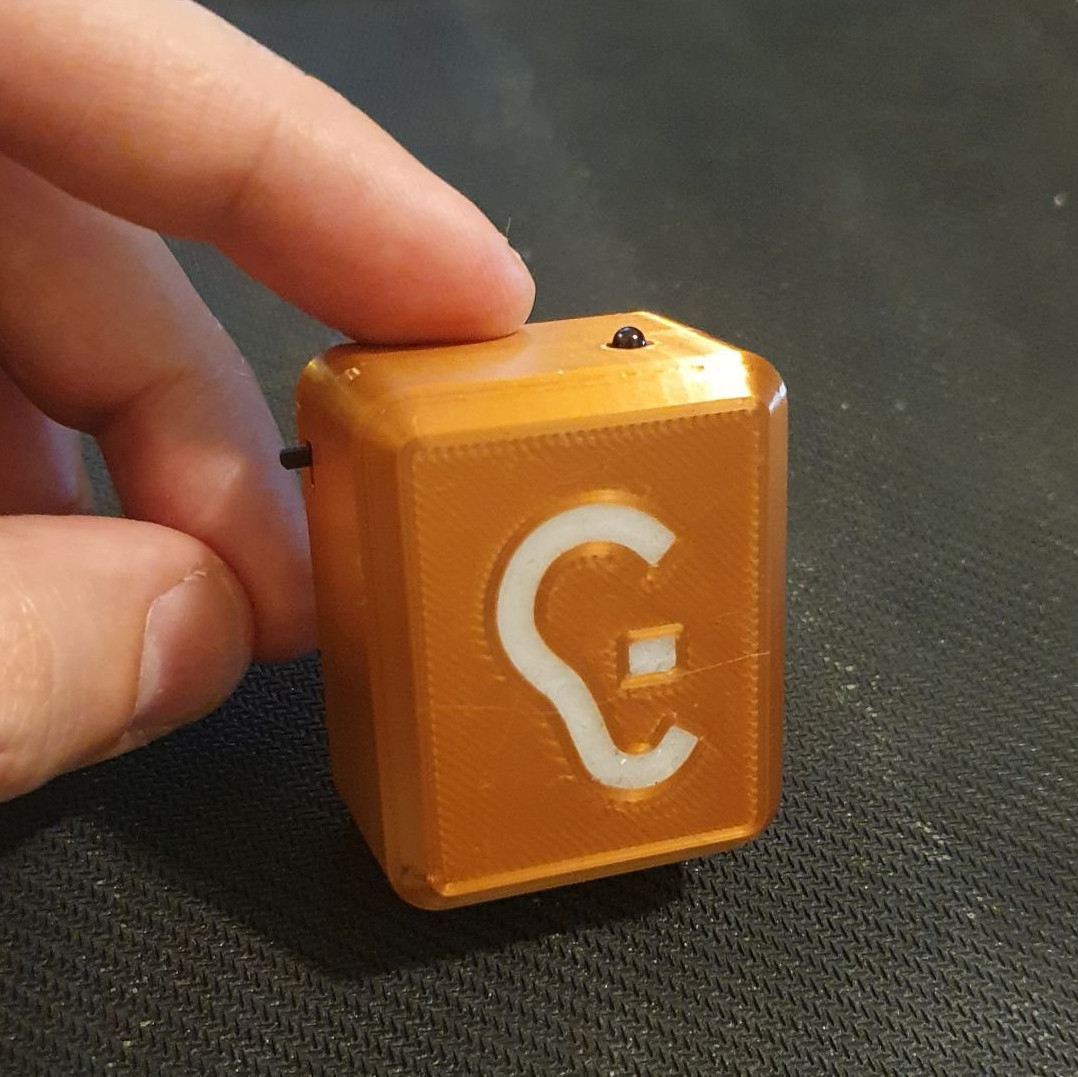
We also like the clever way that [Jan] embedded an LED light guide into the 3D-printed enclosure: by making a channel and pouring in a small amount of white resin intended for 3D printers. Cure the resin with a UV light, and one is left with an awfully good light guide that doubles as a diffuser. You can see it all in action in a short video, just under the page break.
Continue reading “Hackaday Prize 2023: Hearing Sirens When Drivers Can’t”