When one thinks about microscopy, it seems to be mostly qualitative. Looking at a slide teeming with bacteria or protozoans is less about making measurements and more about recognizing features and describing their appearance. Not all microscopes are created equal, though, with some being far more optimized for making fine measurements of the microscopic realm.
This 3D-printed confocal laser scanning microscope is a good example of an instrument for measuring really small stuff. As [Zachary Tong] points out, confocal scanning microscopy uses a clever optical setup to collect light from a single, well-defined point within a sample; rather than getting an image of all the points within a two-dimensional focal plane, the scanning function moves the focal point around through the sample in three dimensions, capturing spatial data to go along with the optical information.
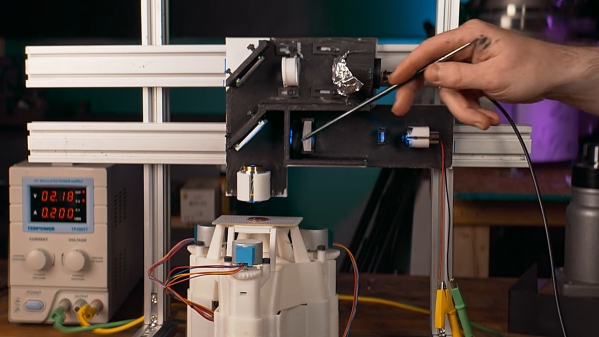
The stage of [Zach]’s microscope is based on OpenFlexure’s Delta Stage, an open-source, 3D-printed delta-bot motion control platform that’s capable of positioning samples with sub-micron precision. Above the stage are the deceptively simple optics, with a laser diode light source, an objective lens, and a photodiode detector behind a pinhole. The detector feeds a homebrew trans-impedance amplifier that captures data at millions of points as the sample is moved through a small three-dimensional space. All that data gets crunched to find the Z-axis position corresponding to the maximum intensity at each point.
It takes a while to gather all this data — up to several days for even a small sample — but it works pretty well. [Zach] already has some ideas for reducing noise and speeding up the scan time; perhaps a stage based on DVD parts like this one would be faster than the delta stage. We look forward to seeing his improvements.
Continue reading “3D-Printed Laser Scanning Confocal Microscope Measures Microns” →