Covert Remote Protest Transmitters

As a piece of protest art, “Covert Remote Protest Transmitters” ticks all the boxes. An outdoor covert projector that displayed anti-globalization messages at a G20 summit is protest. To disguise it inside a surveillance camera body housing — sticking it to the man from inside one of his own tools — is art. And a nice hack.

However you feel about the politics of globalization (and frankly, we’re stoked to be able to get cheap tech from anywhere in the world) the open-source DIY guidebook to building the rig (PDF) makes up for it all.

They installed the camera/projector long before the summit, where it sat dormant on a wall. A cell phone inside turned on the projector’s light with each ring because they attached a relay to the cell phone’s speaker circuit. In the instructions there’s an example of using a light-dependent resistor (CdS cell) to do the same thing, relying on the phone’s backlight functionality instead. There are a lot of ways to go here.

The optics consist of a couple of lenses aligned by trial and error, then fixed in place to a balsa wood frame with hot glue. A big fat Cree LED and driver provide the photons.

The video documentation of the piece is great. It’s mostly the news media reacting to the art piece as a “security breach”. A security breach would be a gun or a bomb. This was an overhead projector displaying messages that were out of the organizers’ control. Equating security with the supression of dissent is double-plus-ungood. Touché, CRPT.

Anyway, while you’re getting prepped for your next protest, have a look at the Image Fulgurator.
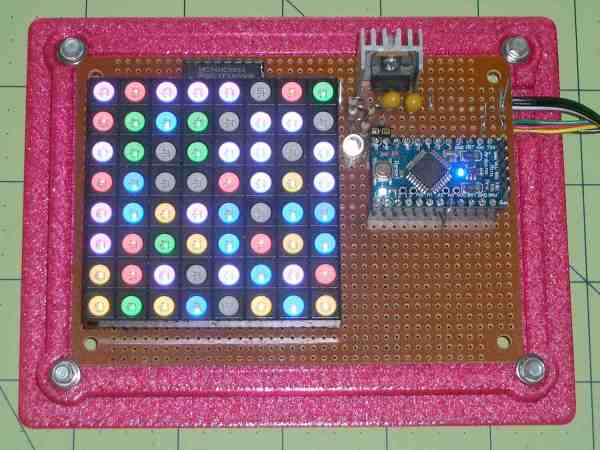
LED Matrix Plus Geiger Counter

A lot of projects get made because someone just has the parts lying around. In this case, [Ed Nisley] got given a nice 8×8 RGB LED matrix, and needed something to display. [Ed] details the transformation of stuff-lying-on-the-desk into a unique matrix display for a Geiger counter (which he also presumably had sitting around somewhere). The result is a lightshow that’s as random as radioactive decay, and that’s pretty darn random.

img_5583-random-led-dots-circuit-layout-rb-smd-resistorsThe first post covers the hardware layout. It’s build on protoboard, but ends up looking a lot nicer than our projects because [Ed] spent some time hiding the shift-register ICs and row-driver transistors underneath the matrix itself, which was nicely socketed above. A sweet touch is the use of SMT resistors soldered upright underneath the board to save space. Cute.

The second post covers the circuit design, and is worth a look if you’re new to driving many LEDs from a minimum number of microcontroller pins. There are eight rows, and three colors each for eight LEDs per row. Without using shift registers, this would require 8*8*8*8 = way too many pins to control. If you want a worked example of how to do this with just four microcontroller pins, have a look. (Spoiler: cascaded shift registers driven by the AVR’s hardware SPI peripheral.)

The third post starts to flesh out the software. [Ed] settled on seven colors (and off) for the display, so the matrix’s total state can be crammed into just 32 bytes, which fits nicely in even a tiny microcontroller, much less the gargantuan ATmega328. Wrapping this all up in an array of structs and providing a couple of helper functions makes quick work of the software side. The addition of a sync pulse to trigger an oscilloscope at the end of a row is a nice touch.

aware-rm-60-geiger-pulseNext up is the Geiger counter interface software post. When a radioactive decay event is detected, the code reads out the time in milliseconds and uses that as the source of randomness. To whiten the noise, the times are run through a simple hash function: the Jenkins hash (link). This hash function was new to us and seems pretty useful for quick-and-dirty microcontroller applications.

The last post details pre-loading the matrix on startup and running a test sequence that blinks each LED to make sure they’re all working. Using a single random value to seed a software pseudo-random number generator ensures that it will (almost) never start off with the same display twice.

Phswew! That’s a lot of well-documented writeup of a well-polished project! Hope it inspires you to dig out something cool from your junk drawer and build.

Robot Camel Jockeys

You might think we’re sinking to lowest-common-denominator, click-bait headlines like the rest of the online press. We’re not. The New York Times Video Notebook series has a story on camel racing that you’ve just got to see in the video after the break.

robotPreviously, the camel races in Abu Dhabi had used small children as jockeys because they’re lightweight. Unfortunately, this lead to illegal trafficking of small children, mostly orphans. That won’t do. So they came up with a technological solution.

Strap a cordless drill with a purpose-built whip in the chuck onto the back of your camel. Add a car-remote keyfob to activate, and a two-way radio so that you can shout encouragement into your animal’s ear at just the right times. Now just chase the racers down the highway in an SUV and it’s like you’re there on the camel’s back!

talkingWe love the little silk suits that the drillbot-jockeys get to wear, but we’re not sure that cordless drills with walkie-talkies and remote controls count as “robots” really, because they don’t do anything autonomous. We think they’re more accurately described as “telepresence agents”.

Continue reading “Robot Camel Jockeys”

Forbidden Fruit Machine

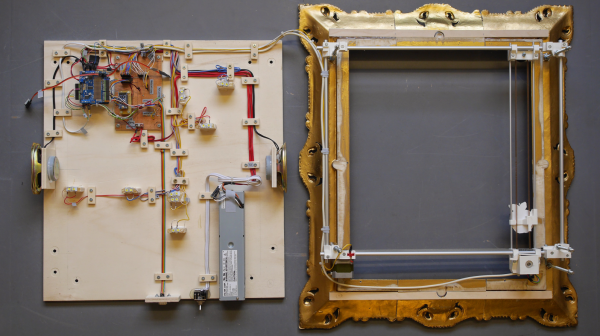
Here’s another example of how today’s rapid-prototyping technologies are allowing Artists and Craftsmen to create interactive works of art rapidly and easily. [Kati Hyypa] and [Niklas Roy] teamed up to transform a classic painting in to an interactive exhibit. It’s a painting of Adam, Eve and the apple with a joystick attached. Spectators can control the destiny of the apple with the joystick and thus explore the painting.

The “Forbidden Fruit Machine” is based on a painting called “The Fall of Man” created by [Cornelis Cornelisz van Haarlem] in 1592. The painting depicts Eve and Adam in the Garden of Eden, being tempted by the serpent to eat the forbidden fruit. A public domain, high-resolution scan of the painting is available for download from the Rijksmuseum Amsterdam. Starting with that, the arms were edited out, and replaced with articulated versions (mounted on acrylic) driven by servos. The apple was mounted on a X-Y gantry driven by two stepper motors. These are driven by a motor shield, which is controlled by an Arduino Uno. The Uno also controls a Music Maker shield to play the various audio tracks and sound effects. Finally, an additional Arduino Pro-Mini is used to control the LED lighting effects via a Darlington driver and also connect to the end stops for the X-Y gantry. The joystick is connected to the analog ports of the Uno.

The LED’s give clues on where to move the apple using the joystick, and pressing the red button plays an appropriate audio or sound effect. For example, pressing the button over the cat at Eve and Adam’s feet elicits a heart-breaking meow, while letting Eve eat the apple results in an even more dramatic effect including a thunder storm.

The machine is open source with code posted on Github and 3d files on Youmagine. Watch a video after the break. The artist’s names may be familiar to some some readers – that’s because both have had their earlier work featured on our blog, for example this awesome ball sucking machine and another one too.

Continue reading “Forbidden Fruit Machine”

Turning A Page With Your Voice

[Justin]’s friend [Steve] injured his spine a while ago, and after asking what would make [Steve]’s life simpler, the answer was easy. [Steve] missed reading books. Sure, e-readers exist, but you still need to turn the page. Now [Steve] can do that with his voice thanks to some microcontrollers, Bluetooth modules, and a voice recognition module.

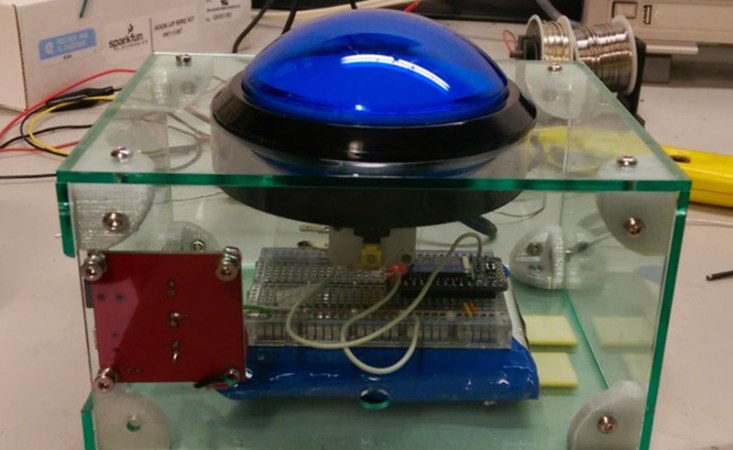
A voice-activated page turner wasn’t the first attempt at giving [Steve] the ability to turn a page on a Kindle. The first prototype was a big blue button that sent a keyboard code for ‘right arrow’ over Bluetooth, turning a book one page at a time. This worked well until multiple pages turned, and with no back button it was a major nuisance.

After playing with the voice recognition in an Amazon Echo, [Steve] and [Justin] wondered if the same voice recognition technology could be applied to page turns on a Kindle. With a voice recognition Arduino shield from SparkFun it was easy to detect a ‘page down’ command. A Bluetooth module sends HID commands to a Kindle, allowing [Steve] to read a book with only his voice.

[Justin] put all the design files for this build up on Github.

Vintage Microammeter Now Tells Temperature

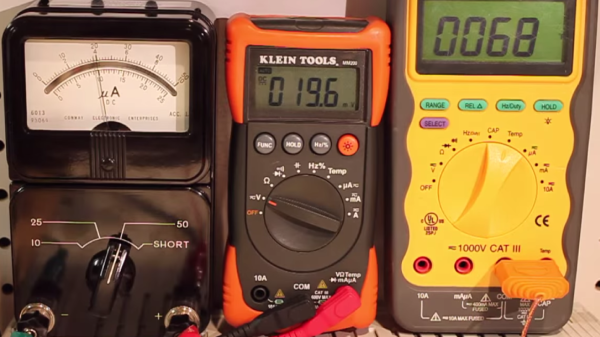
[Craig] sent in this tip about a simple hack he built to convert an old analog micro-ammeter into a thermometer using a few parts. There’s a certain charm to retro analog meters, and there was enough space inside the old meter to accommodate the tiny breadboarded circuit and the three AA batteries to convert it into a cool looking centerpiece which is useful too!

He used the 3-pin MCP9700 analog temperature sensor connected to a LTC1541 – a combined comparator, op-amp and band gap reference voltage all rolled into one package. The thermometer displays 1uA per degree Celsius, has an output of 1mV per degree Celsius for external temperature monitoring / data logging, and draws just about 20uA. While the build itself is pretty simple, [Craig] took the time to walk through every design decision he made in the video after the break. This starts with the design for his circuit, and  moves on to the selection of parts and their values. The video is a must-watch for anyone wanting to learn more about precision op-amp based designs.

The three batteries will drain over time, and a circuit like this one requires a stable reference voltage. That is taken care by the bandgap reference voltage from the LTC1541. This eliminates the use of additional voltage regulators, and allows the circuit to work from 4.5V down to about 3.3V. Check the video after the break to listen to [Craig] describe how it works. We’re not sure how quickly it responds to changes in ambient temperature since the sensor is enclosed inside the meter, so maybe some vents at the back, or bringing out the sensor might be a good idea.

Continue reading “Vintage Microammeter Now Tells Temperature”

Not Just A Floor Wax But An Embossing Powder!

The embossing process used in the creation of some of your fancier wedding invitations and business cards is an interesting one. It’s often called thermography or thermographic printing. Slow-drying, wet ink is applied to a substrate. The ink is dusted with a thermoplastic polymer called embossing powder, and a heat source raises the ink while drying it.

Commercial embossing powder costs about $10 an ounce. As [Ken] discovered, its manufacture is quite closed-source to boot. He set about creating his own embossing powder, and succeeded with a combination of commonly available floor finish and distilled white vinegar. A standard-sized bottle of floor finish yielded about four ounces of homemade embossing powder.

How does this work? The floor finish is an acrylic-based stable emulsion. Adding vinegar destabilizes the emulsion, decreasing its pH and setting the polymer free.  It’s a fairly fast process, which you can see in the second video that accompanies [Ken]’s write up. From there, it’s mostly a matter of straining the material, letting it dry, and pulverizing the coarse matter into powder. In the first video, [Ken] performs a comparison test of Ranger, a commercial powder, and his own concoction.

For a completely different take on home embossing, check out this soda-can-turned-keepsake-box.