MBox: A Child’s MP3 Player

mobx

For young children, music is a wonderful and exciting thing — but do you really want them playing with your phone, or worse yet, an iPod? [Arons] decided to make the MBox, an Arduino powered MP3 player.

He was inspired by hörbert, a very similar wooden MP3 player for children. Apparently it’s a great product, but it also costs 239€. We don’t blame him for wanting to make his own.

The MBox follows the same exterior design as hörbert — though we must admit, he could have spiced it up a bit! It uses an Arduino Uno at its core with a Freaduino MP3 music shield, capable of playing all the typical formats like MP3, MIDI, WAV, and even Ogg Vorbis. To amplify the sound he’s using a Mono Audio Amp Breakout board from SparkFun which drives an 8Ω loudspeaker. A mini USB power brick provides the juice, and a 12-digit keypad provides the ability to select music — each number plays from a different directory on the SD card.

[Arons’] daughter loves it, and he probably only spent a fifth of what the real hörbert costs!

[Thanks for the tip Renzo!]

The Most Beautiful Floppy Disk Jukebox Ever

Playing music on floppy drives is something that has been done to death. [kiu]’s RumbleRail is something else entirely. Yes, it’s still a collection of floppy drives playing MIDI files, but the engineering and build quality that went into this build puts it in a class by itself.

Instead of the usual assemblage of wires, power cords, and circuits that accompany most musical floppy drive builds, [kiu]’s is an exercise in precision and modularity. Each of the eight floppy drives are connected to its own driver with an ATMega16 microcontroller on board. The microcontrollers in these driver boards receive orders from the command board over an I2C bus. Since everything on the RumbleRail is modular, and the fact [kiu] is using DIP switches to set the I2C address of each board, this build could theoretically be expanded to 127 voices, or 127 individual floppy drives each playing their part of a MIDI file.

The RumbleRail can also operate in a standalone mode without the need for a separate computer feeding it data. MIDI files can be loaded off an SD card by the main controller board, and decode them for the floppy drivers.

If you’d like to build your own RumbleRail, all the board files, schematics, and firmware are up on [kiu]’s git. There are, of course, a few videos below of the floppy jukebox in action.

Continue reading “The Most Beautiful Floppy Disk Jukebox Ever”

A Guitar From An Old Tin Box

omar-mos

[Atdiy and Whisker], collectively known as  [The Tymkrs] have been busy honing their luthier skills. They’ve created a 10 part YouTube series about the construction of their new cigar box guitar. Instead of a cigar box though, they’ve substituted a 1920’s tin cigarette box. The Omar Cigarette company gave “Project Omar” it’s name. Like [Tymkrs] previous guitar, Omar is a three string affair. The neck was cut from Black Palm, which really shined when polished with a mixture of orange oil and beeswax. They also threw in a couple of new tricks on this build. Omar is an electric guitar, with a pickup custom wound  by [Bob Harrison]. Omar also has frets, which creates a whole new set of complications. Frets are generally installed by cutting slits in the guitar neck with a fret saw. Rather than buy a new tool, [Tymkrs] created a simple jig for their mini table saw. The jig held the guitar neck perpendicular with the saw blade. This made quick work of the many fret slits to be cut. Installed frets must also be dressed and leveled, which is a time-consuming process. 

The tin cigarette box also created a new set of problems. The thin tin proved to be a bit on the weak side when the strings were tightened down. A bit too much pressure on the box while playing would cause notes to bend, much like the tremolo or whammy bar on a standard electric guitar. [Tymkrs] were able to counteract this by adding bracing inside, and a couple of black palm braces to the back of the box.

Hum was also a problem. When [Tymkrs] first plugged in, they found they had more 60Hz mains hum than signal from their strings. Omar uses a classic single coil guitar pickup. Single coils will pick up noise from any magnetic field, including the field created by the studio electrical system. A humbucking pickup uses two coils to counteract this effect. Humbuckers also have a slightly different tone than single coils. [Tymkrs] wanted to stick with their single coil tone, so they counteracted the hum by raising the pickup closer to the strings. Higher pickups receive more signal from the strings, so this is basically a free signal to noise ratio improvement. They also grounded the entire tin box, along with Omar’s metal tail stock. The final build sounds great, as evidenced by the jam session toward the end of Video 10.

Continue reading “A Guitar From An Old Tin Box”

Making An ARM Powered MIDI Synthesizer

What you see in the picture above is a hand-made 4-oscillator synthesizer with MIDI input, multi-mode filter and a handful of modulation options. It was built by [Matt], an AVR accustomed electronics enthusiast who made an exception to his habits for this project. The core of the platform is a DIP packaged 32-bit Cortex-M0 ARM processor (LPC1114), stuffed with ‘hand’ written assembly code and compiled C functions. With a 50MHz clock speed, the microcontroller can output samples at 250kHz on the 12bit DAC while being powered by 3 AA batteries.

Reading [Matt]’s write-up, we discover that the firmware he created uses 4 oscillators (sawtooth or pulse shape) together with a low frequency oscillator (triangle, ramp, square, random shapes). It also includes a 2-pole state-variable filter and the ability to adjust the attack-release envelopes (among others). The system takes MIDI commands from a connected device. We embedded videos of his creation in action after the break.

Continue reading “Making An ARM Powered MIDI Synthesizer”

The Magnetophone

The Magnetophone

The Magnetophone is the latest electro-acoustic instrument from [Aaron Sherwood]. This tower contains 14 strings, and 14 hand-wound electromagnets. By energizing each electromagnet with a square wave, the strings can be vibrated to create music.

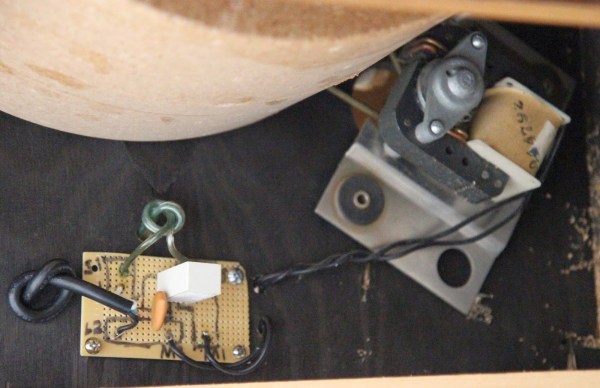
The brains of the device consist of an Arduino Mega attached to the top of the tower. The microcontroller has 6 timers, which allows for 6 notes to play at the same time. An open source tone library was used to generate square waves at the correct frequencies. These square waves are amplified by LM386 based circuits, which provide enough power to the coil to oscillate the string. By using square waves at specific frequencies, overtones of strings can be created.

This isn’t the first time we’ve seen [Aaron] combine strings and electronics. His Glockentar used solenoids to strike strings. However, this project provides new possibilities by allowing the rate of oscillation to be controlled precisely. You can see the instrument in action after the break.

Continue reading “The Magnetophone”

Fubarino Contest: Single PCB Synth

fubarino-contest-synth

Here’s a musical entry for the Fubarino Contest that turned out to be rather delightful. First, [Mats] shows off his musical knowledge by using the notes H, A, and D to play the chord that unlocks the Easter eggs. What’s that you say? There’s no H on your keyboard? You’re wrong. In the German music tradition B natural is known as H. This is what allowed Bach to write a tune that spells his name.

[Mats] is hacking on his PlingPlong synthesizer. The first Easter egg—which you can see in the clip after the break—launches with the H-A-D chord in the lower octave, spelling out our URL on the 7-segment displays. But we prefer the second egg, launched with the chord in the upper octave, which is shown above. It uses the 3×5 LED grid to scroll out the address; in this still image an H is displayed.


This is an entry in the Fubarino Contest for a chance at one of the 20 Fubarino SD boards which Microchip has put up as prizes!

IR Theremin Speaks In Four Voices

infraredTheremin

At the end of every semester, we get a bunch of cool and well-documented student projects from Cornell’s ECE4760 class. [Scott] and [Alex]’s infrared theremin is no exception.

The classic theremin design employs each of the player’s hands as the grounded plate of a variable capacitor in an LC circuit. For the pitch antenna, this circuit is part of the oscillator. For the volume antenna, the hand capacitor detunes another oscillator, changing the attenuation in the amplifier.

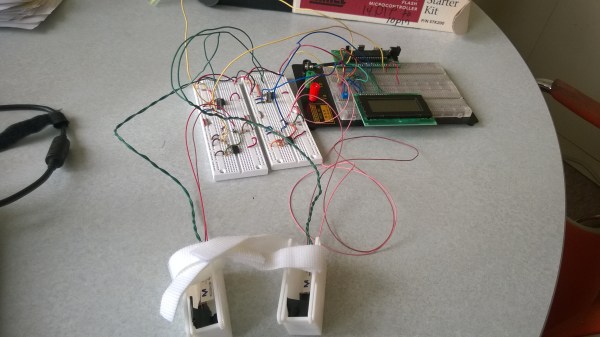
[Scott] and [Alex] put a twist on the theremin by using two IR sensors to control volume and pitch. The sensors compute the location of each hand and output a voltage inversely proportional to its distance from the hand. An ATMega1284P converts the signal to an 8-bit binary number for processing. They built four voices into it that are accessible through the push-button switch. The different voices are created with wave combinations and modulation effects. In addition to Classic Theremin, you can play in pure sine, sawtooth, and FM modulation.

If you’re just not that into microcontrollers, you could build this digital IR theremin instead. If you find IR theremins soulless or plebeian, try this theremincello.

Continue reading “IR Theremin Speaks In Four Voices”