Homebrew Guitar Tuner Also Includes MIDI Out

A few years ago, [Frédéric]’s brother in law wanted a guitar tuner for Christmas. Instead of going out and buying one, [Frédéric] broke out the soldering iron and built one from scratch.

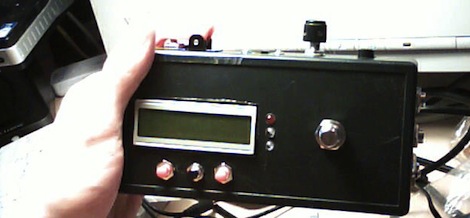
[Frédéric]’s tuner is built around an ATMega168 uC on a Real Bare-Bones Board with an LM386 amplifier. The display is a standard 20×2 LCD character display, and the interface is torn from the pages of stomp box schematics with a very hefty foot switch.

Detecting the frequency of a note played into [Frédéric]’s tuner involves a fair bit of math. To measure the frequency, the Arduino samples the waveform coming from the input jack. This signal is delayed for a fraction of a second and the area underneath the real and delayed waveforms is measured. This delay slides across the original waveform until the area between the real and delayed samples are minimized. At that point, delayed wave form will be exactly one cycle behind the real signal, and the cycles per second can be calculated. It’s called the YIN algorithm, and you can read more about it here.

Since [Frédéric] already knew the exact frequency being played into the tuner, he figured it would be trivial to add a small analog audio to MIDI converter. This feature (as shown in the video after the break) turns the sounds from a guitar into MIDI notes. It’s monophonic and probably a little superfluous, but still very cool.

Continue reading “Homebrew Guitar Tuner Also Includes MIDI Out”

Draw Your Own Vinyl Beats


The Dyskograf lets you make music with a magic marker. The musical installation looks much like a turntable for playing vinyl records. But instead of a spiraling groove containing the sounds, this uses marks on a paper disk to play sound samples.

You can see the light outline of several tracks on the paper disc shown above. By adding black marks the optical input of the Dyskograf knows when to start and end each sound. This is best illustrated in the video demonstration after the break.

The marker-based setup makes a lot of sense, and we think it would be perfect if the disc was a dry-erase board. It certainly makes it a lot easier to lay down new beats than this other optical turntable which required holes to be drilled in a vinyl record to play the sounds. While we’re on the topic you may also find this coin-based turntable sequencer of interest.

Continue reading “Draw Your Own Vinyl Beats”

Typing With A MIDI Drum Set

[Autuin] picked up the drums at the age of 18, but by his own admission he’s no [Bonzo], [Buddy Rich] or [Ringo]. Practicing always seems to fall off the end of his to-do list, and there really is only one way to Carnegie Hall. One thing [Autuin] is really fast at is typing, so he figured he could improve his drumming skills by banging a few paragraphs out.

The core of the build is a Yamaha DTX drum module, a MIDI-to-USB adapter, and little light coding. Basically, [Autuin] made a chorded keyboard out of his drums; by hitting one (or two, or three) drum heads at the same time, he can type characters in Open Office.

For going outside the comfort zone of a steady rock beat, we’re thinking [Autuin]’s build might just be useful. He’ll be displaying his Keyboard/Drum mashup at Vancouver’s East Side Culture Crawl alongside a horrible device of artistic merit. If you promise not to break anything, drop in on him in a few weeks.

Vidia after the break.

Continue reading “Typing With A MIDI Drum Set”

A Harpsichord That Plays Itself

[Malcolm Messiter] is an Oboe player who loves to play pieces from the Baroque era. This often means playing with a Harpsichord and he managed to acquire one to call his very own. Unfortunately you can’t play both instruments at once so he set out to automate the keyboard. What you see here is a fully working version, but he soon went on to add solenoids to the upper rank as well. His story starts on page 27 of this newsletter (PDF).

He really went out of his way to make sure the instrument was not mistreated. A cabinet-maker built some brackets to mount the system above the keys. A friend drilled and tapped a sheet of acrylic to which each solenoid was mounted. The solenoid shafts have each been padded with felt to cushion the blow on the keys. We’ve embedded two demo video after the break that show off the first and second versions of the builds.

Harpsichords pluck the strings instead of hitting them with a hammer as the piano does. The mechanism that does the plucking had worn out on many of the keys so [Malcolm] used a 3D printer to help replace them.

Continue reading “A Harpsichord That Plays Itself”

Nebulophone Microcontroller Synthesizer Project Sounds Great

Judging from the video (found after the break) the Nebulophone is one of the best sounding DIY synthesizers we’ve seen. Especially when you consider the simplicity of the hardware design. It uses an AVR chip and an OpAmp. The rest of the parts are just a few handfuls of inexpensive components.

The device was developed by Bleep Labs, and they sell the synthesizer kit seen on the left. But since it’s an open source project you can follow their design to fabricate your own, which is what [BlinkyBlinky] did with his offering seen to the right.

An ATmega328 drives the device, which is the chip often used in the Arduino Duemilanove. The keyboard is a set of traces hooked to the microcontroller. These are tinned pads on the kit PCB, but the DIY version simply uses some adhesive copper foil with a jumper wire soldered to it. The keys are played with a probe that makes the electrical connection, a common practice on these stylophone type designs. Chances are you have everything on hand to make this happen so keep it in mind for that next cold winter weekend that’s making everyone a bit stir crazy.

Continue reading “Nebulophone Microcontroller Synthesizer Project Sounds Great”

Artemis Synthesizer Kit

The Artemis Synthesizer was created as a kit for Boston University’s Artemis Project. This project aims to teach female rising high school freshmen about computer science with hands-on activities. [Chris] based the kit on a ATMEGA328P microcontroller and a MCP4921 digital to analog converter. It can be used in a keyboard mode, where the buttons toggle various notes of the scale, or in a sequencer mode, where the buttons are used to toggle pre-programmed sequences.

[Chris] wanted the kit to be usable by the students after the workshop, so he used an optical link dubbed the “Optoloader” to program new sequences and waveforms into the device. A web based application allows for waveforms and sequences to be built in the browser, then programmed by holding a phototransistor up to a blinking square. The square flashes black and white corresponding to a Biphase Mark Code encoded message. This is decoded by the microcontroller on the synthesizer and stored in memory. As a result, no special hardware is needed to play new waveforms and sequences.

[Chris] has a thorough write up for the project, including feedback surveys from the students. He plans to add more specific information about the Optoloader in the future.

Check out a video of the kit in action after the break.

Continue reading “Artemis Synthesizer Kit”

Arduino Voice Changer Turns You Into [Vader]

Halloween is just around the corner, so of course we’re looking forward to a bunch of awesome costumes put together by Hackaday readers. In an effort to match his voice to his costume, [Phil Burgess] over at Adafruit (and former Hackaday alumnus) put together an Arduino-powered voice changer to give his voice the gravitas of [James Earl Jones] or the lightheartedness of a member of the Lollipop Guild.

If you’ve ever played with a turntable, you’ll know playing a 33 RPM record at 45 or 78 RPM turns your treasured copy of Dark Side of the Moon into a lighthearted aural experience with a pitch that is much too high. Likewise, playing a single at 33 or 16 RPM means those once dulcet tones are now recordings of tormented souls in an acoustic hell.

[Phil]’s voice changer operates on the same principle by recording sounds from a microphone into a circular array and playing them back at a different rate; faster if the desired effect is a Munchkin, and slower if this year’s Halloween costume will be a Sith lord.

The completed build incorporates a 10k pot to dynamically change the timbre of the voice changer, as well as an Adafruit Wave Shield to play back a few pre-recorded sounds of lightsabers clashing. In all, a very cool project for your Halloween costume that’s also a very good introduction to DSP and real-time audio modifications with a microcontroller.

Continue reading “Arduino Voice Changer Turns You Into [Vader]”