MIDI controllers can be simple straightforward keyboards, or wild magical devices that seem to snatch notes from the very aether itself. As you might expect from the name, the Nanoaetherphone II is one of the latter.
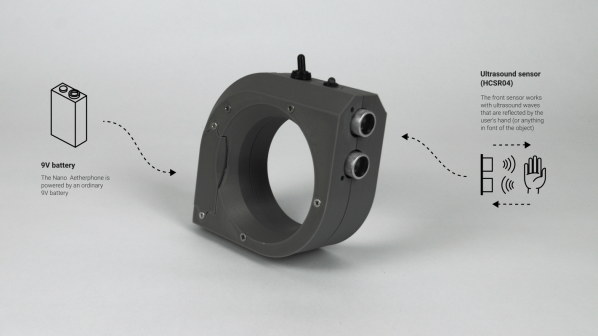
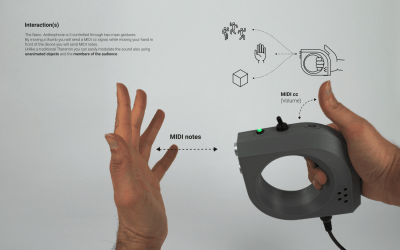 The device is inspired by the Theremin, and was built to celebrate its 100th anniversary. The Nanoaetherphone II is all about using sensors to capture data from wireless hand-wavey interactions, and turn it into MIDI messages. To this end, it has an LDR sensor for detecting light levels, which determines volume levels. This is actuated by the user’s thumb, blocking the sensor or allowing ambient light to reach it. At the front of the handheld unit, there is also an ultrasonic range sensor. Depending on how close the sensor is to the user’s hand or other object determines the exact note sent by the device. As a MIDI controller, it is intended to be hooked up to an external synthesizer to actually generate sound.
The overall concept isn’t too complicated, and the design makes it easy to pickup and play. We imagine it could even be foolproofed by programming it only to play notes from a given scale or mode, allowing for easy soloing without too many of those ill-tempered blue notes. Jazz enthusiasts might prefer it to just spit out any and all notes, of course.
We love a good MIDI controller around these parts, and we’ve seen everything from knitted models to those made out of old phones. Video after the break.
Continue reading “Nanoaetherphone Is A Special MIDI Controller”