Native SMB3 Client Brings Modern NAS Access To 20-Year-Old PowerPC Macs

As software updates cease for operating systems, they eventually begin to lose access to parts of the LAN and internet due to out of date encryption features, as well as the inability to handle file sharing protocols like SBM3, which is somewhat of a necessity if you have e.g. a NAS on the LAN. Such too was the case with [watermark_hd]’s 20-year old PowerPC Macs and their installations of OS X Tiger and Leopard.

Cue Aqualink, a native SMB3 client for these older OS X versions that uses [Ronnie Sahlberg]’s libsmb2 server/client library for SMB2 and SBM3. The source code can be found over on GitHub, along with a Japanese translation. By using a local WebDAV server Tiger’s built-in mount_webdav feature can be used to mount these remote volumes.

While you can often still use SMB1 even on modern Windows and Linux/BSD via Samba, allowing even retro systems like these PowerMacs to speak SMB3 is at least a great boost for network security, even if the aforementioned encryption shortcomings mean that you cannot quite run encrypted file shares yet.

Although OS X eventually began to adopt modern SMB versions, some of us may remember how incredibly buggy they were, to the point that us OS X users often had to fall back to CIFS (SMB 1.0), so this is another potential use for this Aqualink application.

Snooping Flume Water Monitor Data On The Wire

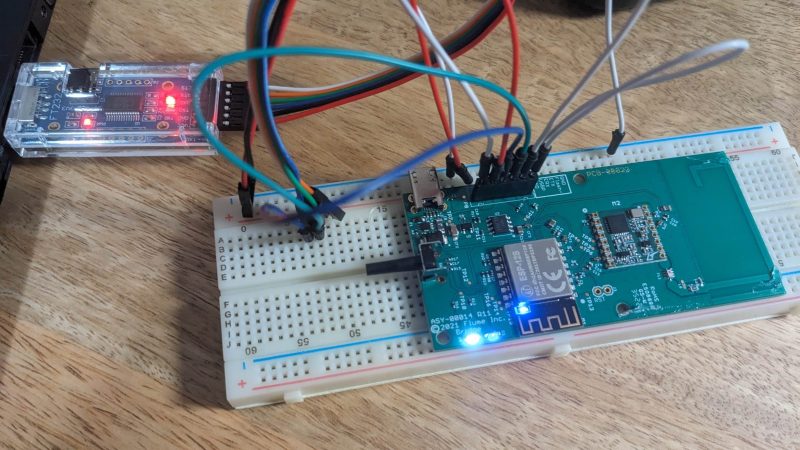
[Stephen] had an interesting piece of hardware at home—namely, a Flume water monitor. It’s a smart device which reports usage data to Flume’s servers, and the water utility in turn. He’d previously determined how the device worked mechanically to monitor water flow, but he had a greater goal—figuring out how to sniff the reported data as it passed through his network on its way to Flume servers.

The Flume rig has a sensor installed in the water line, which communicates to a bridge device that then hooks up to the Internet. [Stephen] had an early win, figuring out how to trick the bridge unit of the Flume water sensor into sending data in plaintext. This was as simple as corrupting the public key in the device’s flash. However, this wasn’t a perfect solution—as the corrupt key stopped the device from authenticating with Flume’s servers. Further diving into the LibHydrogen encryption implementation, however, revealed that the device was apparently authenticating without using session keys, relying only on a static device secret key which can be harvested from the onboard flash. This allowed [Stephen] to build a tool to sit in between the bridge and the Flume servers, forwarding traffic seamlessly while decrypting and saving it locally at the same time.

With this setup, [Stephen] was able to locally log water flow and status data from the sensor. It does come with a caveat, that the man-in-the-middle setup could block the hardware from receiving firmware updates in future. It’s also worth checking out [Stephen’s] earlier work on demystifying the Flume hardware, too. The relay tool is available on GitHub for the curious.

We love seeing hackers figure out how to interface utility meters and similar devices, in legal and appropriate manners, of course. If you’re tinkering in this realm yourself, feel free to let us know on the tipsline!

Linux Fu: Heads Or Tails For VPN

If you’ve done much networking, you surely know the frustration of trying to connect to something, say a Raspberry Pi, that lives behind your consumer router. There are a number of solutions for this, ranging from opening ports on your router along with dynamic DNS. Or, you can operate a VPN server on your network. Modern Linux has a facility called Wireguard that lets you create secure network tunnels very easily, but it is a little difficult to set up. But there are tools like Tailscale that can do most of the work for you. There’s only one problem: Tailscale is sorta-kinda free, but not really. But it turns out, you can build your own Tailscale network, and it is easier than you might imagine.

In all fairness, Tailscale’s free tier is good and recently got even more generous, allowing unlimited nodes and up to six users. That’s plenty for most hackers. However, as we’ve seen before, what they can give they can also take away. Besides, there are some extra services you still have to pay for if you want them, but overall, the free tier is more than enough for most people.

On the other hand, no matter how great the free tier may be, some people don’t want to run things on other people’s hardware. Or you need that 7th user. Or you need paywalled features. No worries. Headscale is a self-hosted service that can do nearly everything the cloud portion of Tailscale does, and if you have a place to host it, you can be your own Tailscale server.

For the client side? That’s the best part. Headscale works seamlessly with the existing Tailscale clients. You simply have to point them to your server instead of the defaults.

Continue reading “Linux Fu: Heads Or Tails For VPN”

The Need For Speed: Internet Speed Measurement (or DIY?)

Car enthusiasts want to know how quickly they can make a quarter mile. Weightlifters are forever trying to add one more plate to the bar. Internet denizens have their own favorite number to brag about: the result from a speed test.

The ritual is familiar. Close a few browser tabs, click the big “Go” button, and watch the needle climb. Perhaps you pay for gigabit service and see 940 megabits per second, which produces a satisfied nod. Perhaps you see 299 megabits and begin obsessing over network hardware. But before you get too excited either way, try another test. There is a fair chance it will give you a different answer.

That does not necessarily mean one test is lying. “Internet speed” is not a single physical quantity waiting to be measured. A speed test measures the performance of a particular device, over a particular local connection, through a particular ISP route, to a particular server, at a particular time using a particular test method. Change any of those things and the answer can change too. Continue reading “The Need For Speed: Internet Speed Measurement (or DIY?)”

UDP Broadcasting And The Joys Of IPv4 Subnetting

In the previous installment on UDP broadcasting and service discovery, the basics of both were explored, including an implementation in the form of NyanSD and its protocol. Contained in the comment section was a very good demonstration of why one of the most exciting aspects of software development is the opportunity to share your latest creations with other people. This being the ability to get solid feedback on all the points – including any potential boneheaded omissions – that you really should address, whether intentional or accidental.

The most pertinent point raised was definitely that of broadcast addresses and IPv4 subnets, with the latter topic especially being something that the sysadmins at the office would talk about all the time, but which us software developers were always happy to ignore as something that didn’t concern us. Turns out the joke was on me and everyone else – like our esteemed readers – who thought that they could escape the fascinating world of subnets, as today we’ll take an in-depth look at what subnets are and how they are relevant to the world of UDP network discovery.

I somewhat alluded in the first article to the topic of ‘which broadcast address to use’ as being somewhat of a rough topic to figure out, which is clearly why I just stuck to a blatantly ‘works for me’ /24 subnet that usually will work on networks, until it does not.

Continue reading “UDP Broadcasting And The Joys Of IPv4 Subnetting”

Linux Fu: The Local Phonebook

I’ll admit it: I miss the simplicity of /etc/hosts. There was something elegant about it. You wanted laserprinter to mean 192.168.1.40, so you opened a text file and wrote:

192.168.1.40 laserprinter

Done. No cloud account, no discovery daemon, no dashboard with material-themed icons. Just a name and an address. The trouble, of course, is that /etc/hosts is only simple when you have one machine. The moment you have a desktop, a laptop, a Raspberry Pi, a NAS, a test box, and a phone or two, every little network change becomes a tiny distributed-database problem. Which copy of /etc/hosts is authoritative? Did you update the laptop? What about the machine you only boot once a month?

One Solution

Modern LANs solved this with mDNS, using Avahi on Linux. It resolves addresses that end in .local. Instead of asking a central DNS server “who is thing.local?”, a machine sends a multicast query on the local network: “who has thing.local?” The device that owns the name answers. This is why your Linux box named spock and usually be reached as spock.local on your LAN.

There are limits. mDNS is link-local; it is meant for the local LAN, not the whole Internet and shouldn’t route across subnets. Each device is supposed to publish its own name. That works fine when the device cooperates. But what about devices that do not publish mDNS? Or little embedded things that barely even have an IP address?

That is where I wanted the best of both worlds: keep a small authoritative /etc/hosts file on one Linux box, but publish selected entries onto the LAN using mDNS.

Continue reading “Linux Fu: The Local Phonebook”

Homelab Gets Linksys Themed Aesthetic

If you’re building a homelab rig, you could just use off-the-shelf hardware in standard cases and slap it all in a rack like the normies do. Or, you could follow the example of [Justin Garrison] and build a more oddball setup.

This particular homelab is, at its heart, built from familiar components. There are two Raspberry Pi 5s, two Raspberry Pi 4s, a GMKtec NucBox M6 Mini with an ASUS GeForce RT 2060 GPU, a LattePanda IOTA, an NVidia DGX Spark, and an HP Z4 G4 mini PC. These machines are all laced together with a TP-Link LS108GB PoE switch. [Justin] has the mini PC running the control plane components, with the rig as a whole running Talos and Kubernetes workloads. What makes this build particularly appealing, though, is the aesthetics of the rig. [Justin] documents how he hacked this hardware to fit into a bunch of old Linksys router cases, which provides a pleasant early 2000s look to the build. This included a bit of hackery to get status LEDs flickering as they should be. [Justin] also took the time to make the power buttons accessible.

If you want to stunt on your friends with a rad homelab, you either have to go for maximum power, or maximum style. This build would be the latter. Video after the break.

Continue reading “Homelab Gets Linksys Themed Aesthetic”