Video games are a great way to relax, and sometimes get your heart rate up at the same time. But unless you’re playing something like Dance Dance Revolution, the controls pretty much always require the use of both hands. Even the old Atari controller benefited from using the other hand for support.
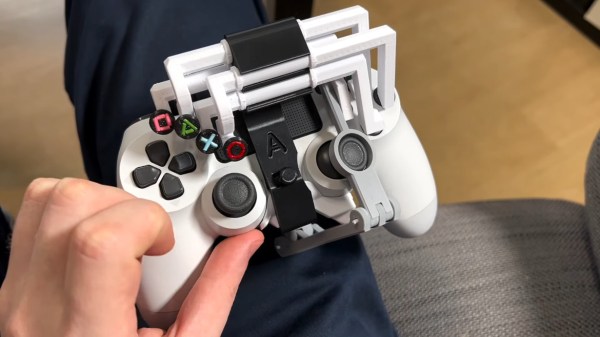
But what if you don’t have the use of both hands? Or you have a repetitive stress injury? Or you just want to eat cheese curls with chopsticks while you play? [Akaki Kuumeri] has you covered with one of the hands-down greatest uses for 3D printing we’ve seen — a PlayStation DualShock 4 controller modified for one-handed use. If this looks familiar, it may be because [Akaki] made a PS5 controller version a while back, but who can get one of those, anyway?
 Though [Akaki] does most of the demonstrating in the video below with their left hand, they were cool enough to make a right-handed version as well. In the left-handed version, the symbol buttons and right trigger are actuated with the left hand, and the right joystick is used by moving the whole controller against your leg, the table, the arm of the couch, or whatever you wish.
[Akaki] even designed some optional pieces, including a leg strap. The right-hand version of course does the D-pad instead. But what should the order of the arrow buttons be? After much contemplation, [Akaki] settled on the standard DDR configuration of ←↓↑→.
We love that the symbols are made from raw filament pressed into grooves, and think it’s totally awesome that this is made to be attached to the controller and removed with one hand. Check out the video below to see it in action with a handful of games.