Most of us use our hands to interface with computers, but the human body is capable of many types of input other than that of fingers and feet. But what about people who can’t use their extremities and don’t have a voice? For their sake, it’s time to get creative.
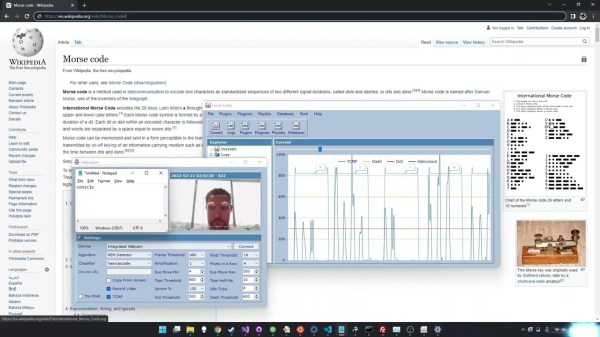
[Michael Paul Coder] has made a way to type simply by blinking in Morse code. Those of you with long memories may recall Lucid Scribe, where he was attempting to document lucid dreaming experiments by detecting rapid eye movements with an accelerometer and triggering his computer to play music. This would in turn notify [Michael] that he was in fact dreaming and was safe to tie a cape around his neck and take a flying leap from a tall building.
Whereas [Michael]’s creation needed a commercial EEG device before, he’s now made it work with just an old webcam thanks to the new trans-consciousness messaging protocol, which operates by using facial detection and then interpreting the amount of changed pixels between video frames. Be sure to check it out in action after the break.
You know how much we love assistive technology around here — just two years ago, the Byte took top honors in The Hackaday Prize.
Continue reading “Morse Keyboard Communicates With The Blink Of An Eye”