The R820T tuner IC is used in the popular Airspy software defined radio (SDR) as well as many of the inexpensive RTL SDR dongles. [TLeconte] did some experiments on intermediate frequency (IF) configuration of the chip, and you’ll find his results interesting.
Using 5 million samples per second and the device’s real mode, the tests look at a what comes out when the IC reads a noise source. There are two registers that set the IF parameters, but the tests show the effects these registers have in precise terms.
In July 1940 the German airforce began bombing Britain. This was met with polite disagreement on the British side — and with high technology, ingenuity, and improvisation. The defeat of the Germans is associated with anti-aircraft guns and fighter planes, but a significant amount of potential damage had been averted by the use of radio.
Night bombing was a relatively new idea at that time and everybody agreed that it was hard. Navigating a plane in the dark while travelling at two hundred miles per hour and possibly being shot at just wasn’t effective with traditional means. So the Germans invented non-traditional means. This was the start of a technological competition where each side worked to implement new and novel radio technology to guide bombing runs, and to disrupt those guidance systems.
We’ve become used to software-defined radio as the future of radio experimentation, and many of us will have some form of SDR hardware. From the $10 RTL USB sticks through to all-singing, all-dancing models at eye-watering prices, there is an SDR for everyone.
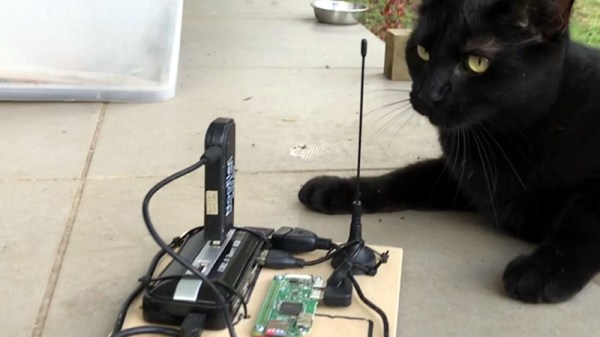
What about the idea of an SDR without any external hardware? Instead of plugging something into your Raspberry Pi, how about using the Pi itself, unmodified? That’s just what the Nexmon SDR project has achieved, and this has been made possible through clever use of the on-board Broadcom 802.11ac WiFi chip. The result is a TX-capable SDR, albeit one only capable of operating within the 2.4 GHz and 5 GHz spectrum used by WiFi.
The team had previously worked extensively with the chipset in the Nexus 5 phone, and the SDR extension was first available on that platform. Then along came the Raspberry Pi 3 B+ with a similar-enough WiFi chipset that the same hack was portable to that platform, et voilá: WiFi SDR on a Pi 3 B+.
If you’ve not looked at the Pi 3 B+ we’d like to direct you to our review. If you don’t have a Nexus 5 kicking around, and you’d like to do some WiFi-band SDR work, it’s looking like an amazing deal.
There are a multiplicity of transmission modes both new and old at the disposal of a radio amateur, but the leader of the pack is still single-sideband or SSB. An SSB transmitter emits the barest minimum of RF spectrum required to reconstitute an audio signal, only half of the mixer product between the audio and the RF carrier, and with the carrier removed. This makes SSB the most efficient of the analog voice modes, but at the expense of a complex piece of circuitry to generate it by analog means. Nevertheless, radio amateurs have produced some elegant designs for SSB transmitters, and this one for the 80m band from [VK3AJG] is a rather nice example even if it isn’t up-to-the-minute. What makes it rather special is that it relies on only one type of device, every one of its transistors is a BC547.
In design terms, it follows the lead set by other simple amateur transmitters, in that it has a 6 MHz crystal filter with a mixer at either end of it that switch roles on transmit or receive. It doesn’t use the bidirectional amplifiers popularised by VU2ESE’s Bitx design, instead, it selects transmit or receive using a set of diode switches. The power amplifier stretches the single-device ethos to the limit, by having multiple BC547s in parallel to deliver about half a watt.
While this transmitter specifies BC547s, it’s fair to say that many other devices could be substituted for this rather aged one. Radio amateurs have a tendency to stick with what they know and cling to obsolete devices, but within the appropriate specs a given bipolar transistor is very similar to any other bipolar transistor. Whatever device you use though, this design is simple enough that you don’t need to be a genius to build one.
At this point it’s pretty well-known that you can tack a long wire to the Raspberry Pi’s GPIO, install some software, and you’ve got yourself the worlds easiest pirate FM radio station. We say that it’s a “pirate” station because, despite being ridiculously easy to do, broadcasting on these frequencies without a license is illegal. Even if you had a license, the Raspberry Pi with a dangling bit of wire will be spewing out all kinds of unintentional noise, making it a no-go for any legitimate purposes.
In an effort to address that issue, [Naich] has written up a couple posts on his blog which not only discuss why the Pi is such a poor transmitter, but shows how you can build a filter to help improve the situation. You’ll still be a lawless pirate if you’re transmitting on FM stations with your Pi, but you won’t be a filthy lawless pirate.
In the first post, [Naich] shows us exactly what’s coming out of the wire antenna when the Pi is broadcasting some tunes on the default 107.3 MHz, and it ain’t pretty. The Pi is blasting out signals up and down the spectrum from 50 MHz to 800 MHz, and incredibly, these harmonics are in some cases stronger than the intentional broadcast. Definitely not an ideal transmitter.
[Naich] then goes on to show how you can build a DIY filter “hat” for the Pi that not only cuts down a lot of the undesirable chatter, but even boosts the intended signal a bit. The design is surprisingly simple, only costs a few bucks in components, and conveniently is powered directly from the Pi’s GPIO. It even gives you a proper antenna jack instead of a bare wire wound around a header pin.
LoRa and LPWANs (Low Power Wide Area Networks) are all the range (tee-hee!) in wireless these days. LoRa is a sub 1-GHz wireless technology using sophisticated signal processing and modulation techniques to achieve long-range communications.
With that simplified introduction, [Omkar Joglekar] designed his own LoRa node used for outdoor sensor monitoring based on the HopeRF RFM95 LoRa module. It’s housed in an IP68 weatherproof enclosure and features an antenna that was built from scratch using repurposed copper rods. He wrote up the complete build, materials, and description which makes it possible for others to try their hand at putting together their own complete LoRa node for outdoor monitoring applications.
For a hobby that’s ostensibly all about reaching out to touch someone, ham radio can often be a lonely activity. Lots of hams build and experiment with radio gear much more than they’re actually on the air, improving their equipment iteratively. The build-test-tweak-repeat cycle can get a little tedious, though, especially when you’re trying to assess signal strength and range and can’t find anyone to give you a report.
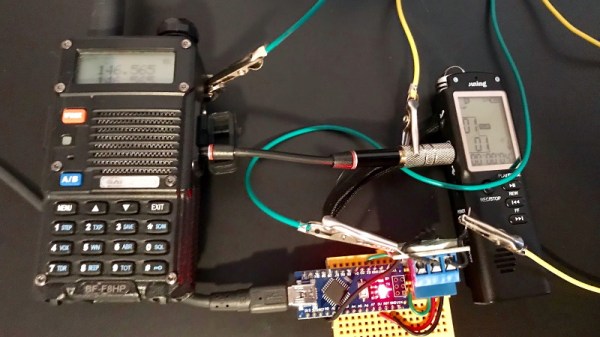
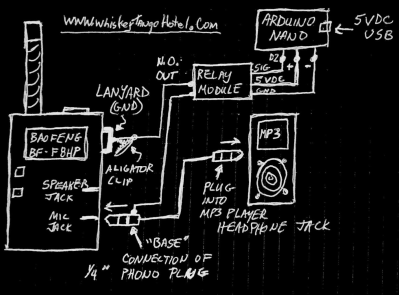
To close the loop on field testing, [WhiskeyTangoHotel] threw together a simple ham radio field confirmation unit that’s pretty slick. It relies on the fact that almost every ham radio designed for field use incorporates a DTMF encoder in the microphone or in the transceiver itself. Hams have used Touch Tones for in-band signaling control of their repeaters for decades, and even as newer digital control methods have been introduced, good old analog DTMF hangs in there. The device consists of a DTMF decoder attached to the headphone jack of a cheap handy talkie. When a DTMF tone is received, a NodeMCU connected to the decoder calls an IFTTT job to echo the key to [WTH]’s phone as an SMS message. That makes it easy to drive around and test whether his mobile rig is getting out. And since the receiver side is so portable, there’s a lot of flexibility in how tests can be arranged.
On the fence about ham as a hobby? We don’t blame you. But fun projects like this are the perfect excuse to go get licensed and start experimenting.