Linger Keeps You Around After You’ve Gone

We’re not sure if this is art, anti-snooping guerilla warfare, or just a cheeky hack, but we do know that we like it! [Jasper van Loenen]’s Linger keeps the SSIDs that your cell phone (for example) spits out whenever it’s not connected to a WiFi network, and replays them after you’re gone.

Some retail stores and other shady characters use MAC addresses and/or the unique collection of SSIDs that your phone submits in probe requests to fingerprint you and track your movement, either through their particular store or across stores that share a tracking provider. Did you know that you were buying into this when you enabled “location services”? Did the tracking firms ask you if that was ok? Of course not. What are you going to do about it?

Linger replays the probe requests of people who have already moved on, making it appear to these systems as if nobody ever leaves. Under the hood, it’s a Raspberry Pi Zero, two WiFi dongles, and some simple Python software that stores probe requests in a database. There’s also a seven-segment display to indicate how many different probe-request profiles Linger has seen. We’re not sure the price point on this device is quite down to “throwie” level, but we’d love to see some of these installed in the local mall.  Continue reading “Linger Keeps You Around After You’ve Gone”

Get Up Close To Your Soldering With A Pi Zero Microscope

Do your Mark 1 Eyeballs no longer hold their own when it comes to fine work close up? Soldering can be a literal pain under such conditions, and even for the Elf-eyed among us, dealing with pads at a 0.4-mm pitch is probably best tackled with a little optical assistance. When the times comes for a little help, consider building a soldering microscope from a Pi Zero and a few bits and bobs from around the shop.

Affordable commercial soldering scopes aren’t terribly hard to come by, but [magkopian] decided to roll his own by taking advantage of the streaming capabilities of the Raspberry Pi platform, not to mention its affordability. This is a really simple hack — nothing is 3D-printed or custom milled. The stage base is a simple aluminum project box for heat resistance and extra weight, and the arm is a cheap plastic dial caliper. The PiCam is mounted to the sliding jaw of the caliper on a scrap of plastic ruler. The lens assembly of the camera needs to be hacked a little to change the focal length to work within 10 centimeters or so; alternatively, you could splurge and get a camera module with an adjustable lens. The Pi is set up for streaming, and your work area is presented in glorious, lag-free HDMI video.

Is [magkopian]’s scope going to give you the depth perception of a stereo microscope? Of course not. But for most jobs, it’ll probably be enough, and the fact that it can be built on the cheap makes it a great hack in our book.

Continue reading “Get Up Close To Your Soldering With A Pi Zero Microscope”

This Hacker Fit An Entire RetroPie In An Altoids Tin

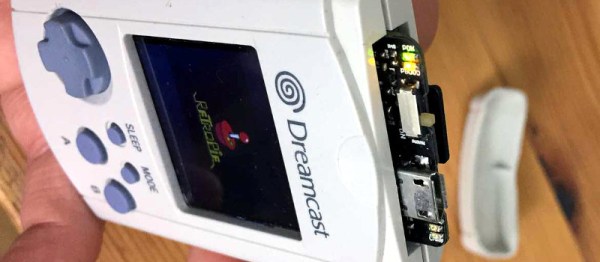
A few months ago, [wermy] built the mintyPi, a Raspberry Pi-based gaming console that fits inside an Altoids tin. It’s amazing — there’s a composite LCD, an audio DAC, and a chopped up Nintendo controller all connected to a Raspberry Pi for vintage gaming goodness on the road. Now, there’s a new mintyPi. The mintyPi 2.0 vastly improves over the earlier generation of this groundbreaking mint-based gaming console with a better screen, better buttons, customized 3D printed bezels, and better audio. Truly, we live in a Golden Age.

Version two of mintyPi uses 3D printed parts and includes a real hinge to keep the display propped up when the Altoids tin is open. Instead of a DAC-based audio solution, [wermy] is using a USB sound card for clearer, crisper sound. This version also uses the new, wireless version of the Raspberry Pi Zero. The Raspberry Pi Zero W allows this Altoids tin to connect to the Internet or, alternatively, gives the user the ability to dump ROMs on this thing without having to connect it to a computer.

For the software, this retro Altoids video game machine is running RetroPie, a very popular way to get retro video games running under low-power Linux machines. Everything is in there, from the NES to Amstrad to the Sega Master system.

Right now, there aren’t a whole lot of details on how [wermy] created the mintyPi 2.0, but he promises a guide soon. Until then, we’ll just have to drool over the video embedded below.

Continue reading “This Hacker Fit An Entire RetroPie In An Altoids Tin”

The Raspberry Pi As An IR To WiFi Bridge

[Jason] has a Sonos home sound system, with a bunch of speakers connected via WiFi. [Jason] also has a universal remote designed and manufactured in a universe where WiFi doesn’t exist. The Sonos can not be controlled via infrared. There’s an obvious problem here, but luckily tiny Linux computers with WiFi cost $10, and IR receivers cost $2. The result is an IR to WiFi bridge to control all those ‘smart’ home audio solutions.

The only thing [Jason] needed to control his Sonos from a universal remote is an IR receiver and a Raspberry Pi Zero W. The circuit is simple – just connect the power and ground of the IR receiver to the Pi, and plug the third pin of the receiver into a GPIO pin. The new, fancy official Raspberry Pi Zero enclosure is perfect for this build, allowing a little IR-transparent piece of epoxy poking out of a hole designed for the Pi camera.

For the software, [Jason] turned to Node JS, and LIRC, a piece of software that decodes IR signals. With the GPIO pin defined, [Jason] set up the driver and used the Sonos HTTP API to send commands to his audio unit. There’s a lot of futzing about with text files for this build, but the results speak for themselves: [Jason] can now use a universal remote with everything in his home stereo now.

Ultrasonic Raspberry Pi Piano

Cheap stuff gets our creative juices flowing. Case in point? [Andy Grove] built an eight-sensor HC-SR04 breakout board, because the ultrasonic distance sensors in question are so affordable that a hacker can hardly avoid ordering them by the dozen. He originally built it for robotics, but then it’s just a few lines of code to turn it into a gesture-controllable musical instrument. Check out the video, embedded below, for an overview of the features.

His Octasonic breakout board is just an AVR in disguise — it reads from eight ultrasonic sensors and delivers a single SPI result to whatever other controller is serving as the brains. In the “piano” demo, that’s a Raspberry Pi, so he needed the usual 5 V to 3.3 V level shifting in between.

The rest is code on the Pi that enables gestures to play notes, change musical instruments, and even shut the Pi down. The Pi code is written in Rust, and up on GitHub. An Instructable has more detail on the hookups.

All in all, building a “piano” out of robot parts is surely a case of having a hammer and every problem looking like a nail, but we find some of the resulting nail-sculptures arise that way. This isn’t the first time we’ve seen an eight-sensor ultrasonic setup before, either. Is 2017 going to be the year of ultrasonic sensor projects? Continue reading “Ultrasonic Raspberry Pi Piano”

Budget Astrophotography With A Raspberry Pi

New to astrophotography, [Jason Bowling] had heard that the Raspberry Pi’s camera module could be used as a low-cost entry into the hobby. Having a Raspberry Pi B+ and camera module on hand from an old project, he dove right in, detailing the process for any other newcomers.

Gingerly removing the camera’s lens, the module fit snugly into a 3D printed case — courtesy of a friend — and connected it to a separate case for the Pi. [Bowling] then mounted he camera directly on the telescope — a technique known as prime-focus photography, which treats the telescope like an oversized camera lens. A USB battery pack is perfect for powering the Pi for several hours.

When away from home, [Bowling] has set up his Pi to act as a wireless access point; this allows the Pi to send a preview to his phone or tablet to make adjustments before taking a picture. [Bowling] admits that the camera is not ideal, so a little post-processing is necessary to flesh out a quality picture, but you work with what you have.
Continue reading “Budget Astrophotography With A Raspberry Pi”

Discontinued Nintendo Consoles And Raspberry Pis

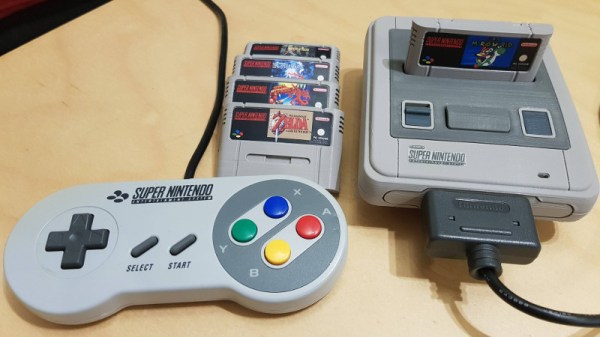
Nintendo has discontinued a Classic gaming console. It’s a pity, yes, but with the release of Nintendo’s new gaming console, they probably have bigger fish to fry. That doesn’t mean these discontinued Nintendo consoles will die a slow, miserable death locked away in a closet; at least one of them will live on with the heart of a Raspberry Pi.

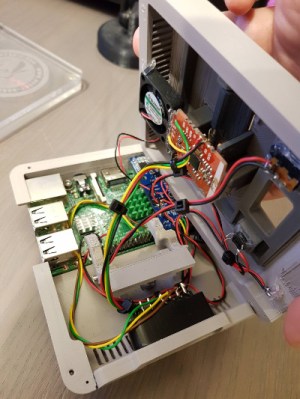
This is a project [Liam] has been working on since 2012, just after he got the first edition of the Raspberry Pi. While some people were figuring out how to stuff the Pi inside a Nintendo Entertainment System or a Super Nintendo Entertainment System, [Liam] decided to embed the Pi inside a console of a more recent vintage: the Nintendo GameCube.

The first phase of this project was simply to get the Pi running inside the enclosure of the non-working GameCube he picked up. The power supply in this console was well designed, and after a quick perusal through some online documentation, [Liam] found a stable 5V with enough amps to power the Pi. After ripping out the internals of this console with the help of a quickly hacked together ‘Nintendo screwdriver’, [Liam] had a perfectly functional Pi enclosed in a Nintendo chassis.

Time marches on, and after a while, the Raspberry Pi 2 was released. By this time, retro emulation was hitting the big time, and [Liam] decided it was time for an upgrade. He disassembled this Nintendo console again, routed new wires and inputs to the original controller ports, and used a Dremel to route a few holes for the HDMI and SD card slot.

With the addition of a few SNES-inspired USB controllers, RetroPi, and a few ROMs, [Liam] has a wonderful console full of classic emulation goodness, packaged in an enclosure Nintendo isn’t making any more.