HiFi Audio On The Commodore 64 – 48KHz, Yo!

Prior to the development of CD-quality audio hardware in the mid-1990s, home computers and consoles typically made do with synthesized music. Due to the storage and RAM limitations of the time, there weren’t a whole lot of other practical options. If you’re willing to ignore practicality, however, you can do some wonderful things – such as playing high-quality audio on a Commodore 64!

The project is the work of [Antonio Savona], who set out to play hi-fi audio on a Commodore 64 using only period-correct hardware. That means no 16MB RAM expansions, and no crazy high-capacity carts. The largest carts of the era were just 1MB, as produced by Ocean, and [Antonio] intended to cram in a full 90 seconds of music.

Targeting a sample rate of 48 KHz with 8-bit samples would mean the cartridge could only fit 20 seconds of raw audio into its 1MB of storage. This wasn’t good enough, so the audio would have to be compressed, with the target being a 4:1 ratio to reach the 90 second goal. With the C64’s CPU running at just 1MHz, there are just 21 clock cycles to deal with each sample when playing at 48 KHz.

Obviously, [Antonio] had set quite the challenge, and some masterful assembly coding was used to get the job done. The final result has the audio sounding impressively good, given that it’s being pumped out by a 6502 that is surely sweating to get the job done.

We love a good C64 hack around these parts, and it’s now even possible to build a new one from scratch if that’s your particular itch. Video after the break.

Continue reading “HiFi Audio On The Commodore 64 – 48KHz, Yo!” →

Vintage Mini Inkjet Prints On-Demand ASCII Art

Readers of a certain age may fondly remember ASCII art emerging from line printers in a long-gone era of computing; for others, it’s just wonderfully retro. Well, when [Emily Velasco] found a vintage Kodak Diconix 150 inkjet at a local thrift store for $4, she knew what she had to do: turn it into a dedicated ASCII-art machine.

Dating to the mid-1980s, the diminutive printer she scored was an early example of consumer inkjet technology; with only 12 “jets,” it sported a resolution roughly equivalent to the dot-matrix impact printers of the day. [Emily] notes that this printer would have cost around $1000 in today’s money — this is from a time before printer companies started selling the printer itself as a loss leader to make revenue on the back end selling consumables. It seems you can’t escape the razor-and-blades model, though: [Emily] had to pay $16 for a new ink cartridge to revive the $4 printer.

With the new ink in place, and some tractor-feed paper acquired, [Emily] started work on the art generator. The concept is something that might have been sold on late-night TV ads: a “cartridge” you plug into your printer to make ASCII masterpieces. Starting with a stripped-down Centronics printer cable that matches the printer’s port, she added an Arduino nano to store and serve up the art. The user interface is foolproof: a single button press causes a random selection from one of ten ASCII images to be printed. The whole thing is ensconced within a slick 3D printed case.

One of the coolest aspects of this project is the lack of power supply. When she first hooked the Arduino to the printer’s parallel port, [Emily] noticed that it powered right up with no external supply, and in true hacker fashion, just ran with it. Upon reflection, it seems that power is being supplied by the printer status lines, Busy and/or Ack, through the input protection diodes of the Atmega328 on the nano.

We really like this project, and are more than a little bummed we tossed those old printers that were kicking around the Hackaday labs for years. If you still have yours, and would like turn out some rad ASCII art, the code for this project is up on GitHub.

We’re no strangers to [Emily]’s work, but if you aren’t familiar with it, check out her inspiring talk from the 2019 Hackaday Superconference. Meanwhile, don’t miss the excellent video about the ASCII art printer cartridge, after the break.

Continue reading “Vintage Mini Inkjet Prints On-Demand ASCII Art” →

BeOS: The Alternate Universe’s Mac OS X

You’re likely familiar with the old tale about how Steve Jobs was ousted from Apple and started his own company, NeXT. Apple then bought NeXT and their technologies and brought Jobs back as CEO once again. However, Jobs’ path wasn’t unique, and the history of computing since then could’ve gone a whole lot different.

In 1990, Jean-Louis Gassée, who replaced Jobs in Apple as the head of Macintosh development, was also fired from the company. He then also formed his own computer company with the help of another ex-Apple employee, Steve Sakoman. They called it Be Inc, and their goal was to create a more modern operating system from scratch based on the object-oriented design of C++, using proprietary hardware that could allow for greater media capabilities unseen in personal computers at the time.

Continue reading “BeOS: The Alternate Universe’s Mac OS X” →

Altair 8800 Again Project

[Dirk] posted a video (you can see below) titled, “Mystery Retro Project Start.” That turned out to be the first of a multipart series on his Altair 8800 Again simulator. The front panel appears to be laser cut and in some future video episodes, we expect to see him simulate the CPU with a Teensy.

There have been plenty of 8800 clones ranging from projects that recreate the original PCBs, to those that just run a Raspberry Pi inside. The middle ground will use an Arduino or some other small CPU to simulate the 8080 CPU.

Continue reading “Altair 8800 Again Project” →

Prolific Videos Show Altair 8800 Recreation

The January 1975 issue of Popular Electronics introduced the Altair 8800 and hit the newsstands in December of 1974, so it is only natural that around the New Year people start thinking about the old computer. [Shadowtron] did more than think about it. He ordered some replica PCBs and is building a new one. Even better, he’s posted an amazing number of videos (up to number 56 as I write this) detailing his progress. You can find part 1, below.

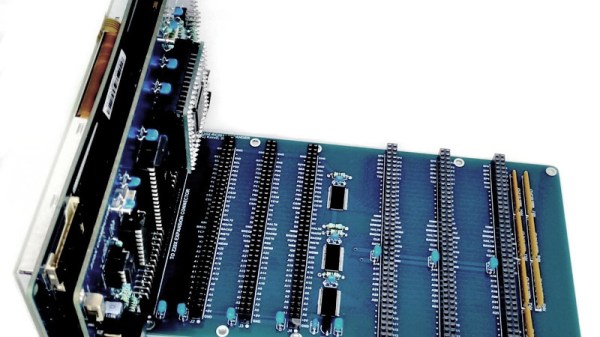
The boards are from Trailing Edge Technology. There’s a backplane board (about $100) as well as a few boards to fit it available for about $30 each — unpopulated, of course.

Continue reading “Prolific Videos Show Altair 8800 Recreation” →

Peek Inside These Same-But-Different Power Supplies

When [Kerry Wong] found an Amrel PPS 35-2 Programmable Power Supply from the late 90s on eBay, he recognized it as the single-channel version of another unit he owned, the dual-channel Amrel PPS-2322. Naturally, he purchased it and did a compare and contrast of the two models.

From the outside, they look fairly different but weigh about the same. But the similarities on the inside make it quite clear that they share a common design. There are a few things that grab your eye and the 35-2 doesn’t seem quite as well thought out, with some components being soldered into awkward-looking places. Capacitors bristle like barnacles where they are soldered directly to a connector, and a blob of hot glue anchors two resistors that rise up out of the board like a couple of weeds.

The link above shows some high resolution side-by-side photos between the two models, and [Kerry] thoughtfully provides a link to the manual for the PPS series as well as a dump of the firmware (.zip) for the 35-2. A teardown video is embedded below.

Benchtop power supplies are important tools, but we’ve also seen how modern breadboard power supplies are remarkably full-featured.

Continue reading “Peek Inside These Same-But-Different Power Supplies” →

Commodore Tape Drive Emulator On A Raspberry Pi

We imagine most of the people reading Hackaday have an old Raspberry Pi or two laying around. It’s somewhat less likely you’ve still got an 8-bit Commodore in working condition, but we’d wager there’s more than a few in the audience that can count themselves among both groups. So why not introduce them?

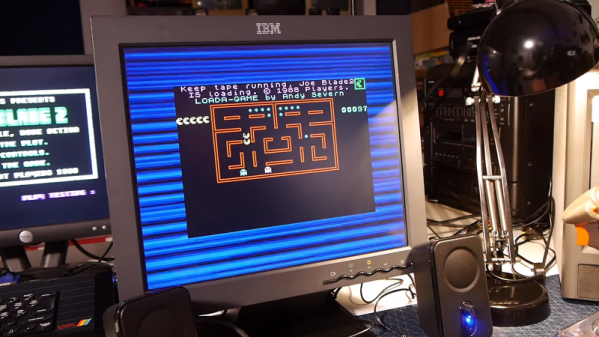
[RhinoDevel] writes in to tell us about CBM Tape Pi , an open source Commodore tape drive emulator for Raspberry Pi that needs only a handful of passive components to get wired up. Even better, the project targets the older Pis that are more likely to be languishing around in the parts bin. In the video after the break, a Commodore PET can be seen happily loading content from the original Raspberry Pi with its quaint little composite video connector.

Without any special software on the Commodore itself, the project allows the user to load and save PRGs on the Pi’s SD card, as well as traverse directories. Don’t expect stellar I/O, as [RhinoDevel] notes that no fast loader is currently implemented. Of course if you’re enough of a devotee to still be poking around a VIC-20 or C64 this far into 21st century, then we imagine you’ve got enough patience to get by.

Continue reading “Commodore Tape Drive Emulator On A Raspberry Pi” →