[carykh] has a really interesting video series which can give a beginner or a pro a great insight into how neural networks operate and at the same time how evolution works. You may remember his work creating a Bach audio producing neural network, and this series again shows his talent at explaining the complex topic so anyone may understand.
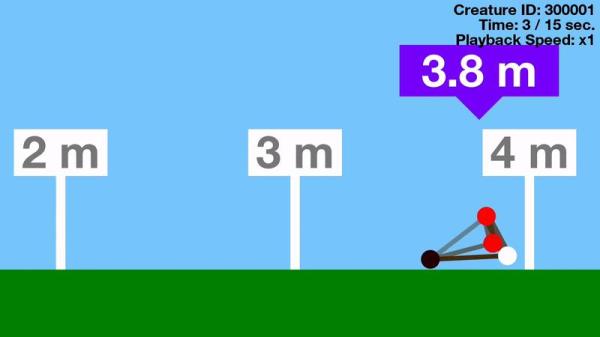
He starts with 1000 “creatures”. Each has an internal clock which acts a bit like a heart beat however does not change speed throughout the creature’s life. Creatures also have nodes which cause friction with the ground but don’t collide with each other. Connecting the nodes are muscles which can stretch or contract and have different strengths.
At the beginning of the simulation the creatures are randomly generated along with their random traits. Some have longer/shorter muscles, while node and muscle positions are also randomly selected. Once this is set up they have one job: move from left to right as far as possible in 15 seconds.
Each creature has a chance to perform and 500 are then selected to evolve based on how far they managed to travel to the right of the starting position. The better the creature performs the higher the probability it will survive, although some of the high performing creatures randomly die and some lower performers randomly survive. The 500 surviving creatures reproduce asexually creating another 500 to replace the population that were killed off.
The simulation is run again and again until one or two types of species start to dominate. When this happens evolution slows down as the gene pool begins to get very similar. Occasionally a breakthrough will occur either creating a new species or improving the current best species leading to a bit of a competition for the top spot.
We think the series of four short YouTube videos (all around 5 mins each) that kick off the series demonstrate neural networks in a very visual way and make it really easy to understand. Whether you don’t know much about neural networks or you do and want to see something really cool, these are worthy of your time.
Continue reading “Learn Neural Network And Evolution Theory Fast”

![This Herald is in much better condition than my 12/50 was. Philafrenzy [CC BY-SA 4.0]](https://hackaday.com/wp-content/uploads/2017/03/triumph_herald_southgate_london.jpg)