Hackaday Prize Entry: Diagnosing Concussions

Athletes of every age receive a lot of blows to the head. After a few years of this and a lot of concussions, symptoms similar to Alzheimer’s can appear. For his Hackaday Prize entry, [Mihir] wanted to build a simple device that could be given to high school coaches that would diagnose concussions. He came up with HeadsUp, a device so simple even a high school gym teacher could use it.

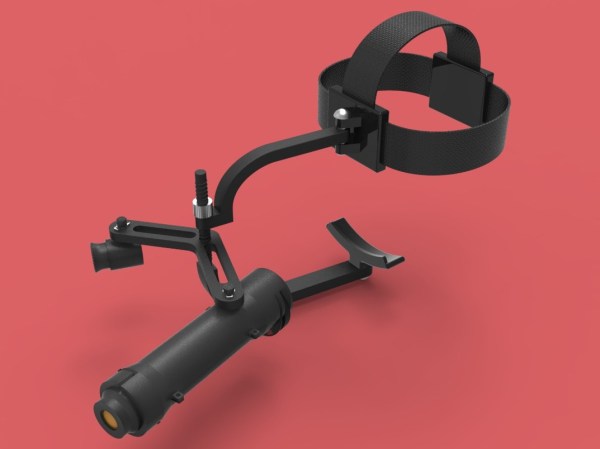
The origins of HeadsUp began as an augmented reality device, but after realizing that was a difficult project, pivoted to something a bit easier and even more useful. HeadsUp tracks the wearer’s eye movements with a webcam while a series of LEDs strobe back and forth in front of the wearer’s eyes. This is the fastest and easiest way to test for a concussion, and making this automated means it’s the perfect device to throw in a gym bag.

Hackaday Prize Entry: Helping Millions See Clearly

Slit lamps are prohibitively expensive in the third world areas of India where they are most needed. An invention that’s been around for over a hundred years, the slit lamp is a simple-in-concept way to see and diagnose a large array of ocular issues.

Since they are relatively old by technological standards, the principles behind them have become more and more understood as time has gone on. While a nice lab version with a corneal microscope is certainly better, innovations in manufacturing have brought the theoretical minimum cost of the device way down, or at least that’s what [Kewal Chand Swami] hopes.

His design aims for portability and cost reduction. It must be able to travel to remote locations and it must be significantly cheaper than the lab versions. It uses off-the-shelf lenses in a 3D printed housing with a simple LED torch, the kind you can buy for a dollar at the check-out stand.

The assembly slides onto the user’s head and is held there with straps. The doctor can adjust where the slit the lamp shines and also look through a microscope to diagnose the issue. Hopefully devices like this will see similar community support to the prosthetic projects we’ve covered.

Hackaday Prize Entry: Low Cost, DIY Thermal Imaging

A few years ago, thermal imaging sensors – cameras that could see heat – became very cheap. FLIR was going all-in with their Lepton module, and there were a number of clip-on cellphone accessories that gave the computer in your pocket the ability to see infrared.

Fast forward a few years, and you can still buy a thermal imaging sensor for your cellphone, and it still costs about the same as it did in 2013. For his Hackaday Prize project, [Josh] is building a more modern lower cost thermal imaging camera. It won’t have the resolution of the fancy $1000 FLIR unit, but it will be very inexpensive with a BOM cost of about $50.

[Josh] is building his low-cost thermal camera around Panasonic’s Grid-EYE module. This thermopile array contains 64 individual infrared sensors, giving this ‘camera’ a resolution of 8×8 pixels. That’s nothing compared to the thousands of pixels found in devices using the FLIR Lepton, but the Grid-EYE is very cheap.

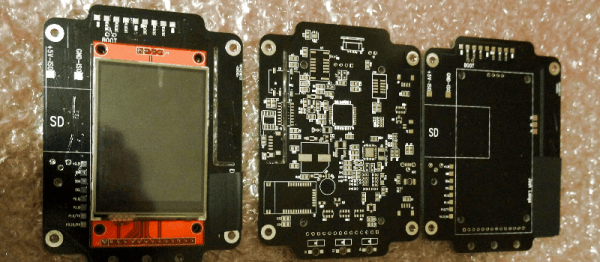
Right now, [Josh]’s build is using an ARM Cortex M0+ and a cheap touch screen LCD he picked up from AliExpress. There’s an optional component to this build in the form of a visible light camera, giving [Josh] the ability to overlay thermal sensor data over a visible light image, just like the fancier, more expensive units.

With a total BOM cost of $44.50, [Josh]’s build is easy on the pocketbook, but still good enough to get some useful information. It’s a great build, and a great entry for The Hackaday Prize.

Hackaday Prize Entry: Smart USB Hub And IoT Power Meter

[Aleksejs Mirnijs] needed a tool to accurately measure the power consumption of his Raspberry Pi and Arduino projects, which is an important parameter for dimensioning adequate power supplies and battery packs. Since most SBC projects require a USB hub anyway, he designed a smart, WiFi-enabled 4-port USB hub that is also a power meter – his entry for this year’s Hackaday Prize.

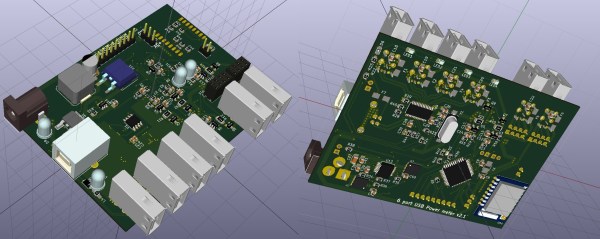
[Aleksejs’s] design is based on the FE1.1s 4-port USB 2.0 hub controller, with two additional ports for charging. Each port features an LT6106 current sensor and a power MOSFET to individually switch devices on and off as required. An Atmega32L monitors the bus voltage and current draw, switches the ports and talks to an ESP8266 module for WiFi connectivity. The supercharged hub also features a display, which lets you read the measured current and power consumption at a glance.

Unlike most cheap hubs out there, [Aleksejs’s] hub has a properly designed power path. If an external power supply is present, an onboard buck converter actively regulates the bus voltage while a power path controller safely disconnects the host’s power line. Although the first prototype is are already up and running, this project is still under heavy development. We’re curious to see the announced updates, which include a 2.2″ touchscreen and a 3D-printable enclosure.

Home Automation Is Hung Up On Software

Home automation is a favorite in sci-fi, from Tony Stark’s Jarvis, to Rosie the robotic maid on the Jetsons, and even the sliding doors pulled by a stagehand Star Trek. In fact, most people have a favorite technology that should be just about ready to make an appearance in their own home. So where are these things? We asked you a few weeks ago and the overwhelming answer was that the software just isn’t there yet.

We’re toddling through the smart home years, having been able to buy Internet-connected garage doors and thermostats for some time now. But for the most part all of these systems are islands under one roof. Automation is the topic of the current challenge for the 2016 Hackaday Prize. Developing the glue that can hold all of these pieces together would make a great entry. Why doesn’t that glue yet exist?

I think the problem is really twofold. On the one hand, there isn’t a clear way to make many devices work under one software. Second, there really isn’t an obvious example of great user experience when it comes to home automation. Let’s look at why and talk about what will eventually get us there.

Continue reading “Home Automation Is Hung Up On Software”

Hackaday Prize Entry: A Visible Spectrophotometer

Spectroscopy is one of the most useful tools in all of science, and for The Hackaday Prize’s Citizen Science effort [esben] is putting spectroscopy in the hands of every high school student. He’s built a super cheap, but very good spectrophotometer.

The idea of a spectrophotometer is simple enough – shine light through a sample, send that light through a diffraction grating, focus it, and shine the light onto a CCD. Implementing this simple system is all about the details, but with the right low-cost lenses and a 3D printed enclosure, [esben] has this more or less put together.

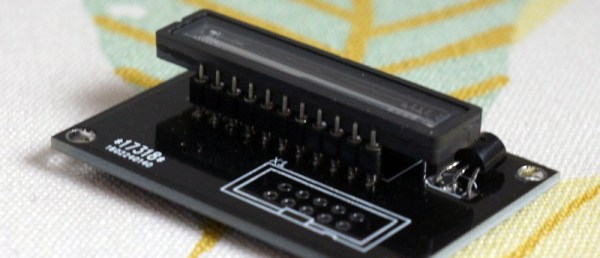
Of course, lenses and diffraction gratings are relatively simple. You need real data, and for this we can turn to another one of [esben]’s projects in the Hackaday Prize. It’s a breakout board for a linear CCD module, able to capture the spectrum coming off a sample with incredible precision. This is how real spectrophotometers are put together, but because of the difficulties in driving a CCD, not many people have put one of these together.

Both of these projects are finalists for in the Citizen Science portion of The Hackaday Prize. That’s an awesome result for what is a complete system for learning about spectroscopy with a device that’s also able to produce some high-quality data, too.

Hackaday Prize Entry: A Linear CCD Breakout

Linear CCDs are an exceptionally cool component. They can be used for DIY spectrometers, and if you’re feeling very adventurous, a homemade version of those crappy handheld scanners of the early 90s. Linear CCDs don’t see much use around these parts, though, which makes [esben]’s Hackaday Prize entry very cool. He’s building a breakout to make using these linear CCDs easier.

A linear CCD module looks like an overgrown DIP chip with a glass window right on top of a few thousand pixels laid out in a straight line. The data from these pixels isn’t output as a series of ones and zeros, though: its old school, and the data this CCD produces is analog. This means reading light from one of these modules requires a fast microcontroller with a good ADC.

For this project, [esben] is using a Nucleo F401RE, a development board built around an STM32F4 microcontroller. This processor is fast enough to read the data off its 12 bit ADC, and store all three thousand pixels. Now the problem is getting this data off the microcontroller and onto some storage. With a UART limited to 230kB/s, each ‘frame’ of the CCD takes 300ms to transfer to a computer. [esben] really wishes that could be done a little faster, so he’s trying to hack the DMA controller to do his bidding. It looks like [esben] is on track to make a fast interface for a very common linear CCD, which means more cool tools and toys for all of us.