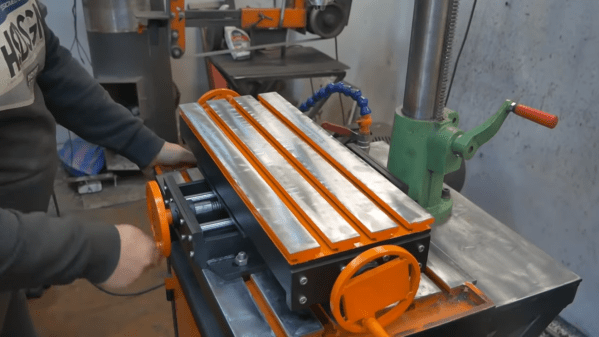
Unless you have one large pile of cash to burn through, properly equipping a workshop can take years of burning through little piles of cash. Whether to save a bit of cash or simply for the challenge, [Workshop from Scratch] is doing exactly what his channel name suggests, and his latest project is a XY table. (Video, embedded below.)
A XY table, or cross table, allows a workpiece to be translated in two dimensions, usually on a drill press or milling machine. On a drill press they make repetitive task like drilling a series of holes simpler and quicker. [Workshop from Scratch] built most of the frame with steel flat bar, and the moving parts run on ground steel rods with linear bearings. Lead screws with hand wheels are used to translate the table.
A machine like this requires the opposing plates of each table to be perfectly aligned, which [Workshop from Scratch] achieved by spot welding the matching plates together and drilling them in one operation. He also added T-slot top surface, created by welding wide flat bar on top of narrower flat bar.
With the lack of dials, it doesn’t look like it’s meant for precision work, but we would still be interested to know how repeatable the lead screw positioning is. Regardless, it’s still a useful addition to the shop.
[Workshop from Scratch] is building a rather impressive collection of DIY tools, including a magnetic vise (that he already used with the XY table), magnetic drill press and a hydraulic lift table. We look forward to seeing what’s next on the list. Continue reading “Scratch-Built XY Table Gets The Job Done”
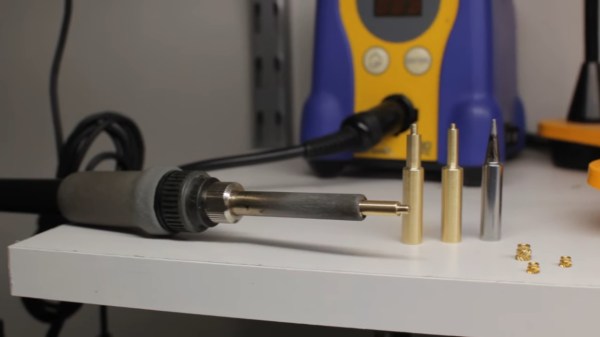
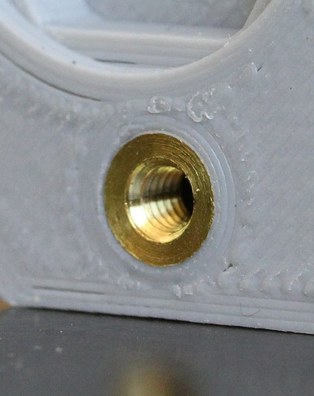 Like many of us, [Sean] has embraced the use of heat-set threaded inserts to beef up the mechanical connections on his 3D-printed parts. [Sean] dedicated a soldering iron to the task, equipping it with a tip especially for the job. But it was the flavor of iron proverbially known as a “fire stick” and he found that this iron was too hot for PLA prints. As the new owner of a lathe, he was able to make quick work of the job using a piece of brass rod stock. Luckily, Hakko tips just slip on the heating element, so no threading operations were needed. [Sean] made insert tips for multiple sized inserts, and the results speak for themselves.
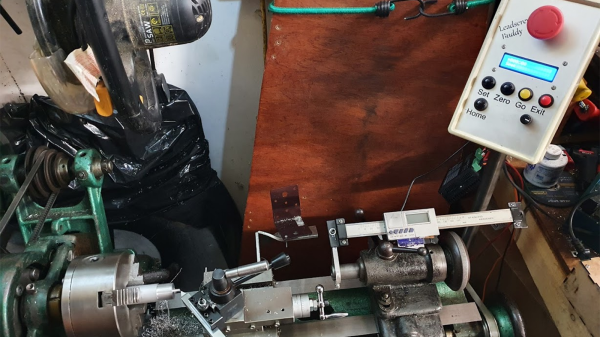
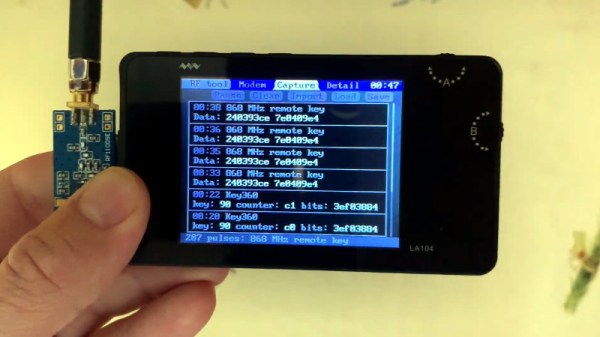
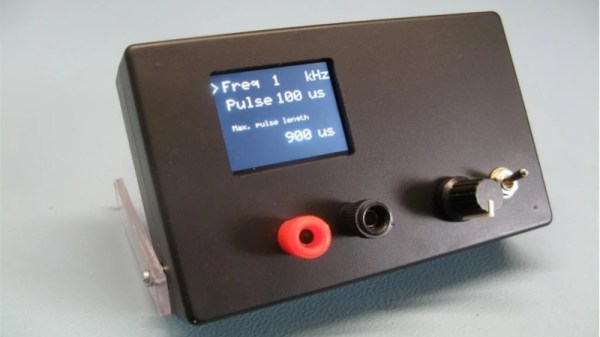
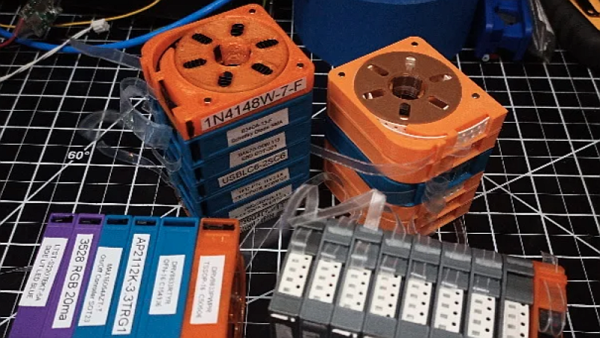
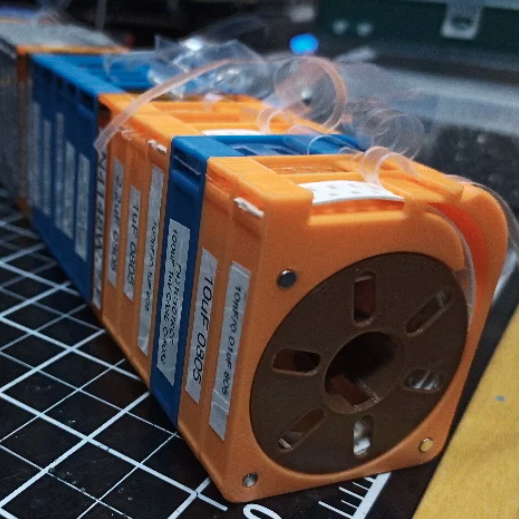
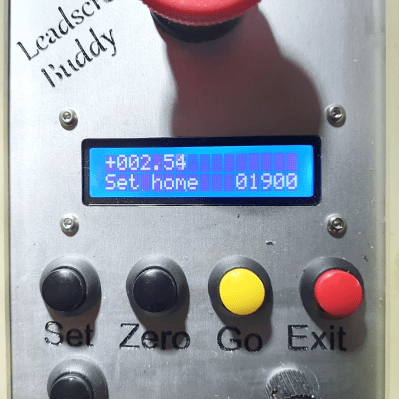 [Tony Goacher] took this idea a few steps further when he created the