Making Things Square In Three Dimensions

Measure twice, cut once is excellent advice when building anything, from carpentry to metalworking. While this adage will certainly save a lot of headache, mistakes, and wasted material, it will only get you part of the way to constructing something that is true and square, whether that’s building a shelf, a piece of furniture, or an entire house. [PliskinAJ] demonstrates a few techniques to making things like this as square as possible, in all three dimensions.

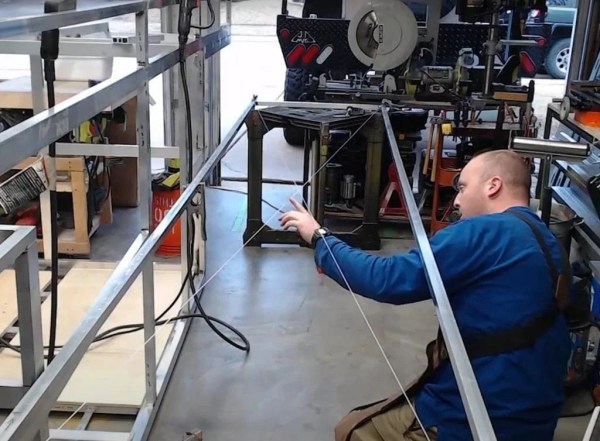
The first method for squaring a workpiece is one most of us are familiar with, which is measuring the diagonals. This can be done with measuring tape or string and ensures that if the diagonals are equal lengths, the workpiece is square. That only gets it situated in two dimensions, though. To ensure it’s not saddle-shaped or twisted, a little more effort is required. [PliskinAJ] is focused more on welding so his solutions involve making sure the welding tables are perfectly flat and level. For larger workpieces it’s also not good enough to assume the floor is flat, either, and the solution here is to minimize the amount of contact it has with the surface by using something like jack stands or other adjustable supports.

There are a few other tips in this guide, including the use of strategic tack welds to act as pivot points and, of course, selecting good stock to build from in the first place, whether that’s lumber or metal. Good design is a factor as well. We’ve also featured a few other articles on accuracy and precision,

Credit For Clever Corner Clamp

We love this design’s simplicity, but its mundane appearance is deceptive because a lot is going on here. [Bas van Hassel]’s clamp looks like a bench cookie or maybe a compressed hockey puck, but one pie piece-shaped quadrant extends on dovetails to form a right-angle channel, perfect for holding your ninety-degree joint while your glue dries. Opposing disc edges are flat, so your clamp won’t slip. Divots on the top and bumps on the bottom keep your stacks nice and neat when you put them away. All around, we have no trouble believing this designer has spent a lot of hours in the woodshop.

As long as your wood pieces are the same thickness, it seems like a practical use of printer filament, but if you have different sizes, you can always pull the dovetail out of its groove. Thanks to the scaling feature built into slicing programs, we expect some precision makers to utilize this in projects like dollhouses and model airplanes. If you have a high-resolution printer, you could make some miniature tools to construct a flea circus set. At that point, you may need to make some smaller clamps.

Print orientation for the puck is straightforward as it is a print-in-place design, but sometimes it isn’t always clear, so listen to those who know better and don’t be afraid of gears in your vises.


Ondophone On Point

The name Ondophone is a mash-up of two instruments, the Marxophone, and the ondes martenot. From the Marxophone, [Wintergatan] borrows the spring-loaded hammers, which repeatedly strike a string once activated. The ondes martenot loans its Theremin-like sound and ability to lean back on western semi-tone notes. Mating such different instruments requires a team, and much like the name, it produces a splendid blend.

At the left-hand side of the Ondophone, we see the spring-hammer battering away on a steel string whenever the neck moves up or down. Next to it is an Ebow that vibrates a string with an electromagnet and can maintain a note so long as it has power. Hidden within the neck are magnets to demarcate semi-tone locations, so it’s possible to breeze past them for a slide sound or rest on them to follow a tune.

The combination of intermittent hammering and droning lends well to the “creepy” phase of the song, which leads segues to the scope-creep that almost kept this prototype on the drawing board. The video talks about all the things that could have been done with this design, which is a pain/freedom we know well. KISS that Ondophone headline act goodbye.

The ondes martenot is an early electronic instrument, so we’ve some high-tech iterations, and if you haven’t heard what’s possible with a DIY Ebow, we will harp on you.

Continue reading “Ondophone On Point”

Cable Operated Blast Door Needs No Power

Every well-equipped wood shop has a dust collection system, with blast gates at every tool to direct the suction power where you need it. If these gates are hard to reach they can be real pain to operate. [Cosmas Bauer] had this problem with his table saw, and created a convenient cable-operated mechanism.

The dust chute on table saw is on the back end, meaning he needs to walk around it to open it, and then walk back to the front to operate the machine. As we all know, laziness increased efficiency can be an excellent reason for projects. Electronics or pneumatics might get the job done, but [Cosmas] realised that a mechanical system might be simpler and more reliable.  Being a woodworker, he built most of the system out of wood.

The blast door itself is held in the closed position by a piece of elastic tubing. To pull it open, he attached a bicycle cable to the blast door, with the other side attached to a latching mechanism that is the star of the show. It’s a rotating disc, with the end of the cable and operating handle attached on the outer edge. A slot track is cut in the disc, in which a pin on the end of a short arm slides. It has a few sharp corners in the track, which forces the pin to only go around in one direction, and to latch in two possible positions when released. Check out the video after the break to see it in action.

Continue reading “Cable Operated Blast Door Needs No Power”

How To Drill A Curved Hole

Next time you’re renovating and need to run some cables around corners in you walls, save yourself some frustration by building [izzy swan]’s corner drilling rig. It’s something akin to a custom tunnel boring machine but on a small scale.

drill-a-curved-hole
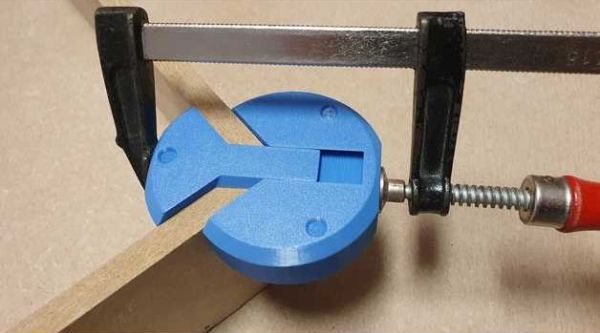
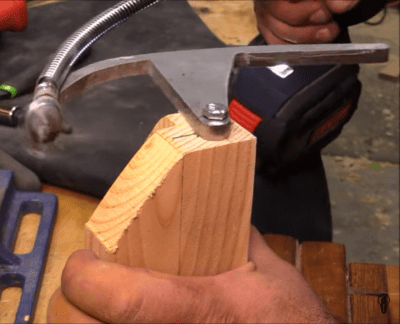
Starting with a piece of steel, [izzy] traced and cut out a 90 degree curve with an attached arm that will allow it to rotate from a central block. He then grabs a random drill bit and attaches it to a flex shaft which is secured to the leading point of the steel curve. To complete the handy setup the entire rig is bolted to a block that will clamp over the corner stock.

As it stands, it takes some elbow grease to get the drill through, but it’s not a purpose built setup. On a second demonstration, the flex shaft breaks, but the idea is there. Now, [izzy] advises that this is most easily accomplished when re-framing walls with no drywall obstructing your drill, but the concept for this rig could nonetheless prove handy for welding, grinding, and so forth along any angled curve.

If instead you want to push your carpentry skills to their limits, build a wooden Vespa.

Continue reading “How To Drill A Curved Hole”

Jewelry Meets Carpentry With Bentwood Rings

[Dorkyducks] is a bit of a jeweler, a bit of a carpenter, and a bit of a hacker.  They’ve taken some time to document their technique for making bentwood rings. Bentwood is technique of wetting or steaming wood, then bending or forming it into new shapes. While the technique is centuries old, this version gets a bit of help from a modern heat source: The microwave oven. [Dorkyducks] starts with strips of veneer, either 1/36″ or 1/42″ thick. The veneer is cut into strips 1/2″ wide by about 12″ long, wrapped in a wet paper towel, and microwaved. The microwaveglue-roll 
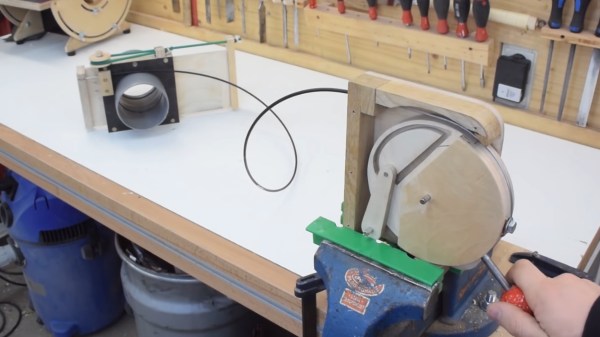
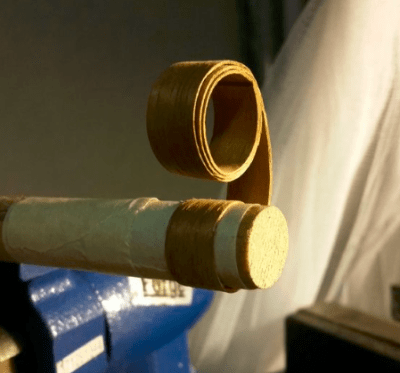
heats the water in the towel, steaming it into the wood. This softens the wood fibers, making the entire strip flexible. The softened wood is then wrapped around a wooden preform dowel and allowed to dry for a day or two.

Once dry, the wood will hold the circular shape of the dowel. [Dorkyducks] then uses masking tape to tack the wood down to a new dowel which is the proper ring size for the wearer. Then it’s a superglue and wrapping game. The glue holds the laminated veneer together, and gives the ring it’s strength. From there it’s sanding, sanding, sanding. At this point, the ring can be shaped, and inlays added. [Dorkyducks] shows how to carve a ring and insert a gemstone in this gallery. The final finish is beeswax and walnut oil, though we’d probably go for something a bit longer lasting – like polyurethane.

Pac Man Clock

Pac-Man Clock Eats Time, Not Pellets

[Bob’s] Pac-Man clock is sure to appeal to the retro geek inside of us all. With a tiny display for the time, it’s clear that this project is more about the art piece than it is about keeping the time. Pac-Man periodically opens and closes his mouth at random intervals. The EL wire adds a nice glowing touch as well.

The project runs off of a Teensy 2.0. It’s a small and inexpensive microcontroller that’s compatible with Arduino. The Teensy uses an external real-time clock module to keep accurate time. It also connects to a seven segment display board via Serial. This kept the wiring simple and made the display easy to mount. The last major component is the servo. It’s just a standard servo, mounted to a customized 3D printed mounting bracket. When the servo rotates in one direction the mouth opens, and visa versa. The frame is also outlined with blue EL wire, giving that classic Pac-Man look a little something extra.

The physical clock itself is made almost entirely from wood. [Bob] is clearly a skilled wood worker as evidenced in the build video below. The Pac-Man and ghosts are all cut on a scroll saw, although [Bob] mentions that he would have 3D printed them if his printer was large enough. Many of the components are hot glued together. The electronics are also hot glued in place. This is often a convenient mounting solution because it’s relatively strong but only semi-permanent.

[Bob] mentions that he can’t have the EL wire and the servo running at the same time. If he tries this, the Teensy ends up “running haywire” after a few minutes. He’s looking for suggestions, so if you have one be sure to leave a comment. Continue reading “Pac-Man Clock Eats Time, Not Pellets”