Do You Have An Endangered Craft?

It is probably fair to say that as Hackaday readers, you will all be people with the ability to make things. Some of you can make incredible things, as your writers we are in constant awe of the projects that pass through our hands. But even if you feel that your skills in the maker department aren’t particularly elite, you’ll have a propensity for work in this direction or you wouldn’t be here.

Most of the craft we feature involves technologies that are still very modern indeed to the majority of the population. We for example know that the first 3D printers were built decades ago and that we take them for granted on our benches, but to the Man In The Street they are still right up there with flying cars and time-travelling police telephone boxes.

We use 3D printers and microcontrollers because they are the tools of our age, but how different might our crafts have been if we’d been born a few centuries ago? Apprenticed to a master craftsman as teenagers, we (well, at least you boys!) would have learned  a single craft to a high level of expertise, making by hand the day-to-day products of life in those times.

The Industrial Revolution brought mechanisation and mass production, and today very few of the products you use will be hand-made. There may still be a few craftsmen with the skills to produce them by hand, but in the face of the mass-produced alternative there is little business for them and they are in inevitable decline. In an effort to do something about this and save what skills remain, the Heritage Crafts Association in the UK has published a list of dying crafts, that you can view either alphabetically, or by category of risk.

It’s a list with a British flavour as you might expect from the organisation behind it, after all for example hand stitched cricket balls are not in high demand in the Americas. But it serves also as a catalogue of some fascinating crafts, as well as plenty that will undoubtedly be of interest to Hackaday readers. Making hand-made planes, saws, or spades, for example, or at least where this is being written, coracle making.

As your Hackaday scribe this is close to home, a blacksmith carrying on her father’s business can’t earn enough to live in Southern England while an electronic engineer and technical journalist can. Eventually there will be one less blacksmith plying the craft, and though his tools and some of his skills will live on here, the business will not. Take a look at the list of crafts, do any of you have them? Or do you know of any craftspeople who have any of the skills listed, that the HCA might not know about? Let us know in the comments.

Treadle lathe image: Patrick-Emil Zörner (Paddy) [CC BY-SA 2.0].

New Release Makes EAGLE And Fusion 360 Besties

The latest release of EAGLE builds a bridge between mechanical design and electronic design. Version 8.3 rolls in the ability to synchronize between EAGLE and Fusion 360. You can now jump between mechanical design and PCB layout without the need for extra steps in between. This is the first release of EAGLE that highlights what the Autodesk purchase actually means.

Just over a year ago, Autodesk bought EagleCAD which is one of the more popular PCB design suites for students, electronic hobbyists, and Open Hardware engineers. While there were some questions about the new license structure of EAGLE under the Autodesk banner, there was a promise of a faster development schedule and the possibility for integration of EAGLE with Autodesk’s CAD programs. Now it’s finally time for EAGLE and Fusion 360 to become besties.

The EAGLE and Fusion 360 integration update includes an online library editor with managed libraries. These online libraries are the ‘cloud’ solution to a folder full of custom EAGLE libraries filled with parts. These libraries package 3D models with the EAGLE libraries, simplifying mechanical design. You can place components on your PCB, then pull that layout into Fusion 360 to see how the board will work with your enclosure. Component placements that collide with the enclosure can be adjusted in Fusion before jumping back to EAGLE to fix the routing.

Embedded passive designs. The resistors *are* the PCB.

There are a few other interesting items in the release notes for EAGLE 8.3. At the top of the list is a new ‘board shape’ object. This is more than just a milling layer for a board outline — the board shape object can now be checked with DRC to ensure components aren’t too close to an edge. This also allows for new features like customizable cutouts and embedded passive designs, or putting resistors and caps in the layers of a PCB instead of placing them as discrete components.

With this release, there is a new Single Layer Mode. This mode only highlights the active layer of the PCB, leaving all other layers grayed out. To be honest, this feature should have been in EAGLE ten years ago, but late is better than never.

For the last year, those of us not complaining about the new EAGLE licensing situation have been watching the updates to EAGLE creep out of Autodesk. There has been a lot of speculation on what Autodesk would bring to the table when it comes to electronic design. This is it. It looks like Autodesk is fulfilling their promise to integrate electronic and mechanical design. The latest EAGLE release looks great, especially with the addition of walk-around routing and something resembling push and shove traces added earlier this year, combined with this update for the mechanical side of design projects.

You can check out a promo video from Autodesk of the new EAGLE release below.

Continue reading “New Release Makes EAGLE And Fusion 360 Besties”

Touchscreen Oscilloscope

[Marco Reps] didn’t want to lug a full-sized oscilloscope around to measure his ECG while running. He decided to check out the DSO112A which is a tiny touchscreen scope from the usual China sources. The tiny one channel scope can go to 2mV/division at 2MHz and can save and recall up to 24 configurations. It also has access to the data via a serial port so you can use it as a fancy data logger. [Marco’s] video appears below.

Apparently, there is was an older model without the A on the end that was not as sensitive and had some other missing features. The price is about $70–fairly inexpensive, although not throw-away cheap.

[Marco] noted that one of the two small connectors can act as an external trigger input or a function generator. There’s the typical LiPo battery inside and a shielded input section. [Marco] tears the board down and looks at the chips on the board. Inside are two Atmel CPUs and a 20 megasample per second analog to digital converter.

The color screen looks surprisingly good in the video although, as [Marco] points out, with one channel, the colors aren’t super useful. The device also has cursors and a nice selection of measurements that work both live and on stored data.

At the end of the video, [Marco] shows a simple ECG amplifier he built from an open source schematic. We’ve covered simple ECG circuits before if you want to read more.

Last year we looked at two small inexpensive scopes. Like everything else, each year the bar gets higher. Although, in fairness, those scopes had a (reported) 25 MHz bandwidth. We’d love to see that kind of front end with the user interface of the DSO112A.

Continue reading “Touchscreen Oscilloscope”

The Trouble With Cordless Power Tools

If you grow up around a small engineering business you are likely to gain something of an appreciation for power tools. You’ll see them of all ages, sizes, manufacturers, and technologies. When thinking of the power tools constantly on hand in the workshop of a blacksmith like my dad for instance, I’m instantly seeing a drill and an angle grinder. The drill that most comes to mind is a Makita mains powered hand drill, and given that I remember the day he bought it to replace his clapped-out Wolf in 1976, it has given phenomenal service over four decades and continues to do so.

41 years of hard use, and still going strong.
41 years of hard use, and still going strong…

Of course, the Makita isn’t the only drill in his possession. A variety of others of different sizes and speeds have come and gone over the years, and there is always one at hand for any given task. The other one I’d like to single out is I think the most recent acquisition, a Bosch cordless model he bought several years ago. It’s similar in size and capabilities to the Makita save for its bulky battery pack, and it is a comparably decent quality tool.

So, we have two drills, both of similar size, and both of decent quality. One is from the mid 1970s, the other from the end of the last decade. One is a very useful tool able to drill holes all day, the other is little more than a paperweight. The vintage model from the days of flared trousers is a paperweight, you ask? No, the not-very-old Bosch, because its battery pack has lost its capacity. The inevitable degradation due to aged cell chemistry has left it unable to hold enough charge for more than maybe a minute’s use, and what was once a tool you’d be glad to own is now an ornament.

Continue reading “The Trouble With Cordless Power Tools”

Maintain Temperature With A DIY Laboratory Dry Bath

[abizar] lucked into some aluminum blocks, one of which had test-tube-sized holes in it–just the thing to turn into a dry bath for his biology projects.

He stuck a 100W positive temperature coefficient heater into the bottom of the block using silicone glue, and the heater heated the block up in around half an hour. He connected a temperature controller to maintain the temperature at an ambient 95C, with a controller monitoring a thermistor to keep the block within the pre-determined range. The heater has an auto shutoff if it got too hot, so [abizar] felt safe keeping the dry bath on, unmonitored.

The aluminum block sits in a plywood box lined with rubber from an inner tube, with the heater underneath the block and the temperature controller underneath that, separated by more plywood from the heat. The result? A dry, temperature regulated bath for 20 1.5ml test tubes.

Looking to tool up? Check out the plethora of biohacking tools on Hackaday, including a DIY CO2 incubator, a basic biohacker’s toolkit, and a cheap electrophoresis rig.

Scissor Lift Table From The Wood Shop, For The Wood Shop

The value of a mobile adjustable height cart in the shop can’t be overestimated. From moving tools around to installing heavy fixtures on walls and ceiling, a scissor-lift platform is a great tool. Commercial versions get a bit expensive, though, so a shop-built scissor lift table made of wood might be a nice project for the budget-minded to tackle.

Wood might not be your first choice for a fixture such as this, but it’s what [Marius Hornberger] is set up to use, and with proper species selection and careful engineering, it can make for an amazingly sturdy table. [Marius] chose ash for his parts, a wood with a long history of performing well under difficult conditions. The table is not all wood, of course; metal bushings and pins are used in the scissor mechanism, and the lift drive is a stout Acme-thread screw and nut. We’re impressed by [Marius]’ joinery skill, and with how sturdy the table proved to be.

Not a lot of woodworking projects seem to show up in our tip line for some reason, which is a shame. We love to feature wood builds, and like our own [John Baichtal] recently pointed out, the health of the wood shop is often a leading indicator of the health of a hackerspace.

Continue reading “Scissor Lift Table From The Wood Shop, For The Wood Shop”

Give Your Bench Power Supply A Helping Hand

[Sverd Industries] have created a pretty cool bench power supply integrating soldering helping hands into the build. This helps free up some much-needed bench space along with adding that wow factor and having something that looks unique.

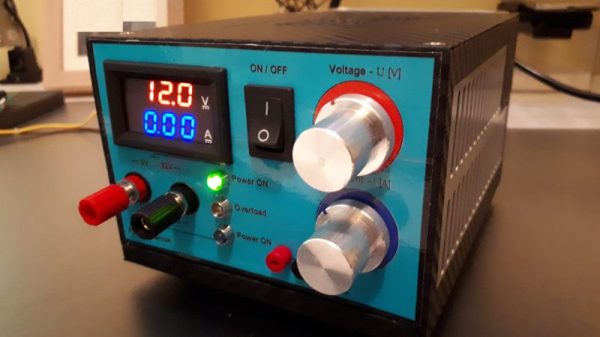
The build is made from a custom 3D printed enclosure (Thingiverse files here), however if you have no access to a 3D printer  you could always just re-purpose or roll your own instrument enclosure. Once the enclosure is taken care of, they go on to install the electronics. These are pretty basic, using a laptop PSU with its output attached to the input of a boost/buck module. They did have to change the potentiometers from those small PCB mounted pots to full size ones of the same value though. From there they attach 4 mm banana sockets to the output along with a cheap voltmeter/ammeter LCD module. Another buck converter is attached to the laptop PSU’s output to provide 5 V for a USB socket, along with a power switch for the whole system.

Where this project really shines is the integrated helping hands. These are made from CNC cooling tubes with alligator clips super glued to the end, then heat shrink tubing is placed over the jaws to stop any accidental short circuiting while using them.

This isn’t a life changing hack but it is quite a clever idea if space is a hot commodity where you do your tinkering, plus a DIY bench power supply is almost a rite of passage for the budding hacker.

Continue reading “Give Your Bench Power Supply A Helping Hand”