We’ve all been there. You want to assemble a proper Star Trek: The Original Series landing party prop set, but the TOS tricorders you can find on the market are little more than overpriced toys. Imagine the embarrassment of beaming down to Cestus III with a plastic tricorder. The Metrons wouldn’t have even bothered with the trial by combat with such a sorry showing.
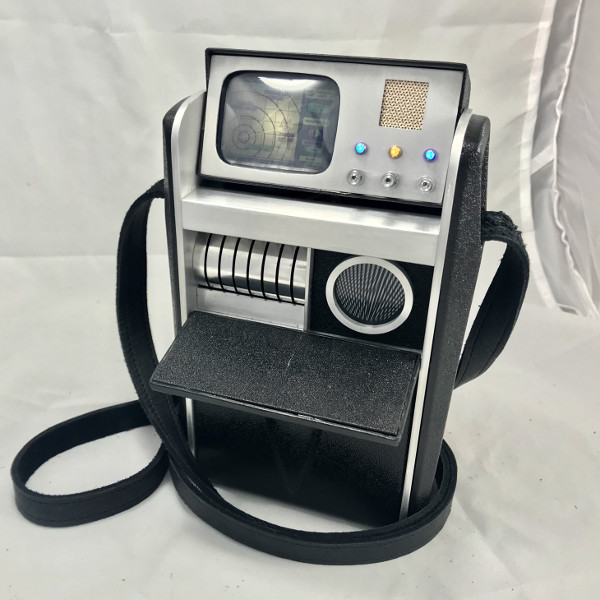 Unhappy with the state of Star Trek props, [Dean O] decided to take matters into his own hands. He purchased a TOS tricorder from Diamond Select Toys and set out to modify it into something a bit closer to Starfleet standards. Anything painted metallic silver on the toy was replaced with a machined aluminum duplicate, adding some much needed heft. He even spruced up the controls and display.
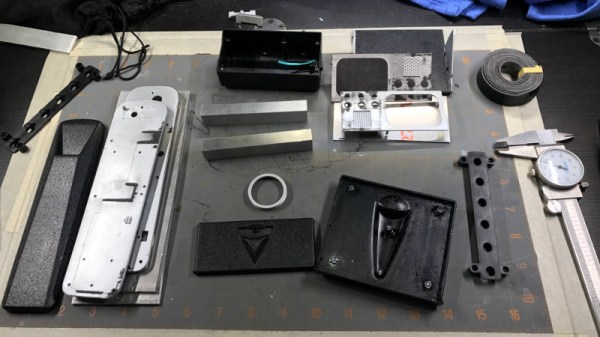
To start, [Dean] stripped the tricorder down, separating all of the silver plastic parts and finding aluminum stock that was close enough to the desired dimensions. This ended up being .125″ plate for the sides, and .500″ bars for the horizontal dividers. To make the side panels he placed the original plastic parts over the aluminum, marked the mounting holes with a punch, and used the belt sander to shape them.
[Dean] then put in a more screen accurate Moire disc, and went as far as to get real watch crowns for the buttons (just like the prop used in the show). In a particularly bold move, he even drilled out the center of watch crowns to install plastic light pipes for LED illumination.
Last year we saw a build that crammed a Raspberry Pi into the same Diamond Select tricorder toy to excellent effect. Now somebody just needs to combine both projects and they’ll have the slickest tricorder in the Alpha Quadrant.