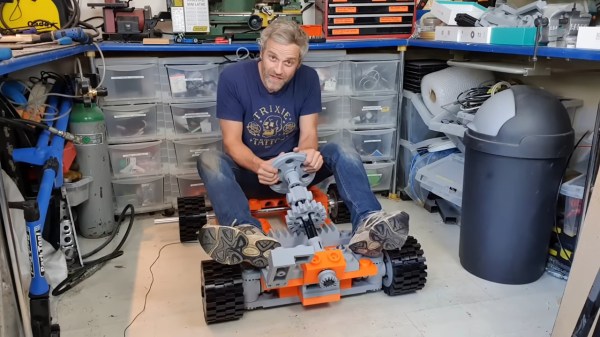
The LEGO Technic line is definitely the hacker’s flavor of LEGO. It brings a treasure trove of engineering uses that make axles, gears, pulleys, and motors a thing. The only problem is that it’s the inanimate minifigures having all of the fun. But not if [Matt Denton] has something to say about it. He’s building a huge 3D-printed go-kart with pieces scaled up 8.43 times the size of their LEGO equivalents. That’s large enough for an adult to fit!
You may remember seeing [Matt’s] previous attempt at something like this about three years back, but that was only around half the size of this one. He printed a blue kart for his nephew, but it didn’t quite scale up enough even for a child to ride. This one is impressively large, but that raises some interesting fabrication issues
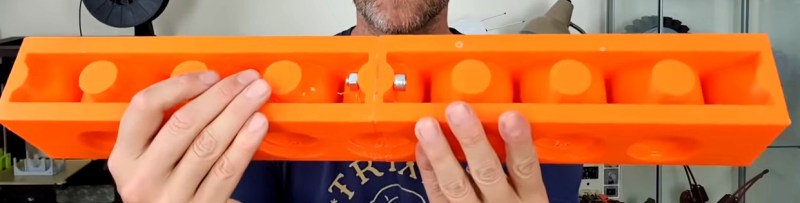
The long beams that make up the frame of the vehicle and the axle piece (the black rods with an X-shaped profile) used for the steering column are far too long to print in one go. So the axle was printed in two parts with a square channel down the center that hides a single run of square tubing. But the beams are much more interesting. Printed in two parts, there’s a dovetail-shaped connector piece that holds the top joint together, and a hidden bolt for the bottom. Glue is also used along the joint to bolster the holding power of the mechanical fasteners.
In general, the weight and friction on this scaled up version need many considerations. [Matt] explains where he’s made design decisions — like perpendicular axle connectors that have proper bearings — to include mostly-hidden metal parts and fasteners to ensure the plastic doesn’t fail. The thing looks awesome, but just wait until you see the assembly process. It’s sooooo satisfying to watch the modular parts snap into place. The project’s still in progress and before he’s done he plans to add an electric motor to make the kart go.
Even if you’re not scaling a model up to full size, giant is a guaranteed recipe for fun. Case in point, [Matt’s] enlarged LEGO fork lift is a delight.
Continue reading “Huge 3D-Printed LEGO Go Kart Makes You The Minifig”