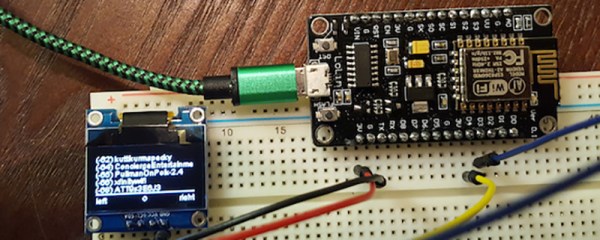
[Steve] needed a tool to diagnose and fix his friend’s and family’s WiFi. A laptop would do, but WiFi modules and tiny OLED displays are cheap now. His solution was to build a War Walker, a tiny handheld device that would listen in WiFi access points, return the signal strength, and monitor the 2.4GHz environment around him.
The War Walker didn’t appear out of a vacuum. It’s based on the WarCollar Dope Scope, a tiny, portable device consisting of an off-the-shelf Chinese OLED display, an ESP8266 module, and a PCB that can charge batteries, provide a serial port, and ties the whole thing together with jellybean glue. The Dope Scope is a capable device, but it’s marketed towards the 1337 utilikilt-wearing, The Prodigy-blasting pentesters of the world. It is, therefore, a ripoff. [Steve] can build his version for $6 in materials.
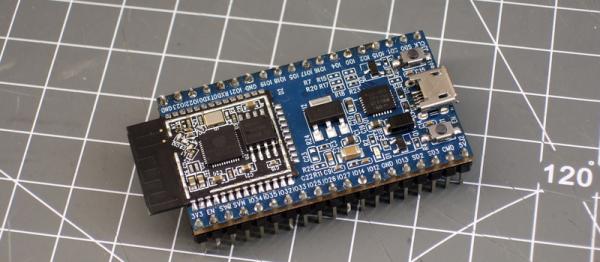
The core of the build is an ESP-based carrier board built for NodeMCU. This board is available for $3.77 in quantity one, with free shipping. A $2 SPI OLED display is the user interface, and the rest of the circuit is just some perfboard and a few wires.
The software is based on platformio, and dumps all the WiFi info you could want over the serial port or displays it right on the OLED. It’s a brilliantly simple device for War Walking, and the addition of a small LiPo makes this a much better value than the same circuit with a larger pricetag.