One of the most common projects we see here at Hackaday is a clock. It could just be that we as humans are fascinated by the concept of time or that making a piece of functional art appeals to our utilitarian sense. In that spirit, [Alexandre Chappel] set out to make a large mechanical clock with complex gears.
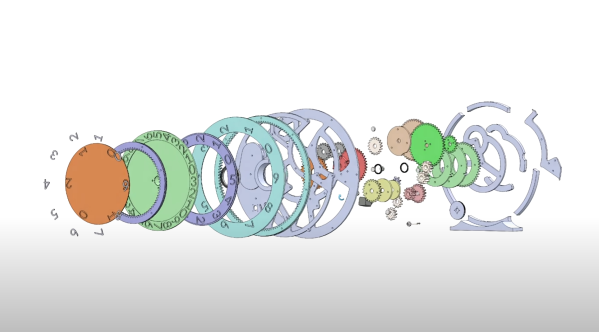
The initial design was made in Fusion360 over a week and then in a somewhat bold move, [Alexandre] started up the CNC and cut all the parts out of valchromat. The basic idea of the clock is that the numbers move on the clock, not the hands. So the clock should show 10:25 instead of moving hands to the 10 and the 5. Most of the clock is made of up stacked gear assemblies, geneva drives, and many bearings. A single stepper motor drives the whole clock, which [Alexandre] admits is a bit of a cheat since trying to add springs and an escapement would add complexity to an already complex clock. He did have to adjust and recut a few gears but most of the assembly came together nicely. Some 3d printed numbers dropped into the CNCed slots offers much-improved readability.
A few problems became apparent once the system was together. The numbers don’t quite line up perfectly, which is unfortunate. He mentioned that tighter tolerances on the gears would likely help there. A fatal design flaw on the smallest disk became apparent as it needs to turn a sixth of the circle whereas the outer circle is just turning a tenth of the circle. Mechanical advantage isn’t in [Alexandre’s] favor and the stepper skips some steps and it slowly makes its way towards the next second digit of the hour.
If you’re looking for more beautiful artistic clocks, why not check out this circuit sculpture one?

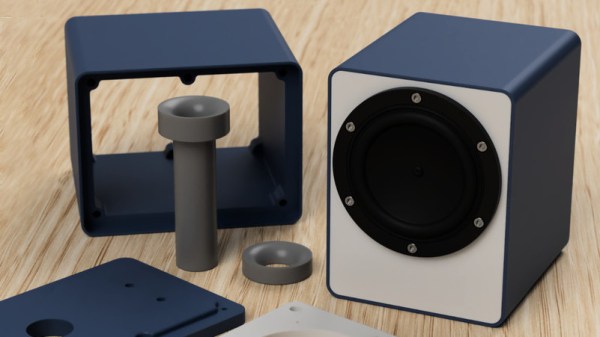
 The parts can be 3D-printed, but the design ensures that the front and back panels are flat, so one can use wood or some other material for those depending on preference and appearance. The assembly is screwed together using six M3 bolts per side with optional