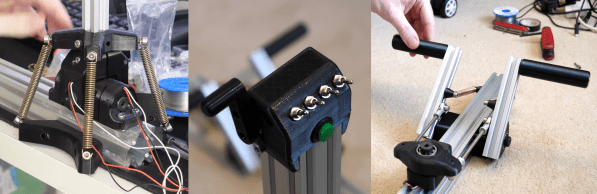
Compound bows (unlike recurve bows, their more mechanically-simple relatives) use a levering system with pulleys and spring tension to grant the user a mechanical advantage. We’re not exactly sure what to call [Zünder’s] bow design. He shared his unconventional take on a DIY bow that uses coiled springs as well as some other unique features.
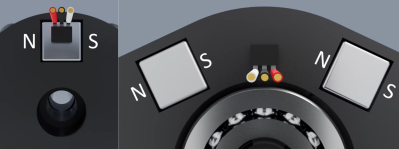
What we really dig about [Zünder]’s design is how easy it is to grasp how it all works. As he demonstrates using the bow, the way the levers, pulleys, and spring tension all work together is very clear. The 3D-printed quiver and arrow rest are nice added touches, and we especially love the use of three toothbrush heads to provide contained support for a nocked arrow. The ring of bristles are sturdy enough to easily support the shaft, and don’t interfere with the arrow’s fletching.
[Zünder] has a photo gallery with a few additional photos and closeups, and you can watch him demonstrate his bow in the video embedded below.
Continue reading “Slick DIY Compound Bow Uses Coiled Springs, Toothbrush Heads”