When it’s time to put together the annual Christmas card, most families take a few pictures of the kids, slap on a generic greeting, and call it a day. It used to be fairly common for the whole family to get dressed up and pose for a special Christmas picture, but who has the time anymore? It’s not like we have hours and hours to slave over a unique and memorable gift we can mail out to a dozen (or more) people.
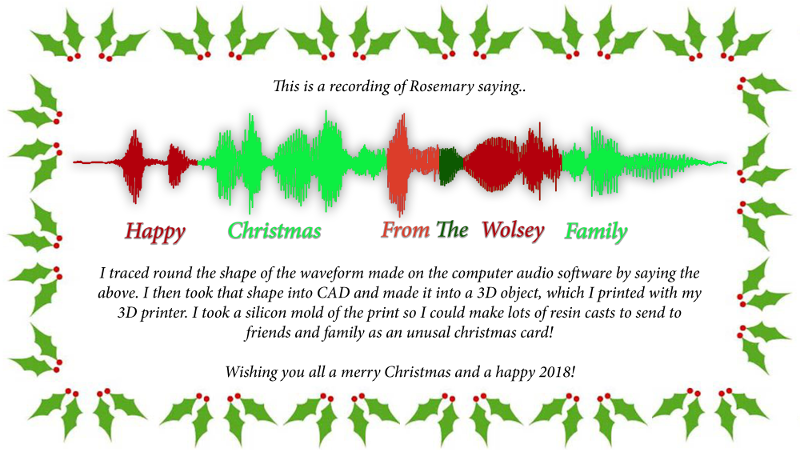
Unless you’re [Chris Wolsey], anyway. Rather than take the easy way out and simply mailing some pictures of his daughter out to friends and family, he recorded her giving a Christmas greeting and turned the waveform of her voice into a framed physical memento. Way to wreck the curve for the rest of us, [Chris].
As it turns out, getting sound into CAD software isn’t exactly straightforward. To start, he made a recording of his daughter saying the words “Happy Christmas From the Wolsey Family” with Audacity, and then took a screenshot of the resulting waveform. This screenshot was then brought into Adobe Illustrator and exported to SVG, which Fusion 360 (and most other CAD packages) is able to import.
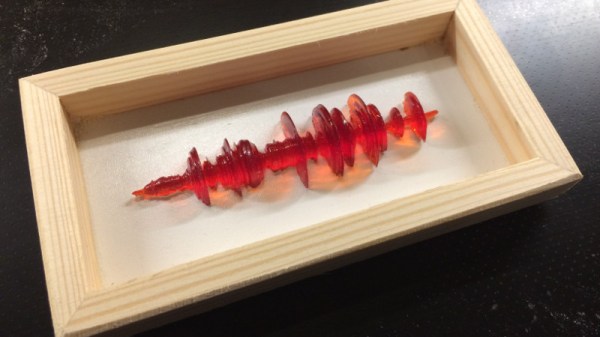
Now that the wave was in Fusion 360 he could scale it to a reasonable size, and use the revolve function to bring it into three dimensions. Cutting that object in half down the length then gave [Chris] a shape which should, theoretically, be printable on his FDM printers. But unfortunately, it wasn’t so easy. His personal Anet A8 had a tough time printing it, and the Prusa i3 MK2 at work didn’t fare much better. In the end, he had to make the leap to SLA, getting the shape printed on a Form 2 via 3D Hubs.
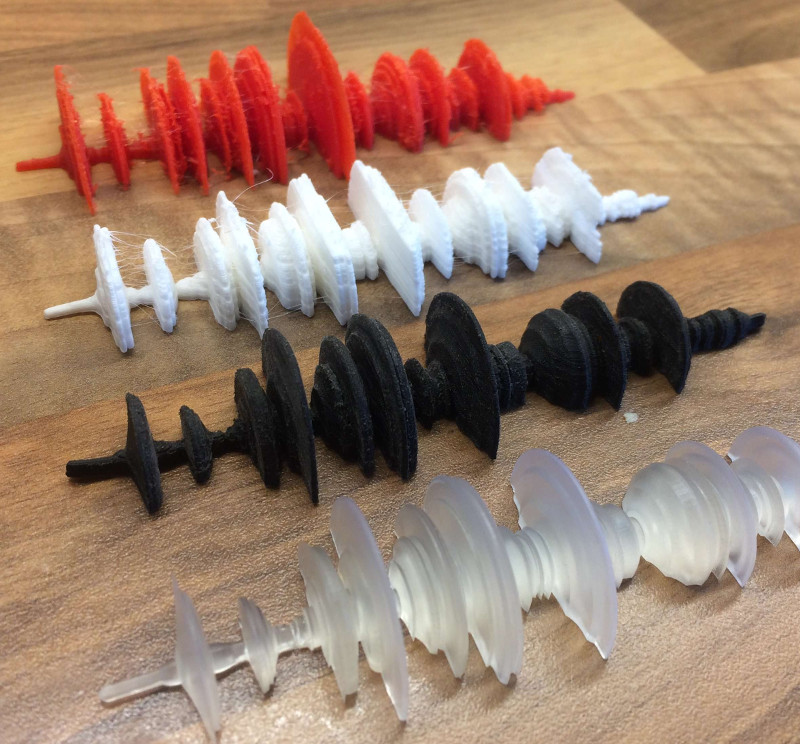
With the finalized shape in hand, [Chris] just need to put them into production. Printing them all via 3D Hubs wasn’t really an option, so he decided to make a mold and cast them in resin. He printed up a mold box, and after fiddling around with the mix a bit, was able to settle on a resin which allowed him to de-mold the shapes just 30 minutes after pouring.
Finally, he made frames for each cast waveform, and printed up a little label explaining just what the recipient was looking at; even going as far as showing which word corresponded to which section of the shape.
This is a fantastically executed and documented project, and while it’s too late to whip up your own version this year, we have no doubt they’ll be a few people “borrowing” this idea next time the holidays roll around.
It’s never too early to start planning for next Christmas. We’ve covered unique takes on the traditional holiday card before, as well as a sleighful of holiday decorating projects.