Art of 3D printer in the middle of printing a Hackaday Jolly Wrencher logo

3D Printering: One Bed Level To Rule Them All

In an ideal world, your FDM 3D printer’s bed would be perfectly parallel with the print head’s plane of movement. We usually say that means the bed is “level”, but really it doesn’t matter if it is level in the traditional sense, as long as the head and the bed are the same distance apart at every point. Of course, in practice nothing is perfect.

The second best situation is when the bed is perfectly flat, but tilted relative to the print head. Even though this isn’t ideal, software can move the print head up and down in a linear fashion to compensate for the tilt. Things are significantly worse if the bed isn’t itself flat, and has irregular bumps up and down all over.

To combat that, some printer firmware supports probing the bed to determine its shape, and adjusts the print head up and down as it travels across the map. Of course, you can’t probe the bed at every possible point, so the printer will have to interpolate between the measured reference points. Marlin’s bilinear bed leveling is an example.

But if you have enough flash space and you use Marlin, you may want to try unified bed leveling (UBL). This is like bilinear leveling on steroids. Unfortunately, the documentation for this mode is not as plain as you might like. Everything is out there, but it is hard to get started and information is scattered around a few pages and videos. Let’s fix that.

Continue reading “3D Printering: One Bed Level To Rule Them All”

3D Printing Gets Tiny

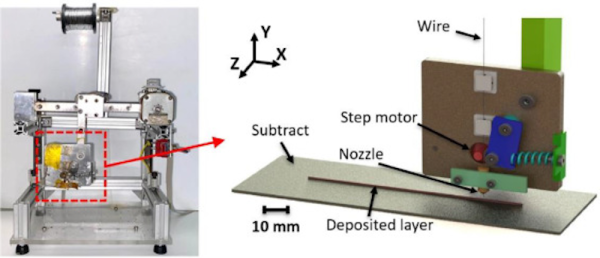
Using a process akin to electroplating, researchers at the University of Oldenburg have 3D printed structures at the 25 nanometer scale. A human hair, of course, is thousands of time thicker than that. The working medium was a copper salt and a very tiny nozzle. How tiny? As small as 1.6 nanometers. That’s big enough for two copper ions at once.

Tiny nozzles are prone to every 3D printer’s bane: clogged nozzles. To mitigate this, the team built a closed-loop control that measured electrical current between the work area and inside the nozzle. You can read the full paper online.

Continue reading “3D Printing Gets Tiny”

When Hacking And Biosensing Collide

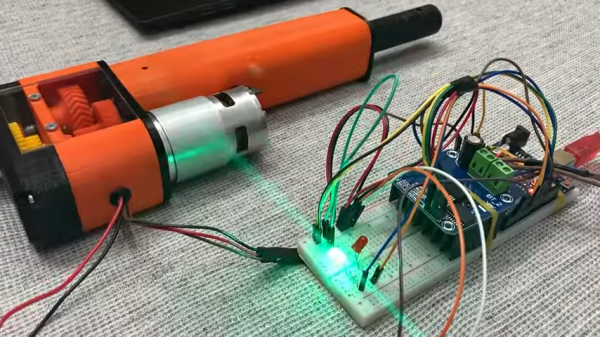
[Prof. Edwin Hwu] of the Technical University of Denmark wrote in with a call for contributions to special edition of the open-access scientific journal Biosensors. Along the way, he linked in videos from three talks that he’s given on hacking consumer electronics gear for biosensing and nano-scale printing. Many of them focus on clever uses of the read-write head from a Blu-ray disc unit (but that’s not all!) and there are many good hacks here.

For instance, this video on using the optical pickup for the optics in an atomic force microscope (AFM) is bonkers. An AFM resolves features on the sub-micrometer level by putting a very sharp, very tiny probe on the end of a vibrating arm and scanning it over the surface in question. Deflections in the arm are measured by reflecting light off of it and measuring their variation, and that’s exactly what these optical pickups are designed to do. In addition to phenomenal resolution, [Dr. Hwu’s] AFM can be made on a shoestring budget!

Speaking of AFMs, check out his version that’s based on simple piezo discs in this video, but don’t neglect the rest of the hacks either. This one is a talk aimed at introducing scientists to consumer electronics hacking, so you’ll absolutely find yourself nodding your heads during the first few minutes. But then he documents turning a DVD player into a micro-strobe for high speed microfluidics microscopy using a wireless “spy camera” pen. And finally, [Dr. Hwu’s] lab has also done some really interesting work into nano-scale 3D printing, documented in this video, again using the humble Blu-ray drive, both for exposing the photopolymer and for spin-coating the disc with medium. Very clever!

If you’re doing any biosensing science hacking, be sure to let [Dr. Hwu] know. Or just tear into that Blu-ray drive that’s collecting dust in your closet.

Continue reading “When Hacking And Biosensing Collide”

Concrete With 3D Printed Foam Forms

The latest 3D printing application?  Forming concrete. That’s according to a team at ETH Zurich who claims that construction with foam forms cuts concrete usage up to 70%. It also offers improved insulation properties. You can see a video about the process, below.

Typical concrete work relies on a form often made with wood, steel, or plastic. That’s easy to do, but hard to make complex shapes. However, if you can create complex shapes you can easily put material where it adds strength and omit material where it doesn’t carry load. Using a robotic-arm 3D print technique, the researchers can lay out prefabricated blocks of foam that create forms with highly complex shapes. Continue reading “Concrete With 3D Printed Foam Forms”

OpenDog Version 3 Is Ready To Go Walkies

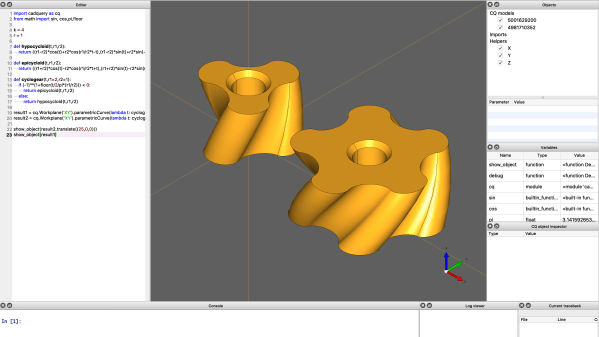
We’ve been following [James Bruton]’s open dog project for a little while now, and with his considerable pace of work – pandemic or no pandemic – development has been incredibly rapid. The latest milestone is the public release of version 3 (Video, embedded below.) This upgrade to the system adds 3D printed cycloidal gearboxes, removing the previous belt drives. [James] had immense fun tuning the motor controller parameters for these and admits they’re not completely dialed in yet. He notes that the wider gearbox body means that the robots geometry needed to change a little, and the previous belt-drive version may have a bit of an edge, but he’s confident he can make it work (and given his incredible previous robotics builds, we totally believe he’ll nail it!)

Silicone overmolding around a 3D printed former, using a 3D printed mould

Older versions struggled with slippery plastic feet; the advantage of a predictably smooth contact shape of a rounded foot is somewhat offset by the limited contact patch size, and that means not so much grip on some surfaces. [James] solution was obvious enough – just learn how to make 3D printed silicone moulds and cast a nice rubber foot around a plastic former, and problem solved! Unfortunately he neglected to add some recesses for a lever to get in between the mould halves, so it was a bit of a struggle to separate after curing. A beginner’s mistake that won’t be repeated, we’re sure.

Full source for openDogV3 is now available on the GitHub page. Here’s the playlist for the whole project, as well as direct links for the cycloidal drive development (part1, part2, part3.) But before you all go diving in to start 3D printing your own pooch, [James] tells us that the total cost would be around $2000 all in, with the bulk of that being the motors and ODrive units, so this one for the serious builder only!

We’ve covered robot dogs a fair bit, a particularly nice example is The Dizzy Wolf, and if you’re wondering just why on earth you’d want a robot dog, then Ask Hackaday has you covered as well.

Continue reading “OpenDog Version 3 Is Ready To Go Walkies”

Showing off the jet powered tesla

Tesla Model S Gets Boost With Jet Engine Upgrade

Tesla is well known for making cars that can accelerate quickly, but there’s always room for improvement. [Warped Perception] decided that his Tesla Model S P85D needed that little bit of extra oomph (despite the 0-60 MPH or 0-97 km/h time of 3.1 seconds), so he did what any sensible person would: add three jet turbines to the back of his car.

The best part of this particular build is the engineering and fabrication that made this happen. With over 200 pieces and almost all personally fabricated, this is a whirlwind of a build. The control panel is first, and there’s a particularly clever technique of 3D printing the lettering directly onto the control panel for the flat stuff. Then for the pieces with angles that would prevent the head from moving freely, he printed onto a plastic sheet in reverse, applied glue, then stuck the letters to the plate as a sheet. A top layer of clear coat ensures the letters won’t come off later.

Using a 3D printer to apply lettering on the control panel.

He installed the control electronics in the trunk with wiring strung from the car’s front to the rear. Three Arduinos serve as controllers for the jets. Afterward, came the bracket to hold the engines and attach it to the car’s underside. Unfortunately, supplies were a little hard to come by, so he had to make do with what was on hand. As a result it didn’t come out as strong as he would have hoped, but it’s still pretty impressive.

[Warped Perception] does a few tests before taking it out on the road. Then, he shifted the car into neutral and could drive the car solely on jet power, which was one of his goals. While we don’t love the idea of testing a jet engine on public roads, it certainly would discourage tailgaters.

Next, he finds a quieter road and does some speed tests. Unfortunately, it was drizzling, and the pavement was damp, putting a damper on his 0-60 standing times. Electric-only he gets 4.38 seconds, and turning on the jets plus electric shaves that down to 3.32 seconds. Overall, an incredible build that’s sure to draw a few curious glances whenever you’re out on the town.

If you’re looking to upgrade your Tesla, perhaps instead of jet engines, you might opt for a robot to plug it in for you?

Continue reading “Tesla Model S Gets Boost With Jet Engine Upgrade”

Wire race bearing

Adding Wire Races Improves 3D-Printed Bearings

Like a lot of power transmission components, bearings have become far easier to source than they once were. It used to be hard to find exactly what you need, but now quality bearings are just a few clicks away. They’re not always cheap though, especially when you get to the larger sizes, so knowing how to print your own bearings can be a handy skill.

Of course, 3D-printed bearings aren’t going to work in every application, but [Eros Nicolau] has a plan for that. Rather than risk damage from frictional heating by running plastic or metal balls in a plastic race, he uses wire rings as wear surfaces. The first video below shows an early version of the bearing, where a pair of steel wire rings lines the 3D-printed inner and outer races. These worked OK, but suffered from occasional sticky spots and were a bit on the noisy side.

The second video shows version two, which uses the same wire-ring race arrangement but adds a printed ball cage to restrain the balls. This keeps things quieter and eliminates binding, making the bearing run smoother. [Eros] also added a bit of lube to the bearing, in the form of liquid PTFE, better known as Teflon. It certainly seemed to smooth things out. We’d imagine PTFE would be more compatible with most printed plastics than, say, petroleum-based greases, but we’d be keen to see how the bearings hold up in the long term.

Maybe you recall seeing big 3D-printed bearings around here before? You’d be right. And we’ve got you covered if you need to learn more about how bearings work — or lubricants, for that matter.

Continue reading “Adding Wire Races Improves 3D-Printed Bearings”