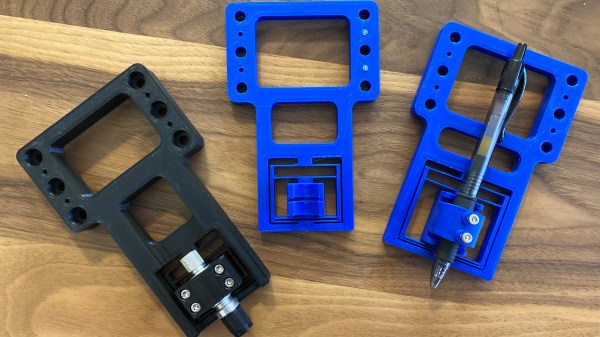
Game developer and eternal learner [David Tucker] just posted a project where he’s making linear flexures on a 3D printer. Tinkerer [Tucker] wanted something that would be rigid in five of the six degrees of freedom, but would provide linear motion along one axis. In this case, it is for a pen or knife on a CNC flatbed device. [David]’s design combines the properties of a 1-dimensional flexure and a spring to give a constant downward force. Not only is this an interesting build in and of itself, but he gives a good explanation and examples of more traditional flexible constructs. He also points out this site by MIT Precision Compliant Systems Lab engineer [Marcel Thomas] which provides a wealth of information on flexures.
3d printing863 Articles
3D Printing Food University Style
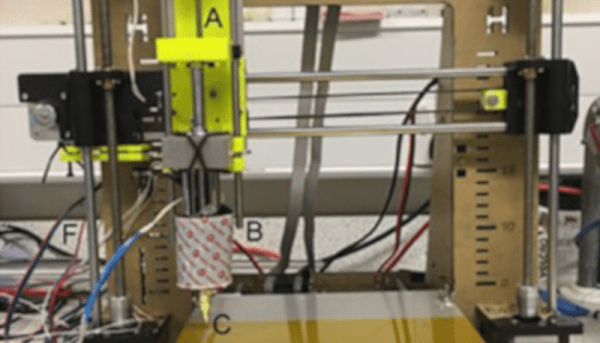
While refitting a 3D printer for food printing isn’t really a new idea, we liked the detailed summary that appeared from a team from the University of Birmingham which converted an i3 clone printer to use a syringe extruder.
The syringe in question was meant for veterinarian use and is made of metal. The paper suggests that the metal is a better thermal conductor, but it was’t clear to us if they included a heating element for the syringe. In the pictures, though, it does appear to have some insulation around it. In any case, we imagine a metal syringe is easier to keep clean, which is important if you are depositing something edible.
Printed Catamaran
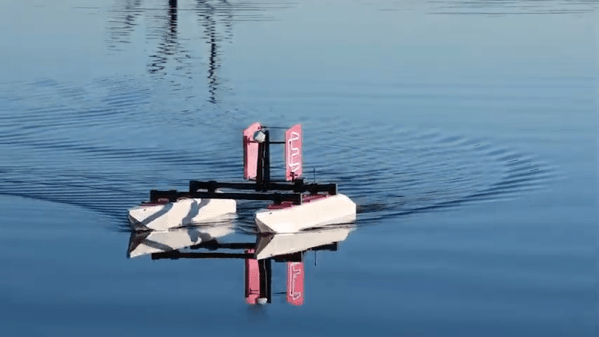
If you want to send some instruments out on the lake or the ocean, you’ll want something that floats. Sure, if you need to be underwater, or if you can fly over the water there are other options, but sometimes you want to be on the surface. For stability, it is hard to beat a catamaran — a boat with two hulls that each support one side of a deck. If that sounds like the ocean sensor platform of your dreams, try printing the one from [electrosync].
The boat looks super stable and has a brushless motor propulsion system. The design purpose is to carry environmental and water quality monitoring gear. It can hold over 5 kg of payload in the hull and there’s an optional deck system, although the plans for that are not yet included in the STL files.
Smooth 3D Prints With Alcohol
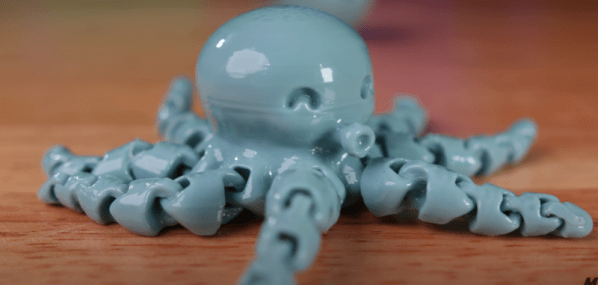
There was a time when most 3D printers used ABS, which is a great plastic for toughness, but is hard to print with since it tends to warp. Worse still, it stinks and the fumes may be bad for you. Most people have switched over to printing in PLA these days, but one thing you might miss with this more forgiving plastic is vapor smoothing with acetone; a smoothed print doesn’t show layer lines and looks more like plastic part that didn’t go through a nozzle.
[Major Hardware] likes the look of vapor smoothed parts, but doesn’t like working with ABS and acetone fumes, so he’s started using Polysmooth. As you can see in the video below, the results look good, but be warned that the filament is relatively pricey. Plus you need to use a $300 machine that atomizes your alcohol into a mist. We feel certain you could do the same thing for less since it appears to just be like a humidifier, but we’d also suggest being careful putting flammable substances in a consumer-grade humidifier and certainly don’t use a vaporizer.
The filament sounds like it is on par with PLA for ease of printing. The material has a higher glass temperature than PLA but less than ABS. The tensile strength and Young’s modulus (a measure of stiffness) numbers are comparable to ABS. Although all smoothing has some imperfections and you probably need to experiment with times and other parameters. The smoothing did fuse some movable joints, so anything that moves or fits together is probably a bad candidate for this process. We’ve also heard that thin-walled parts can get soft in water due to alcohol residue, but you can dry or soak the part clean to avoid that.
If you want to try your own hand at making a mist, this might get you started. After all, if it can handle acetone, we imagine alcohol isn’t any worse. While it isn’t as easy to handle as alcohol, we hear the solvents such as THF or ethyl acetate can smooth regular PLA. Heat guns and open flames are popular, too.
3D Printed Calipers Work Like Clockwork
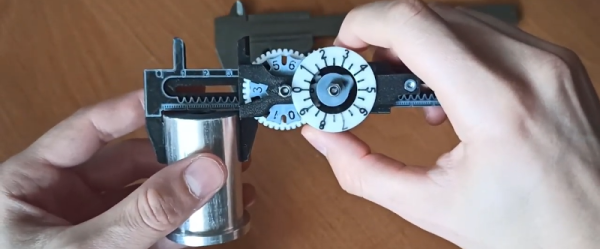
Most of us use calipers when working with our 3D printers. Not [Albert]. He has a clockwork caliper design that he 3D printed. The STL is available for a few bucks, but you can see how it works in the video below. We don’t know how well it works, but we’ll stick with our digital calipers for now.
The digital readout on this caliper is more like a sophisticated watch. A window shows 10s of millimeters and two dials show the single digits and the number after the decimal point.
Finite Element Analysis Vs Real World
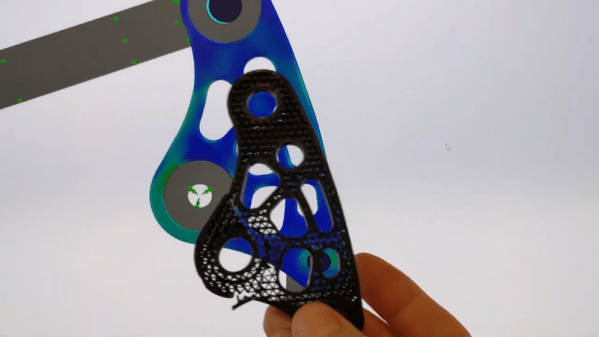
In advanced engineering circles, the finite element method — or, more commonly, finite element analysis — is a real staple. With the advent of more powerful home computers, though, even your home projects can benefit. The technique itself is very general, but you usually see it used for structural analysis. However, you might wonder how well it corresponds to reality. That is if analysis shows a segment of your part is weak (or strong) does that hold true when you actually build the part? [Fiveohno] wondered the same thing and decided to do some testing, which you can see in the video below.
Of course, like any simulation, the accuracy will only be as good as your data input and model. But if you work carefully, it should match up pretty well to the real world, so it is interesting to see the results of a real-world test. In fact, a video from Solidworks that shows a similar part points out — inadvertently — what not to do. For example, the force used in that analysis was too low and at a point where the part was at relatively low stress instead of at the maximum stress.
Repurpose A Monitor Arm As Microscope Mount
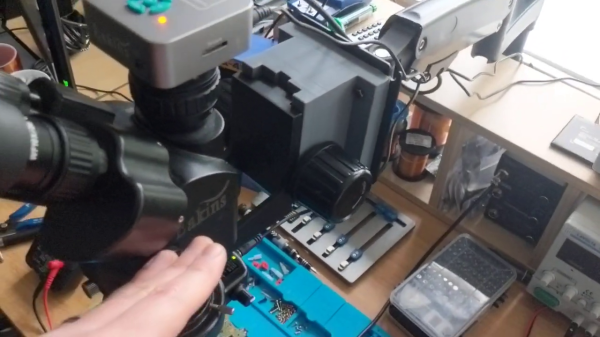
Being a bit shocked at the prices of articulating arm microscope mounts, not to mention the shipping fees to the UK, [CapTec] realized they looked substantially similar to your typical computer monitor arm mount. Thinking he could adapt a monitor arm for much less money, he fired up FreeCAD and started designing.
[CapTec] is using this to support his Amscope / Eakins camera-equipped trinocular microscope, but notes that the same mechanical bracket / focus rack interface is found on binocular ‘scopes as well. He observes that the mount is no more stable than your desk or lab bench, so keep that in mind.
Ultimately the monitor arm set him back less than $40, and all told he reckons the whole thing was under $55. Based on prices he’s been researching online, this represents a savings of well over $200. In his calculations, the shipping fee comprised quite a hefty percentage of the total cost. We wonder if they are artificially high due to coronavirus — if so, the make / buy price comparison might yield different results in the future.
This type of project is a perfect use-case for a home 3D printer — making your own parts when the normal supply channels are unavailable or overpriced. Are articulating arms that are purpose-built for microscopes significantly different than those designed for big computer monitors? If you know, please comment down below.
Continue reading “Repurpose A Monitor Arm As Microscope Mount”

