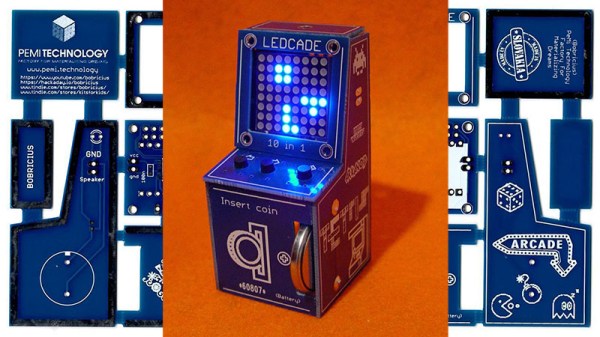
Insert Coin (Cell) To Play LedCade

In this era of 4K UHD game console graphics and controllers packed full of buttons, triggers, and joysticks, it’s good to occasionally take a step back from the leading edge. Take a breath and remind ourselves that we don’t always need all those pixels and buttons to have some fun. The LedCade is a μ (micro) arcade game cabinet built by [bobricius] for just this kind of minimalist gaming.

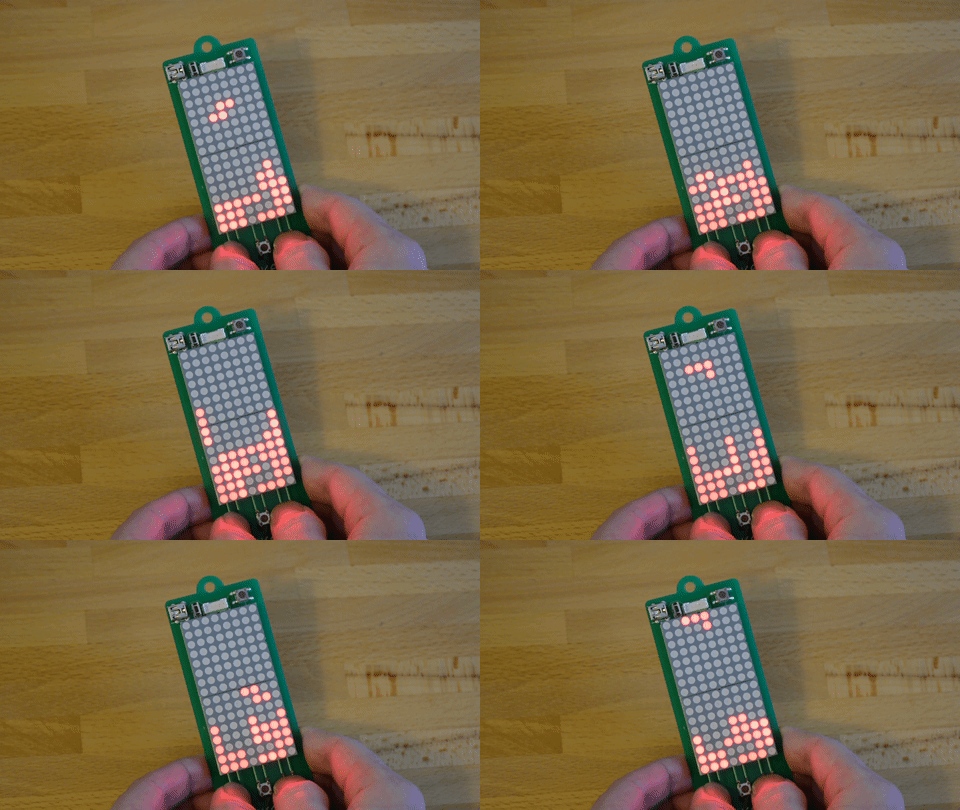
Using just three buttons for input and an 8×8 LED matrix for output, the LedCade can nevertheless play ten different games representing classic genres of retro arcade gaming. And in a brilliant implementation of classic hardware hacking humor, a player starts their game by inserting not a monetary coin but a CR2032 coin cell battery.

Behind the screen is a piezo speaker for appropriately vintage game sounds, and an ATmega328 with Arduino code orchestrating the fun. [bobricius] is well practiced at integrating all of these components as a result of developing an earlier project, the single board game console. This time around, the printed circuit board goes beyond being the backbone, the PCB sheet is broken apart and reformed as the enclosure. With classic arcade cabinet proportions, at a far smaller scale.

If single player minimalist gaming isn’t your thing, check out this head-to-head gaming action on 8×8 LED arrays. Or if you prefer your minimalist gaming hardware to be paper-thin, put all the parts on a flexible circuit as the Arduflexboy does.

Arduino Hunts (and Sees) The Wumpus

For anyone who’s been fiddling around with computers since the days before VGA, “Hunt the Wumpus” probably brings back fond memories. Developed in 1973, this text game has you move around a system of caves searching for the foul-smelling Wumpus, a vile creature which you must dispatch with your trusty bow and arrow. Some consider it to be one of the very first survival horror games ever developed, a predecessor to the Resident Evil franchise as well as the video game version of Hannah Montana: The Movie.

If the concept of “Hunt the Wumpus” sounds interesting to you, but you just can’t get over the whole text adventure thing, you may be in luck. [Benjamin Faure] has developed a semi-graphical version of the classic horror title which might better appeal to your 21st century tastes. Running on an Arduino Mega 2560 with graphics displayed on a 8 x 8 LED matrix, it’s not exactly DOOM; but at least you won’t have to type everything out.

You are winner!

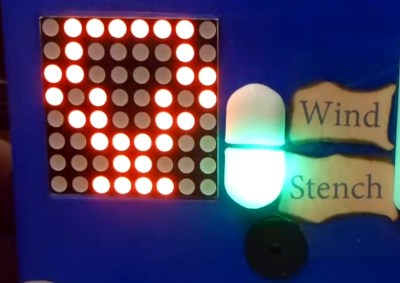
For his handheld version of “Hunt the Wumpus”, [Benjamin] 3D printed a nice enclosure and adorned it with labels and instructions that look like tiny scrolls, a neat touch for a game that’s so old contemporary players would have called Zork a “next gen” game. While playing you can see where you’ve been and where you are currently thanks to illuminated dots on the MAX7219 display, and there are LEDs to warn you of your proximity to bottomless pits and the Wumpus itself. There’s even a piezo speaker that will chirp when a bat is nearby, which is important as they have a tendency to ruin your day by carrying you away to a random location in the cave.

Most of the game looks like an advanced version of Snake, but [Benjamin] did go through the trouble of adding some rudimentary animations and sound effects that play during specific parts of the game. When you shoot your arrow or get carried away by a bat, you’ll see a “cutscene” of sorts on the LED display. It’s a fairly simple effect, but helps break up the otherwise fairly spartan graphics and might just be enough to keep a youngins’ attention.

If you subtract a dimension, this project is reminiscent of the 1D dungeon crawler we covered last year. But if even one dimension is too many, you could always run the text version of “Hunt the Wumpus on your trusty Arduino.

Continue reading “Arduino Hunts (and Sees) The Wumpus”

A Gloriously Impractical Electromechanical Display

For this year’s office holiday party, [Gavan Fantom] wanted to do something really special. Coworkers were messing with LEDs to come up with displays and decorations, but they lack that old-school feel of mechanical displays. He wanted to create something that had retro look of moving elements, but didn’t want to just recreate the traditional flip mechanism we’ve all seen over and over.

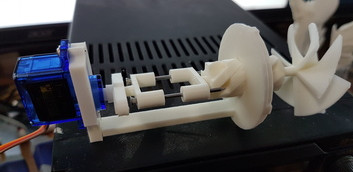
The mechanism to drive a single “pixel”.

What [Gavan] came up with is breathtakingly impractical 8×8 display that sounds as cool as it looks. Each “pixel” in the display is a 3D printed screw mechanism rotated by a hobby servo. As the pixel is rotated in its case, it becomes progressively more visible to the observer. The opacity of the pixel can even be adjusted by varying the degree of rotation, allowing for rudimentary display of grayscale images.

Each element in the display is made up of seven 3D printed parts and two nails, which the mechanism slides on to move forward and backward. An 8×8 display needs 64 elements, which means the entire display needs 64 servos, 128 nails, and a whopping 448 3D-printed parts. Even with two printers attacking the production in parallel, the printing alone took over two weeks to complete.

The display is powered by a Raspberry Pi and three “Mini Maestro” controllers which can each handle 24 servos. [Gavan] found some sample code in Python to pass commands to the Maestro servo controllers, which he used as a template when writing his own software. The Python script opens image files, converts them to grayscale, and then maps the value of each pixel to rotation of the corresponding servo. He says the software is a little rough and that there’s still some calibration to be done, but we think the results are phenomenal so far.

Mechanical displays are a favorite of hackers, due in no small part to the awesome noises they make while in operation. While we’ve seen some very creative approaches to this type of display before, what [Gavan] has created here is certainly in a league of its own.

Continue reading “A Gloriously Impractical Electromechanical Display”

It’s Alive! — Badge For Hackaday Belgrade

Hackaday Belgrade — our first ever conference in Europe — is coming up fast. One of the really exciting things for me is the hardware badge which [Voja Antonic] designed for the conference. He’s done a great job with hardware choices and I think we’ve hit the sweet spot for badge hacking. Let’s jump into the hardware and firmware details after the break.

Get your ticket now for ten hours of talks and workshops, evening concerts, and of course badge hacking the entire time. Earlybird sales close Monday. We’re still in the process of going through talk proposals but we’ll publish a post next week announcing all of the speakers.

Continue reading “It’s Alive! — Badge For Hackaday Belgrade”

Wii Nunchuck-Controlled Tetris On A Raspberry Pi

tetris

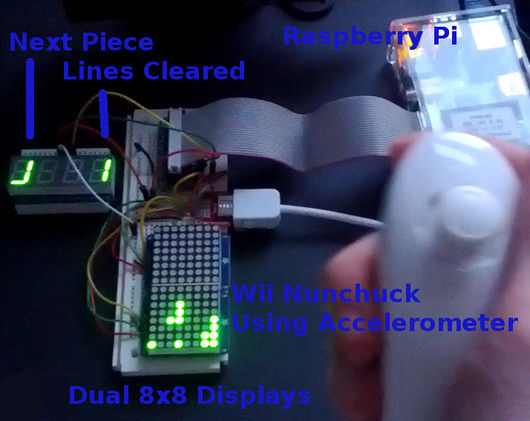
[Vince] teaches an Embedded Systems class at the University of Maine, and some of his students were working on video games for their finals. He decided to “test the hardware” that the students were using by putting two 8×8 displays, one 4×7 segment display, and a Wii Nunchuck on the I2C bus. He then wrote a version of Tetris that accepts trigger presses and accelerometer input for control. Judging by the video (embedded after the break), the Raspberry Pi runs the game without issue. The bus is, of course, more than capable of handling everything.

Unfortunately, [Vincent] had some trouble getting the controls just right. Sometimes dropping a piece can cause the next to drop too quickly, and the accelerometer control seems a bit too sensitive. We imagine using the joystick for rotation and adding some strategic pauses in the game could help. He graciously released the source code for the project, so maybe we’ll see some embracing and extending in the near future.

Continue reading “Wii Nunchuck-Controlled Tetris On A Raspberry Pi”

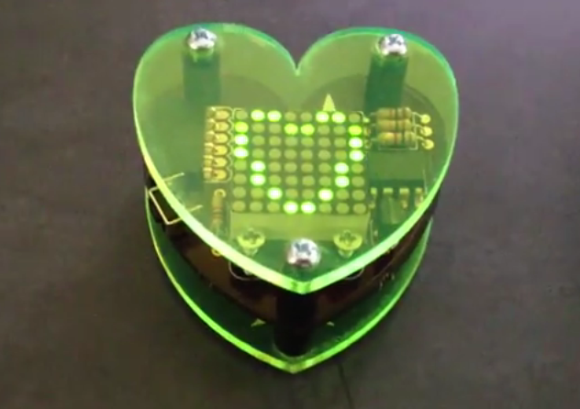
Heart-shaped Project Takes No Shortcuts

heart-shaped-project

If all [Blake] wanted to do is scroll “Blake loves Kim” on some LEDs he could have stopped with the breadboard version of the project. Or hastily craft a cardboard heart around the marquee. But he really just used this heart-shaped electronics project as an excuse to get his feet wet with several different types of manufacturing.

The project started as a simple scrolling message pendant. Something along these lines. His very small LED module was being driven by an ATtiny85. He planned to run it from battery which is a perfect excuse to learn how to use the sleep functions built into the chip.

The initial design worked so well he decided to lay out his own circuit board. This made it quite simple to add in a side-positioned button to wake from sleep, and a coin cell battery holder on the back. He used OSH Park for board manufacturing — good thing they allow creative board outlines. To protect the circuitry he also ordered laser-cut acrylic plates that work in conjunction with stand offs to form a case.

He mentions he missed his Valentine’s Day delivery date by a long shot. But that’s how these sort of things go, right?

Continue reading “Heart-shaped Project Takes No Shortcuts”

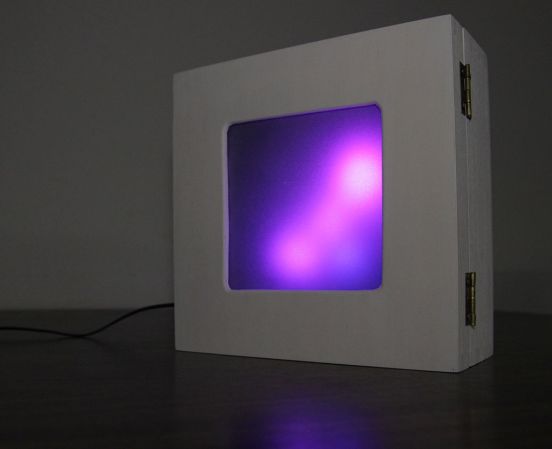
Arduino Particle Light Box Generates Animations From Sound

arduino-particle-display

Simple tools used well can produce fantastic results. The hardware which [Gilad] uses in this project is the definition of common. We’d bet you have most if not all of them on hand right now. But the end product is a light box which seems to dance and twirl with every sound in the room. You should go watch the demo video before reading the bill of materials so that the simplicity doesn’t spoil it for you.

A wooden craft box serves as the enclosure. Inside you’ll find an Arduino board, microphone, and an 8×8 RGB module. The front cover of the project box diffuses the light using a sheet of tracing paper on a frame of foam board. It’s the code that brings everything together. He wrote his own particle system library to generate interesting animations.

If you don’t have a project box on hand this might work with an extra-deep picture frame.
Continue reading “Arduino Particle Light Box Generates Animations From Sound”