Hackaday Links: November 1, 2015

It seems almost compulsory that we start off with a dose of Star Wars. Here’s an epic AT-ST build that motorizes the iconic walker.

That two-legger isn’t going to be lonely. It bigger-slower brother, the AT-AT got a bit of motorized love as well.

What? You were expecting a BB8 build? We have one of those too. [DrYerzinia] has begun a design that hides a quadcopter inside of the BB8. The four 17″ DJI propellers fold up when not in use, extending through hatches in the outer shell when it’s time to take flight. This retains the rolling design you’ve already come to love in the BB8 and we’re going to keep our eyes on it!

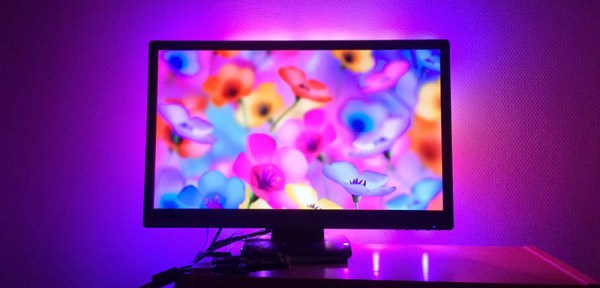
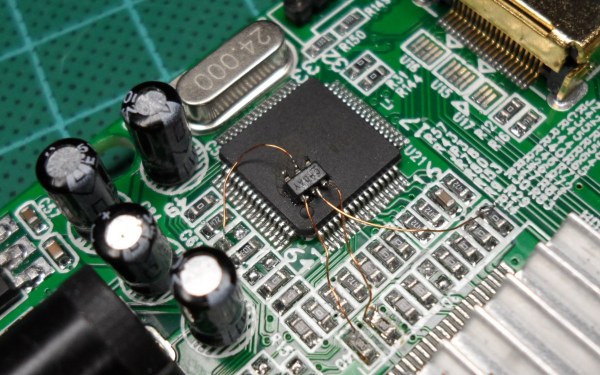
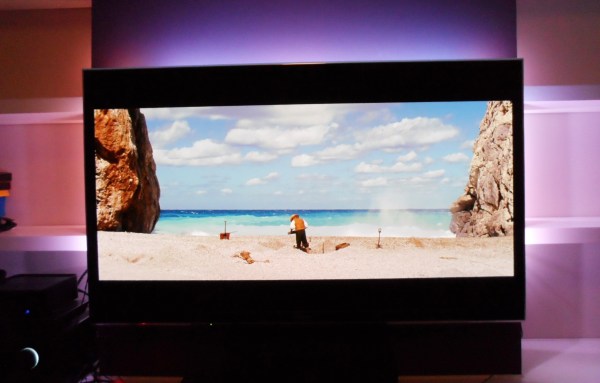
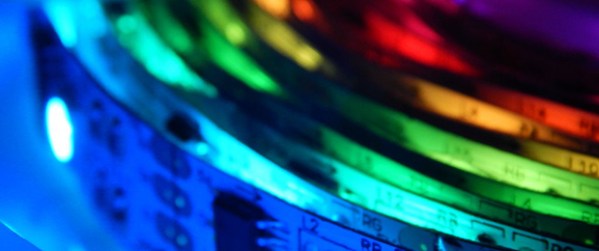
Do you have a Teensy and some extra WS2812 strips hanging out on your bench? [etix] put his to use with an ambilight clone. This works really well: simple hardware which connects via USB to communicate with VLC. We applaud [etix’s] choice of Kung Fury as a demo video… a truly bizarre and entertaining short movie. +1000 for its use of VHS tape artifacts.

We just missed Halloween, but this set of wings is far too great of a build to be reserved for that one day. Alas, there is only the demo video but seeing the huge feathered structures fold and unfold is really impressive!

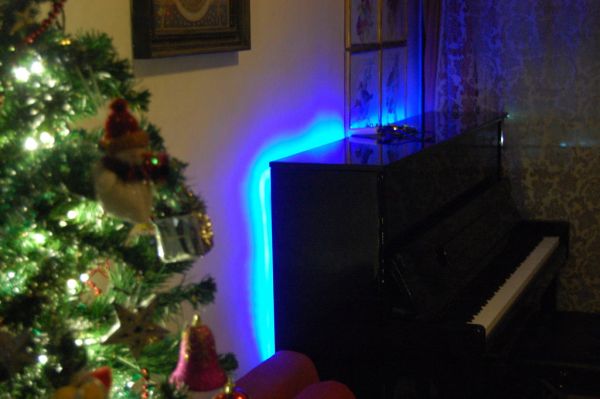
[Truebass] added an artistic accent to one of the walls in his home. He had several cellphone chargers from old phones in his junk bin. These were used to regulate power for some white LEDs. The finished sconces are made from chip-board covered in cherry veneer, all leftover from previous projects.

Want to drink your beer out of beer-byproducts? How about your coffee out of coffee-byproducts. It sounds strange, but 3DOM is marketing it that way, encouraging you to print your beer stein with this beer-byproduct-based 3D printer filament. They also offer coffee filament and have plans for future oddball building materials. Printer inception?

We ran a post about the secret computer of the New York subway system. There wasn’t a ton of information there, but that could change. The New York Historical Society is running a Kickstarter to expand their Computing History made in NY.

FPGA Based Ambilight Clone

The Philips Ambilight – a bunch of rear-facing RGB LEDs taped to the back of a TV – is becoming the standard project for anyone beginning to tinker with FPGAs. [DrX]’s is the best one we’ve seen yet, with a single board that reads and HDMI stream, makes blinkey lights go, and outputs the HDMI stream to the TV or monitor.

[DrX] is using an FPGA development board with two HDMI connectors – the Scarab miniSpartan6+ – and a strand of WS2801 individually addressable RGB LEDs for this project. With a bit of level shifting, driving the LEDs was easily taken care of. But what about decoding HDMI?

Most of the project is borrowed from a project that displays a logo in the corner of a 720p video stream. The hardware is the same, but for an Ambilight clone, you need to read the video stream and process it, not just write to it. By carefully keeping track of the R, G, and B values for each pixel along with the pixel clock,  the colors along the edge of a display can be averaged. It’s not as difficult or as memory-intensive as building a frame buffer; nearly all of the picture data is thrown out when assembling the averages around the perimeter of the display. It does work, though.

After figuring out the average color around the perimeter of the display, it’s just a simple matter of driving the LEDs. Tape those LEDs to the back of a TV, and there’s an Ambilight clone, made with an FPGA.

[DrX] has a few videos of his project in action. You can check those out below.

Continue reading “FPGA Based Ambilight Clone”

HDMI Splitter Is Also A Decrypter

It warms our hearts when the community gets together. [esar] needed to get a decrypted HDMI stream for his home theater system. A tip-off in the comments and a ton of good old-fashioned hacking resulted in a HDMI splitter converted into a full-featured HDMI decrypter. Here’s the story.

His amazing custom Ambilight clone got profiled here, and someone asked him in the comments if it worked when High-bandwidth Digital Content Protection (HDCP) is on. [esar] lamented that it didn’t. Hackaday readers to the rescue. [Alan Hightower] and [RoyTheReaper] pointed [esar] to the fact that HDMI splitters need to decrypt and re-encrypt the signal to pass it on, and pointed him to a trick to knock out the on-board microcontroller. [esar] took off from there.

Unfortunately, taking the micro out of the picture messed with a lot of other HDMI functionality. So [esar] started digging in the datasheets for the HDMI splitter chip, looking for registers relevant to the re-encryption. If he could get in between the microcontroller and the splitter chip on the I2C bus and disable the re-encryption, he’d be set.

If you’re at all interested in I2C hacking or abusing HDMI splitters, you need to read his post because he details all of the tribulations and triumphs. He first tries just brute-forcing the I2C by overwriting a 1 bit with a 0. This (correctly) signals the micro that there’s been a conflict on the bus, so it re-sends the command again. Dead end.

He then found another signal that the receiver could use say that it wasn’t decrypting. He tried sending this continuously to the splitter so that it would stop encrypting. That worked, but only for one channel, some of the time. It turns out that his code was taking too long in his bit-banged I2C code. He fixes this up and all is well? Well, 90% of the way there.

To hammer down the last 10% of the functionality, [esar] buys a couple more splitters, experiments around with another splitter chipset that works with 3D, and solders some more wires to enable the Audio Return Channel. And after a ton of well-documented hard work, he wins in the end.

Ambilight For Your Piano (Hero)

That old upright piano still sounds great, and now it can easily have its own special effects. [DangerousTim] added LED strips which change color when he tickles the ivories. The strips are applied along the perimeter of the rear side of the upright causing the light to reflect off of the wall behind the instrument. This is a familiar orientation which is often seen in ambilight clone builds and will surely give you the thrill of Guitar Hero’s brightly changing graphics while you rock the [Jerry Lee Lewis].

Key to this build is the electret microphone and opamp which feed an Arduino. This allows the sound from the piano to be processed in order to affect the color and intensity of the LED strips. These are not addressable, but use a transistor to switch power to the three colors of all pixels simultaneously.

We think there’s room for some clever derivative builds, but we’re still scratching our heads as to how we’d use addressable pixels. Does anyone know a relatively easy way to take the mic input and reliably establish which keys are being played? If so, we can’t wait to see your ambilight-piano-clone build. Don’t forget to tip us off when you finish the hack!

FPGA Ambilight Clone Packs A Ton Of Features

[Stephen] designed a standalone Ambilight clone built around an FPGA and recently added many new features to make his design even better. His original design was based around a Spartan 3-E FPGA, but his new design uses the Papilio One board with a Spartan-6 LX9 FPGA. This gives him dedicated DSP hardware and more RAM, allowing him to add more processing-intensive features.

[Steven]’s new board can drive up to 4096 LEDs total, and each LED is colored from one of 256 segmented screen areas. The output of the LEDs is smoothed over a configurable time period which makes the result a bit more pleasant. [Steven] also added color correction matrices and gamma correction tables to make up for differences in LED coloration and so the output can be fine-tuned to the color of the wall behind the TV.

Finally, [Steven] added multiple configurations which can be stored in Flash memory. The FPGA can detect letterboxes and pillarboxes in the video stream and change to a corresponding configuration automatically, so settings rarely need to be manually adjusted. He also added an extensive serial interface to configure all of the parameters and configurations in Flash. Be sure to check out the video after the break to see his setup in action.

Continue reading “FPGA Ambilight Clone Packs A Ton Of Features”

Raspi Ambilight Integrated In A 19″ Rack Packs Lots Of Peripherals

raspi ambilight

Ambilight systems create light effects around your monitor that correspond to the video content you’re playing. [Sébastien] just build his (French translated to English, original here) and embedded all the elements in a 19 inch rack he bought from Farnell.

As most ambilight systems we’ve covered over the years the HDMI signal is first split in two, one being sent to his monitor while the other is converted into a S-Video signal. The latter is then captured with a STK1160 stick connected to a Raspberry Pi. A python script using the OpenCV library is in charge of extracting the frames pixels and figuring out what colors should be sent to the SPI connected LPD8806 LEDs. A nice web interface also allows to drive the LEDs from any platform connected to his local network. Finally, a standard HD44780 LCD and an infrared receiver are connected to the raspberry, allowing [Sébastien] to control and monitor his platform. Funny thing: he also had to use two relays to power cycle his HDMI splitter and converter as they often crash. You can check out a demonstration video from a previous revision after the break.

Continue reading “Raspi Ambilight Integrated In A 19″ Rack Packs Lots Of Peripherals”

A Raspi Ambilight With HDMI Input

With the Raspberry Pi now most famously known as a $30 media PC, it only makes sense that the best uses for the GPIO pins on the Pi are used for an Ambilight. [Great Scott Labs] put up a great video on using the Pi as a uniquely configurable Ambilight with Hyperion and just about any video input imaginable.

This isn’t the first Ambilight clone [Great Scott] has put together, but for the first version the Ambilight functioned only under Raspbian and not any random HDMI input. The new version solves this by using an HDMI splitter box, feeding into an HDMI to composite converter, and finally into a USB composite capture dongle attached to the Raspi.

With the software in the instructions, the Raspi effectively mirrors the video coming from the video capture dongle. The Pi is running Hyperion to control a strip of WS2801 RGB LEDs, making the back of any TV glowey and blinkey.

Since [Great Scott] is using a component video signal as an input, the adapters necessary to have any device work with this Ambilight are readily available. We’d honestly like to see this build working with the old Commodore disk access screen border going nuts, so be sure to send that in if you ever get that working.

Continue reading “A Raspi Ambilight With HDMI Input”