Phonenstien Flips Broken Samsung Into QWERTY Slider

The phone ecosystem these days is horribly boring compared to the innovation of a couple decades back. Your options include flat rectangles, and flat rectangles that fold in half and then break. [Marcin Plaza] wanted to think outside the slab, without reinventing the wheel. In an inspired bout of hacking, he flipped a broken Samsung zFlip 5 into a “new” phone.

There’s really nothing new in it; the guts all come from the donor phone. That screen? It’s the front screen that was on the top half of the zFlip, as you might have guessed from the cameras. Normally that screen is only used for notifications, but with the Samsung’s fancy folding OLED dead as Disco that needed to change. Luckily for [Marcin] Samsung has an app called Good Lock that already takes care of that. A little digging about in the menus is all it takes to get a launcher and apps on the small screen.

Because this is a modern phone, the whole thing is glued together, but that’s not important since [Marcin] is only keeping the screen and internals from the Samsung. The new case with its chunky four-bar linkage is a custom design fabbed out in CNC’d aluminum. (After a number of 3D Printed prototypes, of course. Rapid prototyping FTW!)

The bottom half of the slider contains a Blackberry Q10 keyboard, along with a battery and Magsafe connector. The Q10 keyboard is connected to a custom flex PCB with an Arduino Micro Pro that is moonlighting as a Human Input Device. Sure, that means the phone’s USB port is used by the keyboard, but this unit has wireless charging,so that’s not a great sacrifice. We particularly like the use of magnets to create a satisfying “snap” when the slider opens and closes.

Unfortunately, as much as we might love this concept, [Marcin] doesn’t feel the design is solid enough to share the files. While that’s disappointing, we can certainly relate to his desire to change it up in an era of endless flat rectangles.  This project is a lot more work than just turning a broken phone into a server, but it also seems like a lot more fun.

Continue reading “Phonenstien Flips Broken Samsung Into QWERTY Slider”

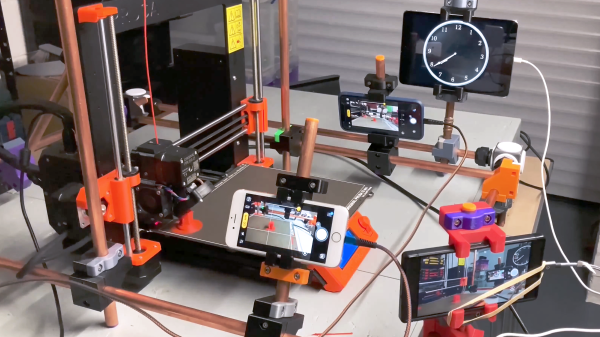
A workbench with a 3D printer, a home-made frame of metal tubing and 3D printed brackets and phone holders. 3 iOS devices and 1 Android phone arranged around the printer with a clock and 3 different camera angles around the print bed

Even 3D Printers Are Taking Selfies Now

We love watching 3D prints magically grow, through the power of timelapse videos. These are easier to make than ever, due in no small part to a vibrant community that’s continuously refining tools such as Octolapse. Most people are using some camera they can connect to a Raspberry Pi, namely a USB webcam or CSI camera module. A DSLR would arguably take better pictures, but they can be difficult to control, and their high resolution images are tougher for the Pi to encode.

If you’re anything like us, you’ve got a box or drawer full of devices that can take nearly as high-quality images as a DSLR, some cast-off mobile phones. Oh, that pile of “solutions looking for a problem” may have just found one! [Matt@JemRise] sure has, and in the video after the break, you can see how not one but four mobile phones are put to work.

Continue reading “Even 3D Printers Are Taking Selfies Now”

Upgrading RAM On A Nexus 5X

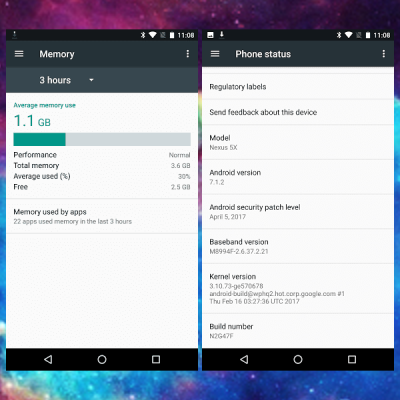
A screenshot of the status screen indicating the phone has detected the extended RAM.

A denizen of the venerable XDA forums reports that it is possible to upgrade the RAM of the Nexus 5X from 2GB to 4GB.  Having suffered the dreaded bootloop, [Cathair2906] decided to send their phone off to China for repair. The technician advised that since reflow of the CPU was necessary anyway, it makes sense to upgrade the RAM as well. This is due to the RAM actually being fitted directly on top of the CPU, a method amusingly known as Package on Package (SFW).

Upgrading RAM in the average computer is a relatively trivial task. Pop the case open, and you slide the new sticks into the extra slots. It’s not the same case for smartphones and tablets — in the endless quest for the slimmest form factor, all parts are permanently soldered. In addition, every device is essentially bespoke hardware; there’s no single overarching hardware standard for RAM in portable devices. You could find yourself searching high and low for the right chips, and if you do track them down, the minimum order quantity may very well be in the thousands.

Unless, of course, you had access to the Shenzhen markets where it’s possible to buy sample quantities of almost anything. Given access to the right parts, and the ability to solder BGA packages, it’s a simple enough job to swap a bigger RAM chip on top of the CPU during the repair.

It’s the sort of thing that’s trivial in Shenzhen, and almost mind-bogglingly impossible in the West. The price of the repair? About $60 USD. [Cathair2906] was even nice enough to share the address of the shop that did the work.

We’ve seen similar antics before – like this Nexus 5 storage upgrade to 64GB.

[via XDA Developers, thanks to Jack for the tip!]

Fix-A-Brick 2: Nexus 5X Rises From The Ashes

It was but two weeks ago when I told my story of woe —  the tale of an LG Nexus 5X that fell ill, seemingly due to a manufacturing fault at birth. I managed to disassemble it and made my way through a semi-successful attempt at repair, relying on a freezer and hairdryer to coax it back to life long enough to backup my data. Try as I might, however, I simply couldn’t get the phone running for more than ten minutes at a time.

All was not in vain, however! I was rewarded for documenting my struggles with the vast experience and knowledge of the wider Internet: “Hairdryers don’t get as hot as heatguns!”

It turned out I had just assumed that two similar devices, both relying on a hot bit of metal and a fan as their primary components, must be virtually identical if rated at a similar power draw. I was wrong! Apparently the average hairdryer stays well cooler than 150 degrees Celsius to avoid melting one’s silky locks or burning the skin. I even learned that apparently, wet hair melts at a lower temperature than dry hair. Who knew?

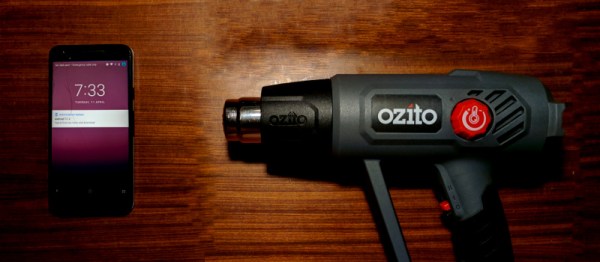
Armed with this knowledge, I rushed out and bought the cheapest heat gun I could find — around $50. Rated up to 600 degrees C, this was definitely going to be hotter than the hairdryer. With the prevailing opinion being that I had not applied enough heat in general, I decided to also increase the heating period to 90 seconds, up from a quick 30 second pass originally.

Continue reading “Fix-A-Brick 2: Nexus 5X Rises From The Ashes”

Fix-a-Brick: Fighting The Nexus 5X Bootloop

Oh Nexus 5X, how could you? I found my beloved device was holding my files hostage having succumbed to the dreaded bootloop. But hey, we’re hackers, right? I’ve got this.

It was a long, quiet Friday afternoon when I noticed my Nexus 5X was asking to install yet another update. Usually I leave these things for a few days before eventually giving in, but at some point I must have accidentally clicked to accept the update. Later that day I found my phone mid-way through the update and figured I’d just wait it out. No dice — an hour later, my phone was off. Powering up led to it repeatedly falling back to the “Google” screen; the dreaded bootloop.

Stages of Grief

I kept my phone on me for the rest of the night’s jubilant activities, playing with it from time to time, but alas, nothing would make it budge. The problem was, my Nexus still had a full day’s video shoot locked away on its internal flash that I needed rather badly. I had to fix the phone, at least long enough to recover my files. This is the story of my attempt to debrick my Nexus 5X.

Continue reading “Fix-a-Brick: Fighting The Nexus 5X Bootloop”

Blynk With Joy

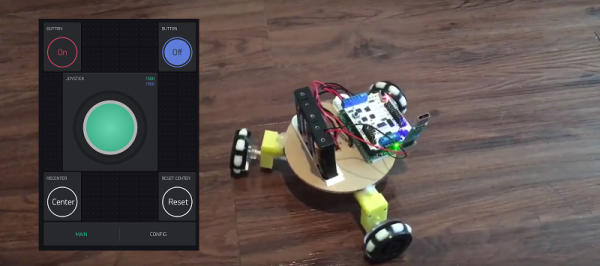
Last time, I talked about how my storage situation and my cheap nature led me to build an RC joystick controller with a cell phone app and an ESP8266. The key to making this easy was to use the GUI builder called Blynk to make a user interface for an Android or Apple phone. Blynk can communicate with the ESP8266 and makes the project relatively simple.

ESP8266 and Arduino IDE

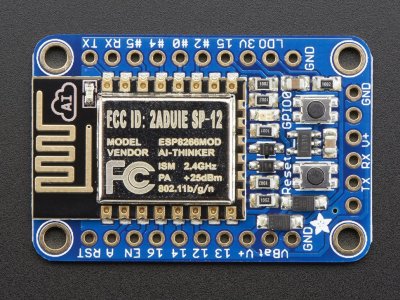
The ESP8266 Blynk code is straightforward. You do need to set up the Arduino IDE to build for the ESP8266. That can vary by board, but here’s the instructions for the board I was using (from Adafruit; see below).

adaesp

Depending on the type of ESP8266 device you are using, you may need a 3.3 V serial cable or some other means of getting the firmware into the device. For the Adafruit device I had, it has a 5 V-tolerant serial connection so a standard USB to serial dongle plugs right in. There’s also two switches on my device. To get into bootload mode, you have to push the one button down, hold it, and then press the reset button. Once you release the reset button you can release the other button. The red LED half-glows and the device is then waiting for a download.
Continue reading “Blynk With Joy”