Teardown: How Many Teddy Ruxpins Does It Take To Start A Coven?

Well, I did it. I conquered my childhood fear of talking bears and brought a vintage Teddy Ruxpin animatronic stuffed bear into my home. There were and still are plenty of his brethren both young and old to choose from on the auction sites, and when I saw this particularly carefree barefoot Teddy in his Hawaiian shirt and no pants, I was almost totally disarmed. Plus, the description promised a semi-working unit with a distorted voice, and who among us could resist a specimen in such condition? Maybe the tape deck motor is going out, or it just needs a new belt. Maybe the tape itself messed up, and Teddy is fine. I had to find out.

But let me back up a bit. If you don’t know what I’m talking about, Teddy Ruxpin was a revolutionary toy that dropped in 1985. It’s a talking teddy bear that reads stories aloud, all the while moving his eyes and mouth to the sounds. Along with Teddy came special cassette tapes, corresponding story books, and outfits. I wanted one when I was a kid, but was also kind of scared of them. Since they were so expensive — about $250 inflation-adjusted for the bear and a single tape / book / outfit, plus another $15 for four D cells — I never did get one in my youth.

Continue reading “Teardown: How Many Teddy Ruxpins Does It Take To Start A Coven?”

Enjoy This Animatronic Eyeball’s Smooth Moves

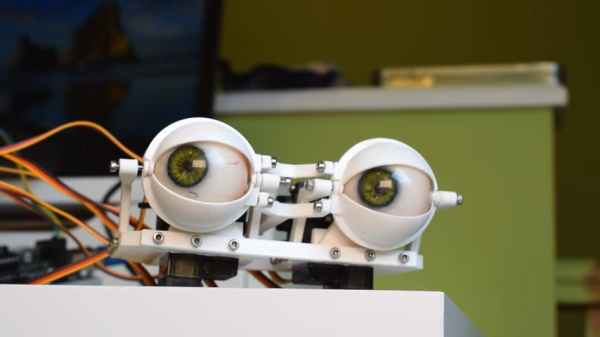
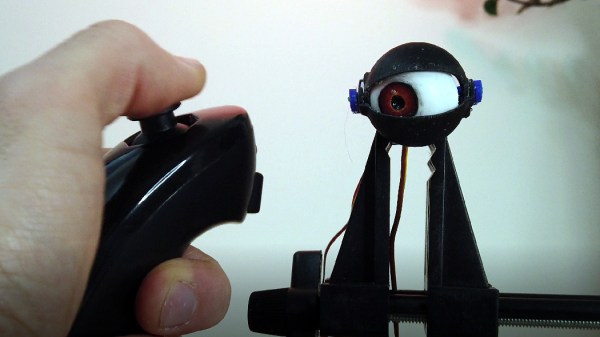
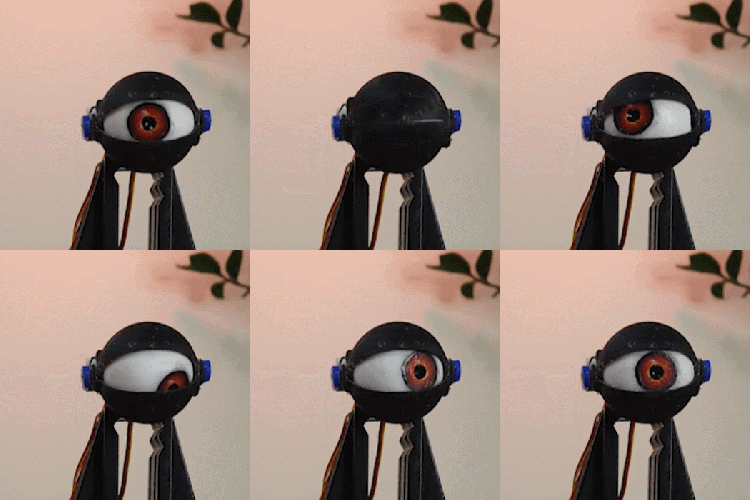
[Enza3D] shows off a surprisingly compact articulated animatronic eyeball that can be intuitively controlled with a Wii nunchuk controller. The design uses 3D printed parts and some tiny servos, and all of the necessary electronics can be easily purchased online. The mechanical design of the eye is very impressive, and [Enza3D] walks through several different versions of the design, the end result of which is a tidy little assembly that would fit nicely into masks, costumes, or other projects.

A Wii nunchuk is ideal for manual control of such a device, thanks to its ergonomic design and ease of interface (the nunchuk communicates over I2C, which is easily within the reach of even most modest of microcontrollers.) Of course, since driving servos is also almost trivial nowadays, it doesn’t look like working this into an automated project would pose much of a challenge.

The eyeball looks great, but if you want to try for yourself, accessing the design files and code will set you back $10 which might look attractive if an eye like this is the missing link for a project.

On the other hand, enjoying the video (embedded below) and getting ideas from [Enza3D]’s design notes will only cost you a few minutes.

Continue reading “Enjoy This Animatronic Eyeball’s Smooth Moves”

Peek Behind The Curtain Of This Robotic Mouse

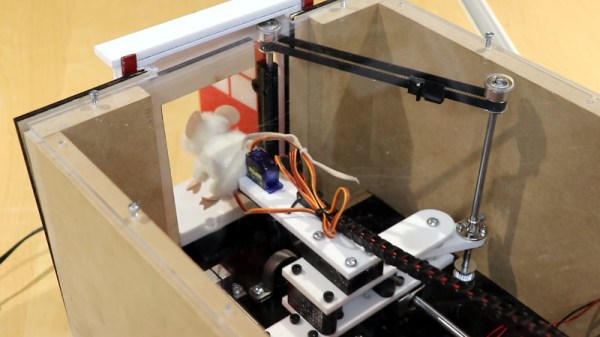
At first glance, this little animatronic mouse might seem like a fairly simple affair. A door opens, our rodent friend pops its head out, looks around, and goes back in. But just like in The Wizard of Oz, a strategically placed curtain is hiding the impressive array of gadgetry that makes the trick possible.

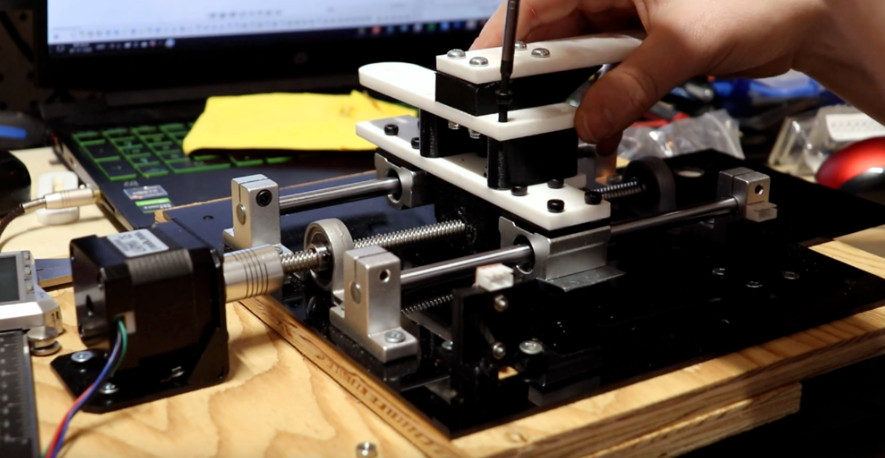
Creator [Will Donaldson] has put together a fantastic write-up of just what went into creating this little fellow, and we think you’ll be surprised at just how serious the mechanics involved are. Take for example the rig that provides horizontal motion with a NEMA 17 stepper motor mated to a 200 mm leadscrew and dual 8 mm rail assembly that would like right at home as part of a 3D printer.

The star of the show rides atop a beefy sliding carriage assembly made of printed components and acrylic, which is linked to the door via a GT2 timing belt and pulley in such a way that it automatically opens and closes at the appropriate time. To inject some life into the puppet, [Will] stuffed it with a pair of SG90 servos in a sort of pan-and-tilt arrangement: the rear servo turns the mouse’s body left and right, while the forward one moves the head up and down.

An Arduino Uno controls the servos, as well as the stepper motor by way of a TB6600 controller, and optical limit switches are used to make sure nothing moves out bounds. [Will] is keeping the CAD files and source code to himself for the time being, though we imagine a sufficiently dedicated mouseketeer could recreate the installation based on the available information.

This would appear to be the first animatronic mouse to grace the pages of Hackaday, but we’re certainly no strangers to seeing folks imbue inanimate objects with lifelike motion.

Continue reading “Peek Behind The Curtain Of This Robotic Mouse”

ESP32-Cam Makes A Dandy Motion Detector

Halloween is right around the corner and just about every Halloween project needs some kind of motion sensor. Historically, we’ve used IR and ultrasonic sensors but [Makers Mashup] decided to use an ESP32-Cam as a motion sensor in his latest animatronic creation. You can see a video of the device and how it works below.

The project is a skull that follows you around with a few degrees of motion on a stepper motor. There’s a 3D-printed enclosure to make the hardware assembly easy. The base software was borrowed from [Eloquent Arduino].

Continue reading “ESP32-Cam Makes A Dandy Motion Detector”

Leap Motion Controls Hands With No Glove

It isn’t uncommon to see a robot hand-controlled with a glove to mimic a user’s motion. [All Parts Combined] has a different method. Using a Leap Motion controller, he can record hand motions with no glove and then play them back to the robot hand at will. You can see the project in the video, below.

The project seems straightforward enough, but apparently, the Leap documentation isn’t the best. Since he worked it out, though, you might find the code useful.

An 8266 runs everything, although you could probably get by with less. The Leap provides more data than the hand has servos, so there was a bit of algorithm development.

We picked up a few tips about building flexible fingers using heated vinyl tubing. Never know when that’s going to come in handy — no pun intended. The cardboard construction isn’t going to be pretty, but a glove cover works well. You could probably 3D print something, too.

The Unity app will drive the hand live or can playback one of the five recorded routines. You can see how the record and playback work on the video.

This reminded us of another robot hand project, this one 3D printed. We’ve seen more traditional robot arms moving with a Leap before, too. Continue reading “Leap Motion Controls Hands With No Glove”

Amazing STARGᐰTE With DHD And Infinity Mirror Wormhole

The Stargate Universe franchise has spawned numerous movies, serials, books, comics and games since 1994, and has been a favorite among science fiction fans. Prop makers and hackers often try building their own Stargate replica – the Einstein–Rosen bridge portal that allows almost instantaneous travel between two distant locations. Building an authentic looking prop requires a lot of attention to detail, and [Kristian]’s The Stargate Project is an amazingly well built rendition of the portal.

[Kristian]’s Stargate is mostly 3D printed and features a symbol ring, with chevrons that lock and light up when engaged. When the correct address has been dialled in, the wormhole is established, via an infinity mirror effect that uses 122 RGB LEDs. The Dial Home Device (DHD) is a replica of the original pedestal shaped computer, with two concentric sets of 19 buttons and a central activation button.

The Stargate ring is assembled from multiple 3D printed in sections, and measures 390 mm across. The seven Chevrons move along 3D printed rack-and-pinion gears, driven by geared micro-motors. The symbol ring is driven by a separate NEMA14 stepper motor. A Raspberry Pi with three piggy backed motor hats controls the various motors and LEDs. A USB sound card and a powered speaker provide audio effects while dialling. Once a worm hole is established, random audio snippets are played. The wormhole is maintained for 38 minutes, after which the Stargate powers down.

The Dial Home Device is built around a custom, circular PCB which holds the keypad buttons, LEDs and an ATmega 32u4 micro-controller which connects to the Raspberry Pi via USB. The 39 LEDs are APA102C’s so they only need two GPIO pins. For the keyboard, four banks of nine buttons and another bank of three are connected via a resistive ladder to the analog GPIO’s. This allows all 39 buttons to be connected via five analog inputs and was probably done to simplify PCB track layout. The back lit button key caps were printed in two parts. The translucent bases are covered with the opaque symbol caps.

Making a prop like this look like the real deal requires a lot of effort in painting the various parts, and this shows in [Kristian]’s final result, right down to the stone platform on which the Stargate sits. The one improvement we would like to see is a wireless DHD, just like it’s supposed to be. Doing so shouldn’t be too difficult, and losing the USB tether between the Stargate and its DHD would be a great upgrade to this amazing project. Check out the videos after the break, and there are many more on [Kristian]’s project page.

And if you are a fan of the franchise, then the amazingly Droolworthy Animatronic Stargate Horus Helmet is an excellent companion project to this Stargate.

Continue reading “Amazing STARGᐰTE With DHD And Infinity Mirror Wormhole”

Animatronic Saturn V Launch Tower Sends Lego Model To The Moon

When it comes to their more adult-oriented models, Lego really knocked it out of the park with their Saturn V rocket model. Within the constraints of the universe of Lego parts, the one-meter-tall model is incredibly detailed, and thousands of space fans eagerly snapped up the kit when it came out.

But a rocket without a launchpad is just a little sad, which is why [Mark Howe] came up with this animatronic Saturn V launch pad and gantry for his rocket model. The level of detail in the launchpad complements the features of the Saturn V model perfectly, and highlights just what it took to service the crew and the rocket once it was rolled out to the pad. As you can imagine, extensive use of 3D-printed parts was the key to getting the look just right, and to making parts that actually move.

When it’s time for a launch, the sway control arm and hammerhead crane swing out of the way under servo control as the Arduino embedded in the base plays authentic countdown audio. The crew catwalk swings away, the engines light, and the service arms swing back. Then for the pièce de résistance, the Saturn V begins rising slowly from the pad on five columns of flame. [Mark] uses a trio of steppers driving linear actuators to lift the model; the flame effect is cleverly provided by strings of WS2812s inside five clear plastic tubes. We have to say it took some guts to put the precious 1,969-piece model on a lift like that, but the effect was well worth the risk.

This project has a great look and is obviously a labor of love, and a great homage to the Apollo program’s many successes. We’ve got a ton of other Apollo-era hacks on our pages, including a replica DSKY, a rejuvenated AGC, and a look behind the big boards of mission control.

Continue reading “Animatronic Saturn V Launch Tower Sends Lego Model To The Moon”