Compound Press Bends, Punches And Cuts Using 3D Printed Plastic

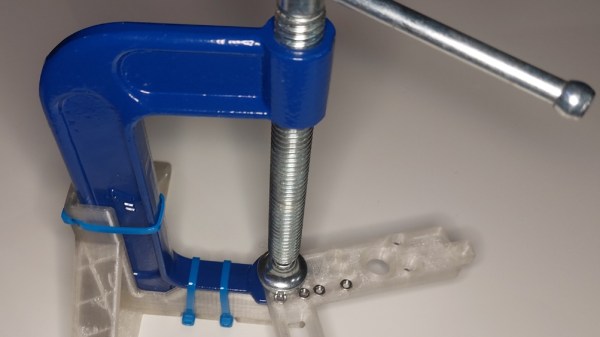
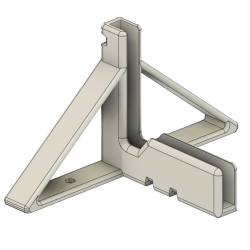
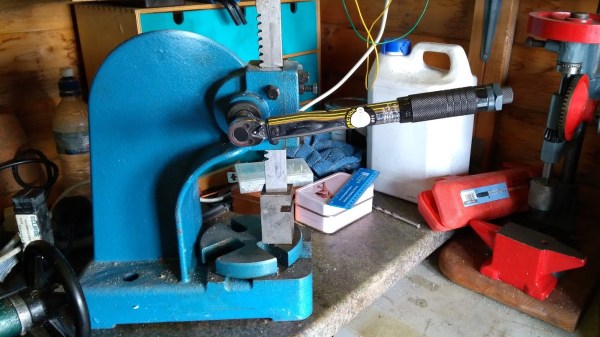
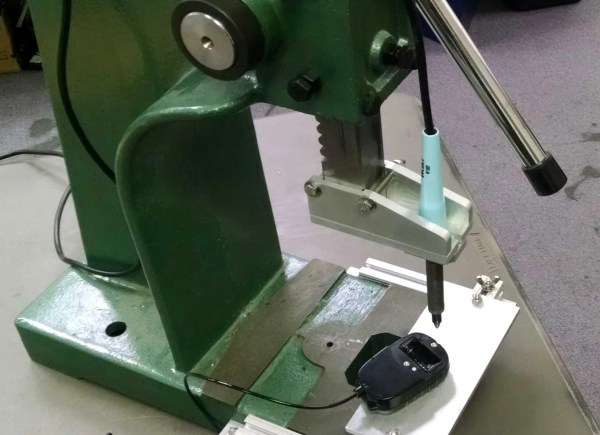
It’s not quite “bend, fold or mutilate” but this project comes close– it actually manufactures a spring clip for [Super Valid Designs] PETAL light system. In the video (embedded below) you’ll see why this tool was needed: by-hand manufacturing worked for the prototype, but really would not scale.

Two examples of the spring in question, embedded in the 3D printed light socket. There’s another pair you can’t see.

The lights themselves might be worthy of a post, being a modular, open source DMX stage lighting rig. Today though we’re looking at how they are manufactured– specifically how one part is manufactured. With these PETAL lights, the lights slot into a base station, which obviously requires a connection of some sort. [Super Valid Designs] opted for a spring connector, which is super valid.

It’s also a pain to work by hand: spring steel needed to be cut to length, hole punched, and bent into the specific shape required. The hand-made springs always needed adjustment after assembly, too, which is no good when people are giving you money for objects. Even when using a tent-pole spring that comes halfway to meeting their requirements, [Super Valid Designs] was not happy with the workflow. Continue reading “Compound Press Bends, Punches And Cuts Using 3D Printed Plastic”

Threaded Insert Press Is 100% 3D Printed

Sometimes, when making a 3D printed object, plastic just isn’t enough. Probably the most common addition to our prints is the ubiquitous brass threaded inset, which has proven its worth time and again over the years in providing a secure screw attachment point with less hassle than a captive nut. Of course to insert these bits of machined brass, you need to press them in, and unless you’ve got a very good hand with a soldering iron it’s usually a good idea to use a press of some sort. [TimNummy]  shows us that, ironically enough, making such a press is perfectly doable using only printed parts. Well, save for the soldering iron, of course.

He calls it the Superserter. Not only is it 100% printed plastic, but the entire design fits on a single 256 mm by 256 mm bed. In his case it was done on the Bambulab X1C, but it’s a common enough print bed size and can be printed without any supports. It’s even sized to fit the popular Gridfinity standard for a neat and tidy desk and handy bin placement for the inserts.

[TimNummy] clearly spent some time thinking about design for 3D printed manufacturing in order to create an assembly that does not need linear rails, sliders, or bearings as other press projects often do. The ironic thing is that if that same amount of effort went into other designs, it might eliminate the need for threaded inserts entirely.

If you haven’t delved into the world of threaded inserts, we put up a how-to-guide a few years ago. If you’re wondering if you can get away with just printing threads, the answer is “maybe”– we highlighted a video comparing printed threads with different inserts a while back to get you started thinking about the design limitations there.

Continue reading “Threaded Insert Press Is 100% 3D Printed”

Upside-down c-clamp held in a frame, forming a crude press

C-Clamp Becomes Light-Duty Arbor Press

[ThingaUser] made a tool to solve a specific problem of theirs, but the design also happens to be a pretty good way to turn a c-clamp into a poor man’s light duty arbor press.

The frame is made for a common 4-inch c-clamp.

The problem they had was a frequent need to press nuts and occasionally bearings into other parts. Some kind of press is really the best tool for the job, but rather than buy a press, they opted to make their own solution. By designing and 3D printing an adapter for a common 4-inch c-clamp, a simple kind of light duty press was born.

Sure, one has to turn the handle on the clamp to raise and lower the moveable jaw, and that’s not the fastest operation. But the real value in the design is that the clamp can now stand by itself on a tabletop, leaving the operator to dedicate one hand to manipulating the part to be pressed, while twisting the clamp’s handle with the other hand. There’s no need for a third hand to keep the clamp itself stable in the process. As a bonus, it can print without supports and the clamp secures with zip ties; no other fasteners or glue needed.

Not all c-clamps are the same, so there is a risk that this frame that fits [ThingaUser]’s clamp might not fit someone else’s. In those cases, it’s best to have access to not just the STL file, but also to a version in a portable CAD format like STEP to make it easy to modify. But there are still ways to make changes to an STL that isn’t quite right.

You Bring It, This Blings It: Retrofitting A Hot Foil Stamping Machine

Hot foil stamping is a method often used to embellish and emboss premium print media. It’s used on things like letterhead and wedding invitations to add a touch of luxury. The operation is actually quite simple, where a custom die is heated, pressed into a heat transfer foil, and then transferred on to the print media. Some of the very first manuscripts used gold leaf embossing to decorate intricate calligraphy. You can also see it often used to decorate the sides of religious texts.

Professional foil stamping machines are often pricey and the cheaper ones you can get from eBay are usually poorly made. [Lindsay Wilson] found this out when he purchased a low-cost hot foil stamping machine that was too difficult to use reliably. It got shelved for years until he had another hot foil stamping project. This time he was prepared. He took the machine apart and robust-ified it by attaching it to a heavy-duty arbor press. He also retrofit the heating assembly with his own temperature controller to improve the accuracy for the foils he wanted to use.

Continue reading “You Bring It, This Blings It: Retrofitting A Hot Foil Stamping Machine”

Arbor Press Modded For Applying Specific Force

Arbor presses are simple and effective tools made for a particular task: exerting force in a specific spot. A 1-ton arbor press fits on a desktop and is very affordable, but doesn’t offer a lot of particularly fine control over the ram beyond lowering and raising it. [concreted0g] got to thinking about ways to gain more control and knowledge about the amount of force being applied, and made a simple modification to combine his press with a torque wrench.

He removed the spindle which raises and lowers the ram, and drilled and tapped it to fit a bolt. Now, by attaching a torque wrench to the bolt and using the wrench as the handle for lowering the ram, he can take advantage of the wrench’s ability to break at set amounts of force. As a result, he has a repeatable way to accurately apply specific amounts of force with a tool that usually lacks this ability. It looks like this mod is limited to lower forces only (too much could shear off the bolt head, after all) but it combines two tools in an unusual way to gain an ability that didn’t exist before, which is great to see. Mods and presses seem to go very well together; don’t miss this DIY thermal insert add-on for an arbor press, and 3D printed dies for a press brake turned out to be remarkably durable and versatile, not to mention economical.

DIY Thermal Insert Press

You might not know what a threaded insert is, but chances are you’ve seen one before. Threaded inserts are small metal (typically brass) inserts that are pressed into plastic to give a strong point of attachment for bolts and screws. These inserts are a huge step up from screwing or bolting directly into tapped plastic holes since the brass threads are very strong compared to the plastic. The only major downside to these inserts is that the press to install them is incredibly expensive. Thankfully, [Alex Rich] came up with a cheap solution: a modified soldering iron mounted to an Arbor press.

Commercial threaded insert presses typically use ultrasonic welding or heat welding to fuse inserts with plastic. [Alex] chose the simple route and went with heat welding, which (as you might imagine) is way simpler than ultrasonic welding. To provide the heat, [Alex] mounted a 100W Weller soldering iron to the press, which he says handles the impact with no problem. Unfortunately the copper tips of the Weller just wouldn’t hold up to the impact, so [Alex] made his own tips out of some brass he turned on a lathe.

If, like most people, you don’t have the capability of making injection-molded cases, let alone an Arbor press on hand, you’re not out of luck! Using this same technique people have successfully added thermal inserts to 3d-printed parts using a soldering iron and much smaller DIY presses. Have any ideas on how you could use thermal inserts in your 3d prints? Let us know in the comments.