[Gurpreet] fell in love with the peaceful, floaty theme from the Avatar series and bought a kalimba so he could hear it resonate through his fingertips. He soon realized that although it’s nice to play the kalimba, it would be a lot cooler if it played itself. Then he could relax and enjoy the music without wearing out his thumbs.
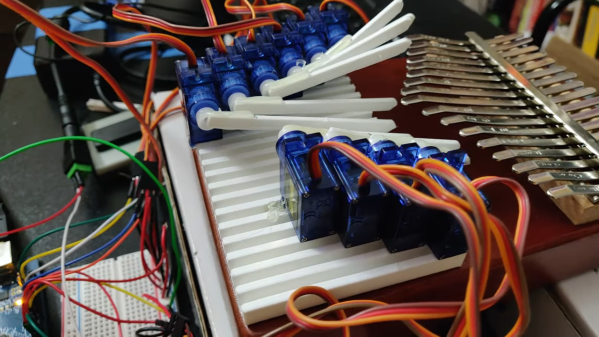
After doing a bit of experimentation with printing tine-plucking extensions for the servo horns, [Gurpreet] decided to start the design process by mounting the servos on a printed base. The servos are slotted into place by their mounting tabs and secured with hot glue. We think this was a good choice — it’s functional and it looks cool, like a heat sink.
[Gurpreet]’s future plans include more servos to pluck the rest of the tines, and figuring out how feed it MIDI and play it real time. For the demo after the break, [Gurpreet] says he lapel mic’d the kalimba from the back and cut out the servo noise with Audacity, but ultimately wants to figure out how to quiet them directly. He’s going to try lubing the gears and making a sound-dampening enclosure with foam, but if you have any other ideas, let him know down below.
We don’t see too many kalimba projects around here, but here’s one connected to a Teensy-based looper.