Car as a computer mouse

Turning A Car Into A Computer Mouse

[William Osman] and [Simone Giertz] have graced our pages before, both with weird, wacky and wonderful hacks so it’s no surprise that when they got together they did so to turn Simone’s car into a computer mouse. It’s trickier than you might think.

They started by replacing the lens of an optical mouse with a lens normally used for a security camera. Surprisingly, when mounted to the car’s front bumper it worked! But it wasn’t ideal. The problem lies in that to move a mouse cursor sideways you have to move the mouse sideways. However, cars don’t move sideways, they turn by going in an arc. Move your mouse in an arc right now without giving it any sideways motion and see what happens. The mouse cursor on the screen moves vertically up or down the screen, but not left or right. So how to tell if the car is turning? For that, they added a magnetometer. The mouse then gives the distance the car moved and the magnetometer gives the heading, or angle. With some simple trigonometry, they calculate the car’s coordinates.

The mouse click is done using the car’s horn, but details are vague there.

And yes, using the carmouse is as fun as it sounds, though we still don’t recommend texting while driving using this technique. Watch them in the videos below as they write an email and drive a self-portrait of the car.

Continue reading “Turning A Car Into A Computer Mouse”

Underwater Logging For Science

Logging data with an Arduino is old-hat for most Hackaday readers. However, [Patricia Beddows] and [Edward Mallon] had some pretty daunting requirements. Their sensors were going underground and underwater as part of an effort to study conditions underwater and in caves. They needed to be accessible, yet rugged. They didn’t want to use batteries that would be difficult to take on airplanes, but also wanted more than a year of run time. You can buy all that, of course, if you are willing to pay the price.

Instead, they used off-the-shelf Arduino boards connected together inside PVC housings. Three alkaline AA batteries are compact and give them more than a year of run time. They wrote a journal paper to help other scientists use the same techniques for the Sensors journal published by the Multidisciplinary Digital Publishing Institute.

Continue reading “Underwater Logging For Science”

Arduino Keyboard Is Gorgeous Inside And Out

While the vast majority of us are content to plod along with the squishy chiclet keyboards on our laptops, or the cheapest USB membrane keyboard we could find on Amazon, there’s a special breed out there who demand something more. To them, nothing beats a good old-fashioned mechanical keyboard, where each key-press sounds like a footfall of Zeus himself. They are truly the “Chad” of the input device world.

But what if even the most high end of mechanical keyboards doesn’t quench your thirst for spring-loaded perfection? In that case, the only thing left to do is design and build your own. [Matthew Cordier] recently unveiled the custom mechanical keyboard he’s been working on, and to say it’s an elegant piece of engineering is something of an understatement. It may even look better inside than it does on the outside.

The keyboard, which he is calling z.48, is based around the Arduino Pro Micro running a firmware generated on kbfirmware.com, and features some absolutely fantastic hand-wiring. No PCBs here, just a rainbow assortment of wire and the patience of a Buddhist monk. The particularly attentive reader may notice that [Matthew] used his soldering iron to melt away the insulation on his wires where they meet up with the keys, giving the final wiring job a very clean look.

Speaking of the keys, they are Gateron switches with DSA Hana caps. If none of those words mean anything to you, don’t worry. We’re through the Looking Glass and into the world of the keyboard aficionado now.

Finally, the case itself is printed on a CR-10 with a 0.3 mm nozzle and 0.2 mm layers giving it a very fine finish. At 70% infill, we imagine it’s got a good deal of heft as well. [Matthew] mentions that a production case and a PCB are in the cards for the future as he hopes to do a small commercial run of these boards. In the meantime we can all bask in the glory of what passes for a prototype in his world.

We’ve seen some exceptionally impressive mechanical keyboards over the years, including the occasional oddity like the fully 3D printed one and even one that inexplicably moves around. But this build by [Matthew] has to be one of the most elegant we’ve ever come across.

The Furby Organ

The Furby Organ

Sometimes you have an idea that is so brilliant and so crazy that you just have to make it a reality. In 2011, [Look Mum No Computer] drew up plans in his notebook for a Furby organ, an organ comprised of a keyboard and a choir of Furbies. For those who don’t know what a Furby is, it’s a small, cute, furry robotic toy which speaks Furbish and a large selection of human languages. 40 million were sold during its original production run between 1998 and 2000 and many more since. Life intervened though, and, [LMNK] abandoned the Furby organ only to recently take it up again.

He couldn’t get a stable note out of the unmodified Furbies so he instead came up with what he’s calling the Furby Forman Fusion Synthesis. Each Furby is controlled by a pair of Ardunios. One Arduino sequences parts inside the Furby and the other produces a formant note, making the Furby sing vowels.

We love the label he’s given for what would otherwise be the power switch, namely the Collective Awakening switch. Flicking it causes all 44 (we count 45 but he says 44) Furbies to speak up while moving their ears, eyes, and beaks. Pressing the Loop switch makes them hold whatever sound they happen to be making. The Vowel dial changes the vowel. But you’ll just have to see and hear it for yourself in the videos below. The second video also has construction details.

Continue reading “The Furby Organ”

Debugging An Arduino With An Arduino

As every Hackaday reader knows, and tells us at every opportunity in the comments, adding an Arduino to your project instantly makes it twice as cool. But what if, in the course of adding an Arduino to your project, you run into a problem and need to debug the code? What if you could use a second Arduino to debug the first? That would bring your project up to two Arduinos, instantly making it four times as awesome as before you started! Who could say no to such exponential gains?

Debugging an ATTiny85

Not [Wayne Holder], that’s for sure. He writes in to let us know about a project he’s been working on for a while that allows you to debug the execution of code on an Arduino with a second Arduino. In fact, the target chip could even be another AVR series microcontroller such as a the ATTiny85. With his software you can single-step through the code, view and modify values in memory, set breakpoints, and even disassemble the code. Not everything is working fully yet, but what he has so far is very impressive.

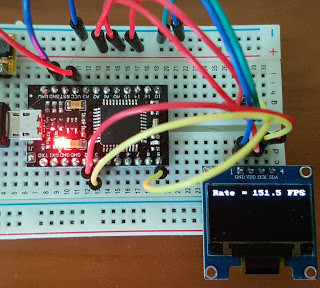
The trick is exploiting a feature known as “debugWIRE” that’s included in many AVR microcontrollers. Unfortunately documentation on this feature is hard to come by, but with some work [Wayne] has managed to figure out how most of it works and create an Arduino Sketch that lets the user interact with the target chip using a simple menu system over the serial monitor, similar to the Bus Pirate.

[Wayne] goes into plenty of detail on his site and in the video included after the break, showing many of the functions he’s got working so far in his software against an ATTiny85. If you spend a lot of time working on AVR projects, this looks like something you might want to keep installed on an Arduino in your tool bag for the future.

Debugging microcontroller projects can be a huge time saver when your code starts running on real hardware, but often takes some hacking to get working.

Continue reading “Debugging An Arduino With An Arduino”

Circuit Bent Casio SK-1 Gets An Arduino Brain

The Casio SK-1 keyboard is fairly well-known in the “circuit bending” scene, where its simple internals lend themselves to modifications and tweaks to adjust the device’s output in all sorts of interesting ways. But creating music via circuit bending the SK-1 can be tedious, as it boils down to fiddling with the internals blindly until it sounds cool. [Nick Price] wanted to do something a bit more scientific, and decided to try replacing his SK-1’s ROM with an Arduino so he could take complete control it.

Replacing the ROM chip with header pins.

That’s the idea, anyway. Right now he’s gotten as far as dumping the ROM and getting the Arduino hooked up in place of it. Unfortunately the resulting sound conjures up mental images of a 56K modem being cooked in a microwave. Clearly [Nick] still has some work ahead of him.

For now though, the progress is fascinating enough. He was able to pull the original NEC 23C256 chip out of the keyboard and read its contents using an Arduino and some code he cooked up, and he’s even put the dump online for any other SK-1 hackers out there. He then wrote some new code for the Arduino to spit data from the ROM dump back to the keyboard when requested. In theory, it should sound the same as before, but with the added ability to “forge” the data going back to the keyboard to make new sounds.

The result is what you hear in the video linked after the break. Not exactly what [Nick] had in mind. After some snooping with the logic analyzer, he believes the issue is that the Arduino can’t respond as fast as the original NEC chip did. He’s now got an NVRAM chip on order to replace the original NEC chip; the idea is that he can still use the Arduino to reprogram the NVRAM chip when he wants to play around with the sound.

We’ve covered some pretty fancy circuit bent instruments here in the past, but if you’re looking for something a bit easier to get your feet wet we ran a start-to-finish guide back in the Ye Olden Days of 2011 which should be helpful.

Continue reading “Circuit Bent Casio SK-1 Gets An Arduino Brain”

I’ll Have A Beer With A Compliment Chaser

[Andrew MacPherson] found out that compliments, even insincere ones, make the recipients feel better. So, he put together a thermal printer and a hilariously large button with an Arduino and created a machine that prints compliments. And where best to put a machine that prints out compliments? The local bar, where else?

An Arduino Nano clone runs the show connected to a thermal printer. The Nano clone didn’t like the 9 volt power supply, so a buck converter was used to reduce the voltage down to 5 volts for the Nano, while the printer gets the full power. During initial trials, the printer was very slow to print and it took [Andrew] a while to adjust the parameters – after tweaking the speed as well as the heating time, he was able to get the printer working without burning the paper or taking forever to print.

Once the machine was working, it was time to add a button. A large, light-up button was connected and glued to the side of the printer. More glue was used (after some “modifications” to the printer chassis) to secure a barrel connector for the power adapter.

[Andrew] decided that since he’s down at his favorite bar quite a lot, he’d set it up there. The customers could push the button and receive a compliment while drowning their sorrows. He got a friend of his who’s a copywriter to come up with some nicely written compliments to print out. The printer was such a hit that the bartender sent [Andrew] a message on Facebook saying so. If you have a thermal printer lying around, you can use this tutorial to connect it to the internet, or, if you don’t have one, you can build your own.

Continue reading “I’ll Have A Beer With A Compliment Chaser”