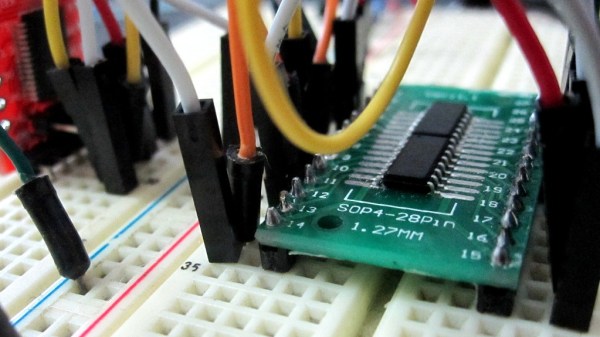
Being An SPI Slave Can Be Trickier Than It Appears

Interfacing with the outside world is a fairly common microcontroller task. Outside of certain use cases microcontrollers are arguably primarily useful because of how easily they can interface with other devices. If we just wanted to read and write some data we wouldn’t have gotten that Arduino! But some tasks are more common than others; for instance we’re used to being on the master side of the interface equation, not the slave side. (That’s the job for the TI engineer who designed the temperature sensor, right?) As [Pat] discovered when mocking out a missing SPI GPIO extender, sometimes playing the other role can contain unexpected difficulties.

The simple case for a SPI slave is exactly that: simple. SPI can be wonderful in its apparent simplicity. Unlike I2C there are no weird addressing schemes, read/write bits, stop and start clock conditions. You toggle a clock line and a bit of data comes out, as long as you have the right polarity schemes of course. As a slave device the basic algorithm is of commensurate complexity. Setup an interrupt on the clock pin, wait for your chip select to be asserted, and on each clock edge shift out the next bit of the current word. Check out [Pat]’s eminently readable code to see how simple it can be.
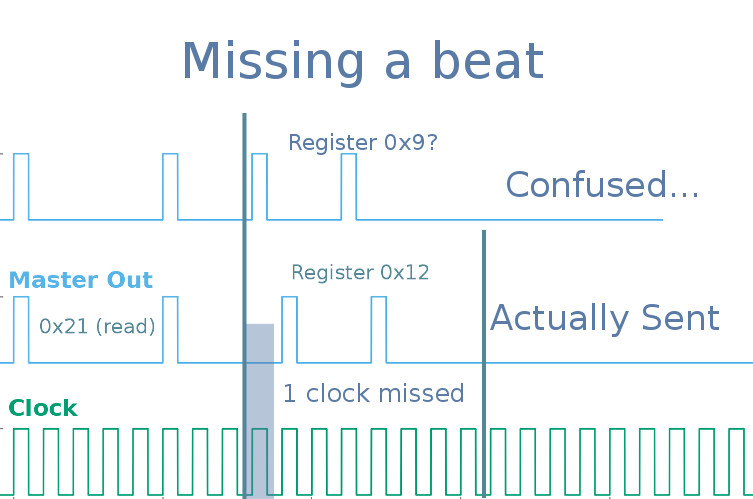
But that last little bit is where the complexity lies. When you’re the master it’s like being the apex predator, the king of the jungle, the head program manager. You dictate the tempo and everyone on the bus dances to the beat of your clock edge. Sure the datasheet for that SRAM says it can’t run faster than 8 MHz but do you really believe it? Not until you try driving that clock a little quicker to see if there’s not a speedier transfer to be had! When you’re the slave you have to have a bit ready every clock edge. Period. Missing even a single bit due to, say, an errant print statement will trash the rest of transaction in ways which are hard to detect and recover from. And your slave code needs to be able to detect those problems in order to reset for the next transaction. Getting stuck waiting to send the 8th bit of a transaction that has ended won’t do.

Check out [Pat]’s very friendly post for a nice refresher on SPI and their discoveries working through the problems of building a SPI slave. There are some helpful tips about how to keep things responsive in a device performing other tasks.
Return Of The Logic Probe

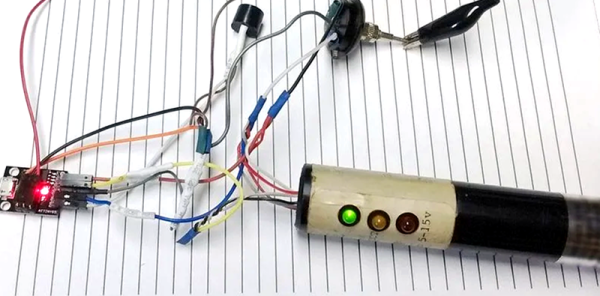
We live in a day when it is very inexpensive to buy an oscilloscope, especially one with modest performance that hooks to a laptop. However, there was a time when even a surplus scope was out of reach for many people who liked to build things. A common alternative was the logic probe. At the low end, this could be an inverter and an LED, although it was more common to have a little extra circuitry to actually do a comparison to a reference voltage and present some indication of fast pulses — you might not be able to tell the frequency of a clock, but you could tell it wasn’t stuck. Of course, today with a microcontroller you can make a very sophisticated probe with less circuitry than a classic probe. We’ve seen a few takes on this and the latest is the DigiLogicProbe from [TheRadMan].

The probe is just a ATtiny85 board with a handful of components. A resistor and diode help protect the probe and the circuit under test. There are also a few LEDs and a buzzer. The rest of the project is software.

Continue reading “Return Of The Logic Probe”

Drawing On An OLED With An ATtiny85, No RAM Buffers Allowed

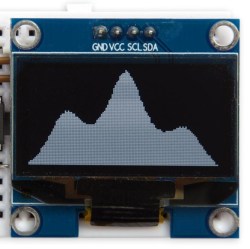
Small I2C OLED displays are common nowadays, and thanks to the work of helpful developers, there are also a variety of graphics libraries for using them. Most of them work by using a RAM buffer, which means that anything one wants to draw gets written to a buffer representing the screen, and the contents of that buffer are copied out to the display whenever it is updated. The drawback is that for some microcontrollers, there simply isn’t enough RAM for this approach to work. For example, a 128×64 monochrome OLED requires a 1024 byte buffer, but that’s bad news if a microcontroller has only 512 bytes of RAM in total like the ATtiny85. [David Johnson-Davies] has two solutions: a Tiny Graphics Library that needs no RAM buffer and an even slimmer Tiny Function Plotter, which we’ll discuss in order.

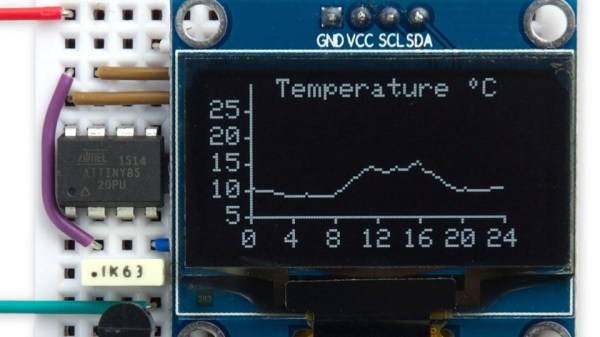
Tiny Function Plotter works on both SSD1306 and SH1106-based displays.

[David]’s Tiny Graphics Library works by taking advantage of a feature of SH1106 driver-based displays: the ability to read the display over I2C as well as write to it. With the ability to perform read-modify-write on a section at a time, using a large RAM buffer can be avoided. The only catch is that the library only works with OLEDs using the SH1106, but the good news is that these are very common at the usual Chinese resellers. ([David] notes that SH1106 is sometimes misspelled as “SSH1106”, so keep that in mind when searching.)

What about all those other SSD1306-based OLED displays out there? Are they out of luck? Not quite. [David] has one more trick up his sleeve: his Tiny Function Plotter works on the SSD1306 and also requires no RAM buffer. It’s unable to write text, but it can easily handle drawing graphs plotting things like values over time while needing very little overhead.

Another approach we’ve seen for using OLEDs driven by microcontrollers with limited memory is the solution [Michael] used in Tiny Sideways Tetris, which was done in part by realizing the smallest screen element he needed was a 4×4 block, and using that premise as the basis of a simple compression scheme.

I2C Bootloader For ATtiny85 Lets Other Micros Push Firmware Updates

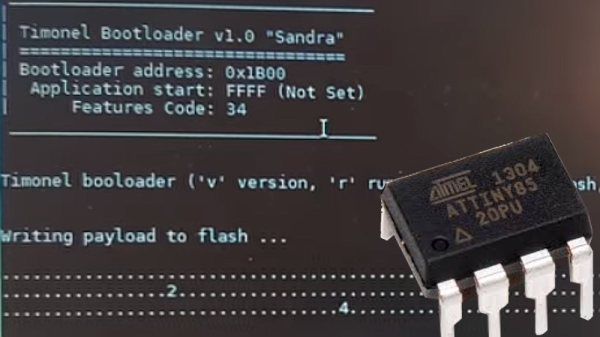
There are a few different ways of getting firmware onto one of AVR’s ATtiny85 microcontrollers, including bootloaders that allow for firmware to be updated without the need to plug the chip into a programmer. However, [casanovg] wasn’t satisfied with those so he sent us a tip letting us know he wrote an I2C bootloader for the ATtiny85 called Timonel. It takes into account a few particulars of the part, such as the fact that it lacks a protected memory area where a bootloader would normally reside, and it doesn’t have a native I2C interface, only the USI (Universal Serial Interface). He’s just released the first functional version for the ATtiny85, but there’s no reason it couldn’t be made to work with the ATtiny45 and ATtiny25 as well.

Timonel is designed for systems where there is a more powerful microcontroller or microprocessor running the show (such as an ESP8266, Arduino, or even a board like a Raspberry Pi.) In designs where the ATtinys are on an I2C bus performing peripheral functions such as running sensors, Timonel allows the firmware for these peripheral MCUs to be updated directly from the I2C bus master. Embedded below is a video demo of [casanovg] sending simple serial commands, showing a successful firmware update of an AVR ATtiny85 over I2C.

Continue reading “I2C Bootloader For ATtiny85 Lets Other Micros Push Firmware Updates”

Less Is More: A Micromatrix Display In A Square Inch

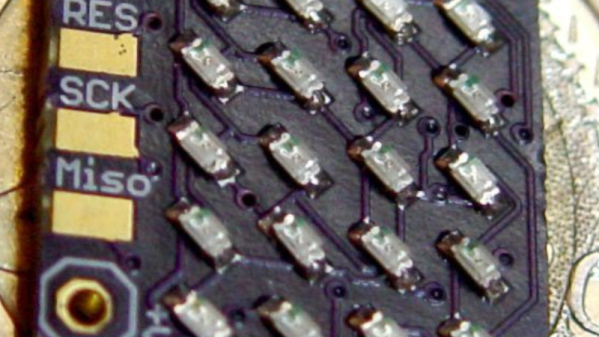
In your living room, the big display is what you want. But in an embedded project, often less is more. We think [bobricius] will agree since he submitted a tiny 4×5 LED display into our square inch challenge. The board features an ATtiny CPU and twenty SMD LEDs in a nice grid. You can see them in action, scrolling to some disco music in the video below.

There is plenty of room left in the CPU for bigger text strings — the flash memory is just over 10% full. A little side-mounted header makes it easy to program the chip if you want to change anything.

Continue reading “Less Is More: A Micromatrix Display In A Square Inch”

The Smaller, Tinier Arduino Platform

While many of the Arduino platforms are great tools for gaining easy access to microcontrollers, there are a few downsides. Price and availability may be the highest on the list, and for those reasons, some have chosen to deploy their own open-source Arduino-compatible boards.

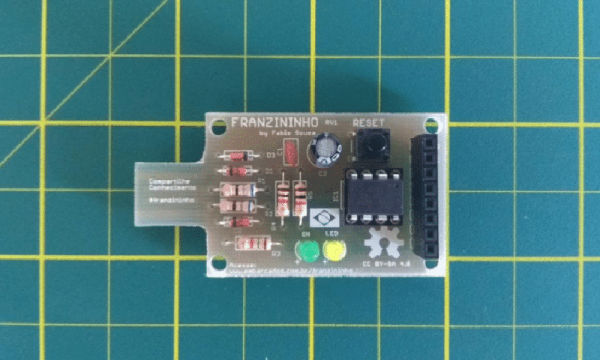
The latest we’ve seen is the Franzininho, an Arduino Gemma-like board that’s based on the ATtiny85, a capable but tiny microcontroller by Atmel in a compact 8-pin configuration. This board has everything the Gemma has, including a built-in LED and breakout pins. One of the other perks of the Franzininho over the Gemma is that everything is based on through-hole components, making the assembly much easier than the surface mount components of the Gemma.

It’s worth noting that while these boards are open source, the Arduinos are as well. It’s equally possible to build your own 100% identical Arduino almost as easily. If you want more features, you can add your own by starting from one of these platforms and do whatever you want with it, like this semi-educational Atmel breakout board.

Thanks to [Clovis] for the tip!

32 Shades Of Gray

The ATtiny85 is an incredible piece of engineering. In just eight pins, you get a microcontroller with just enough oomph to do some really heavy lifting. You get an Open Source toolchain, and if you’re really good, you can build your own programmer. It does have its limits though; there isn’t a whole lot of Flash, and of course you’re always going to need a few extra pins.

For his Hackaday Prize entry, [danjovic] is pushing whatever limits are left with the ‘tiny85. He’s using it as a test pattern generator, pushing out pixels to any old TV. The entire circuit is powered by a coin cell, and the entire thing fits in a Tic-Tac box.

The heart of the project, as you would expect, is a resistor ladder using all six available pins, using five for luminance and one for the sync. That is thirty-two shades of gray, if you’re keeping track. The trick is using the internal PLL and a bit of math to calculate the proper resistor values. The result is just a test pattern, yes, but [danjovic] managed to get a test pattern that has a resolution of 850 pixels across. That’s not bad by any measure.

Of course, if grayscale isn’t your thing, you can also use the ‘tiny85 to send Never The Same Color over the air or even push out the jams over a VGA port.