Miniscule Line-Follower

miniscule-line-follower

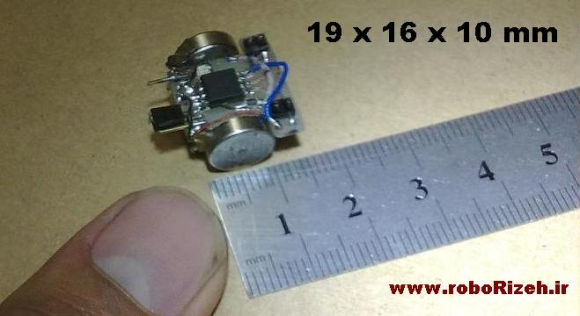
Building line following robots is fun and easy. Building a line-follower that is this tiny is a different story. The surprising thing for us is that despite how it looks, this robot whose name is Rizeh doesn’t use wheels to get around. [Naghi Sotoudeh] built the line-follower using two vibrating motors, with needles (not shown above) making three points of contact with the ground.

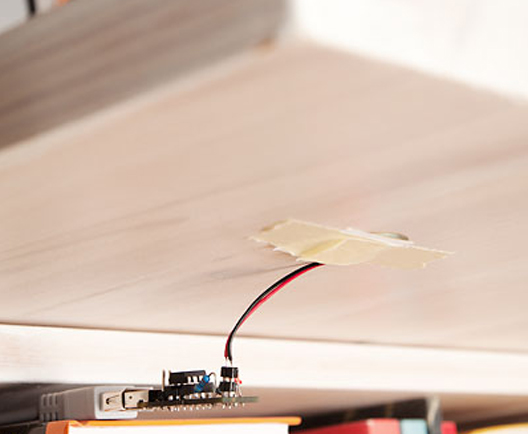
His website is a little sparse, but hit the downloads page to get a PDF file that serves as the build log. We also downloaded the 32 second demo video which is worth it. The magic-marker track that the bot is circumnavigating isn’t any bigger than the palm of your hand!

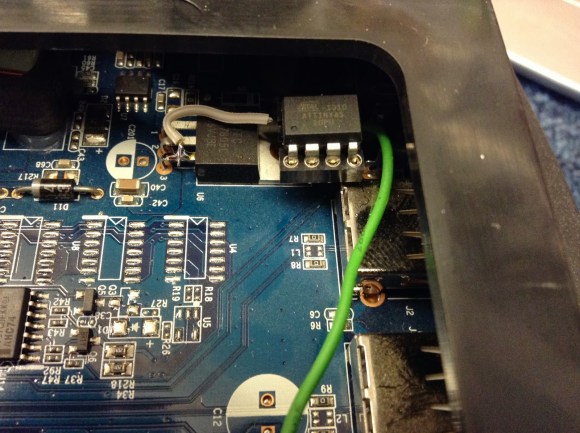
Onboard the diy PCB you’ll find two GP2S04 IR reflectance sensors which detect the black line on a white paper. The power-up sequence spends a few seconds calibrating these sensors. Speaking of power, [Naghi] went with a lithium polymer cell from a Bluetooth headset. At the heart of it all is an ATtiny45 which uses its hardware PWM capabilities to drive the two motors.

Of course line-followers rank up there with self-balancers as our favorite robot projects. But by far the ones we love the most are the speed-run maze solvers.

Turn A PC On With A Knock And An ATTiny

knockAttiny

Pressing the power button on your computer usually isn’t too much trouble, unless your computer is stored away somewhere hard to reach. [Joonas] has been hard at work on a solution that would also impress his friends, building a knock sensor to turn on his PC.

For around $10 in parts he put together an ATTiny45 that emulates a PS/2 device, which takes advantage of his computer’s ability to boot upon receiving PS/2 input. The build uses a Piezo buzzer and a 1M Ohm resistor as a knock sensor exactly as the official Arduino tutorial demonstrates, and one of those PS/2-to-USB adapters that are most likely lurking in the back corner of every drawer in your office.

[Joonas] used AVRweb to disable the 8X clock divider so there’d be enough clock cycles for PS/2 communication, then loaded some test code to make sure the vibrations were being detected correctly. You can check out his Github for the final code here, and stick around after the break for a quick video demo. Then check out a similar hack with [Mathieu’s] home automation knock sensor.

Continue reading “Turn A PC On With A Knock And An ATTiny”

Adding Automatic Power-On To A Linksys NAS

auto-power-up-for-linksys-NAS

We feel [Jim’s] pain in having to physically press the power button to boot his Network Attached Storage device after a power outage. If you live in an area with frequent brief but annoying power blinks it wouldn’t take long to brew up your own solution. Here you can see the ATtiny45 that he added for the auto-boot.

Aside from having to go upstairs in order to reboot the machine there is also a compulsory disk check that his Linksys NAS200 performs before files are available on the network. You can see that he used an 8-pin socket which lets him remove the chip for programming. The socket gets a ground connection from the shielding of the USB port, it pulls 5V off of the linear regulator right next to it, and the green wire connects to the power button’s conductor.

The sketch compiled for the chip starts a ten second timer are power up. When the timer goes off it pulls the pin low and then high, simulating a button press. In hobby electronics it’s a common problem that we have to invent issues to use as the next project. So it’s nice to see a real life application like this one.

Traffic Light Cufflinks

[Brendan Sleight] has been hard at work on this wearable piece of tech. He doesn’t wear much jewelry, but a wedding ring and some cufflinks are part of his look. To add some geek he designed a set of cufflinks that function like traffic lights. Since he still had some program space left he also rolled in extra features to compliment the traffic light display.

That link goes to his working prototype post, but you’ll want to look around a bit as his posts are peppered with info from every part of the development process. The coin-sized PCB hiding inside the case plays host to a red, amber, and green surface mount LED. To either side of them you’ll find an ATtiny45 and a RV-8564-C2. The latter is a surface mount RTC with integrated crystal oscillator, perfect for a project where space is very tight.

The design uses the case as a touch sensor. Every few seconds the ATtiny wakes up to see if the link is being touched. This ensures that the coin cell isn’t drained by constantly driving the LEDs. The touch-based menu system lets you run the links like a stop light, or display the time, date, or current temperature. See a quick demo clip after the break.

Continue reading “Traffic Light Cufflinks”

USB Dongle For Unmodified NES Controllers

This USB dongle will let you use your unmodified NES controllers on a computer. That’s because it includes the same socket you’d find on the classic console.

The image above shows the prototype. Instead of etching the copper clad board, each trace was milled by hand (presumably with a rotary tool). To the left the black square is made of several layers of electrical tape that builds the substrate up enough to fit snugly in a USB port.

An ATtiny45 running the V-USB stack has no problem reading the controller data and formatting it for use as a USB device. This is actually the second iteration of the project. The first attempt used an ATtiny44 and a free-formed circuit housed inside the controller. It worked quite well, but required alterations to the circuit board, and you needed to replace the stock connector with a USB plug. This dongle allows the controller to go unaltered so it can be used with an NES console again in the future.

Using A Touch Sensor As A Telegraph Key

[Sebastian] is learning Morse code and CW radio, and of course he needed a telegraph key. Instead of using the terribly unergonomic paddle style key, he built a capacitive touch iambic key over the course of a few evenings.

An iambic key usually has two switches. When one switch is closed, it will transmit a ‘dit’. When the other switch is closed, it will transmit a ‘dah’. Instead of using mechanical paddles, [Sebastian] brought his iambic key into the 21st century by using a touch sensor. An ATtiny45 measures the time it takes for a single metal plate to fully charge. It’s the same idea behind the wonderful Arduino CapSense library.

This isn’t the first capacitive-touch iambic key we’ve seen; this little guy is just a pair of metal contacts and resistors that plug right into an Arduino. With an ATtiny45, [Sebastian]’s build is a full-blown iambic telegraph key that plugs right into his CW rig. You can check out the walk through of the project along with [Sebastian] trying out his iambic key after the break.

Continue reading “Using A Touch Sensor As A Telegraph Key”

Autonomous Time Lapse With A Video Camera Throwie

When [Matt] came across a small video camera made to fit onto a keychain, the first thing that came to mind is a time-lapse video throwie. Like the LED + coin cell battery + magnet we’ve seen we’ve seen before (and deployed…), [Matt]’s video throwie would be deployed in interesting spots for a few days and shoot a time-lapse video until the battery ran out.

The camera [Matt] picked up has the capability of shooting video or still pictures and writing them to a microSD card. To make his camera film a time-lapse video, [Matt] connected an ATtiny45 to the camera shutter and power buttons and uploaded a short bit of code that would snap a picture ever 15 seconds.

Right now, [Matt] is having a few problems with his video throwie. When the camera is turned on, it iterates through the SD card to find the next unused file name. This eats up a few seconds, so the current setup will slowly speed up the time-lapse video. This isn’t an insurmountable problem, so we’re looking forward to the very interesting videos these tough little cameras will film.

Check out [Matt]’s video of ice melting after the break.

Continue reading “Autonomous Time Lapse With A Video Camera Throwie”