Lenses For DIY Augmented Reality Will Get A Bit Less Unobtainable

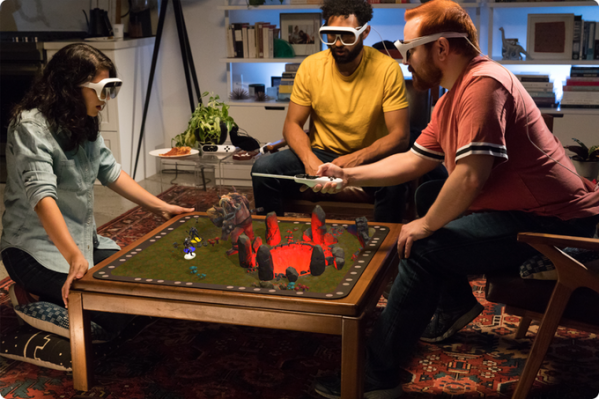
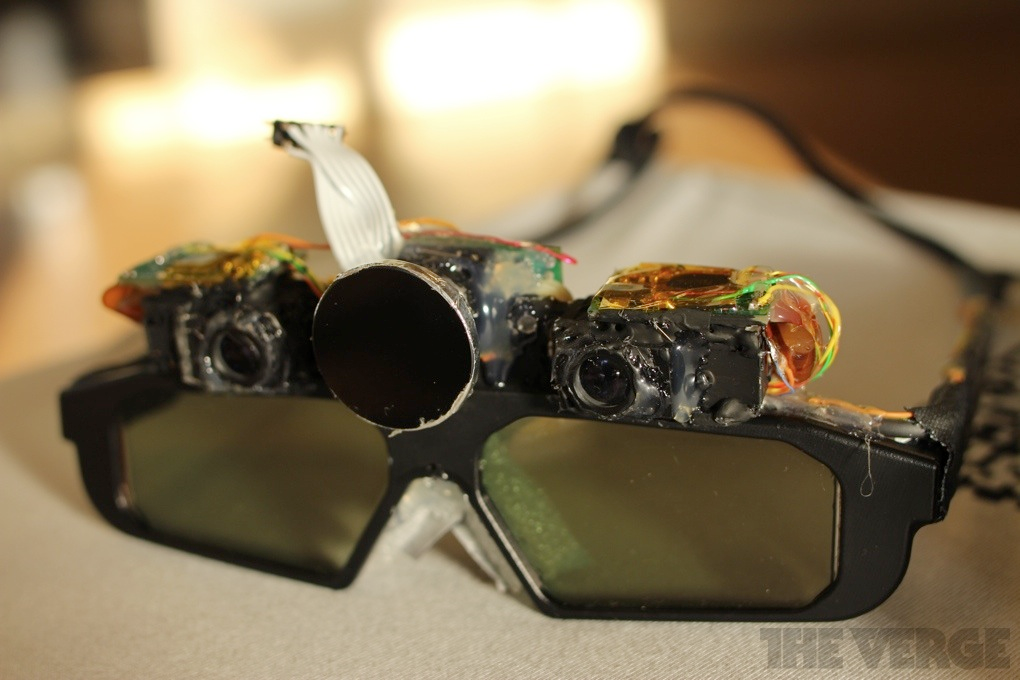
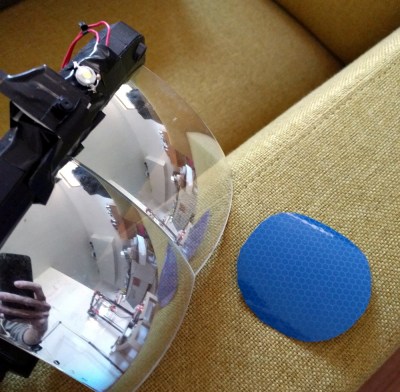
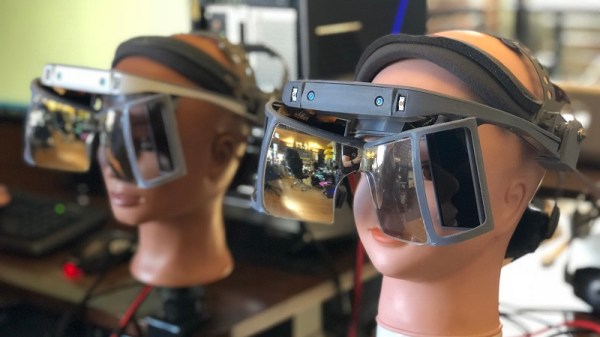
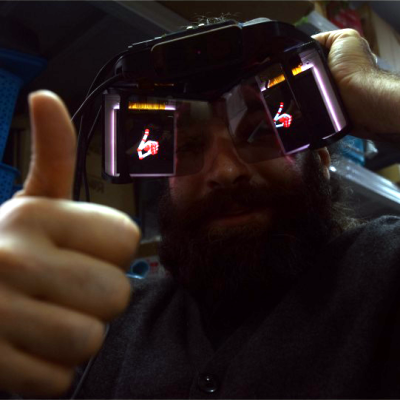
You may remember that earlier this year Leap Motion revealed Project North Star, a kind of open-source reference design for an Augmented Reality (AR) headset. While it’s not destined to make high scores in the fashion department, it aims to be hacker-friendly and boasts a large field of view. There’s also an attractive element of “what you see is what you get” when it comes to the displays and optical design, which is a good thing for hackability. Instead of everything residing in a black box, the system uses two forward-facing displays (one for each eye) whose images are bounced off curved reflective lenses. These are essentially semitransparent mirrors which focus the images properly while also allowing the wearer to see both the displays and the outside world at the same time. This co-existence of both virtual and real-world visuals are a hallmark of Augmented Reality.

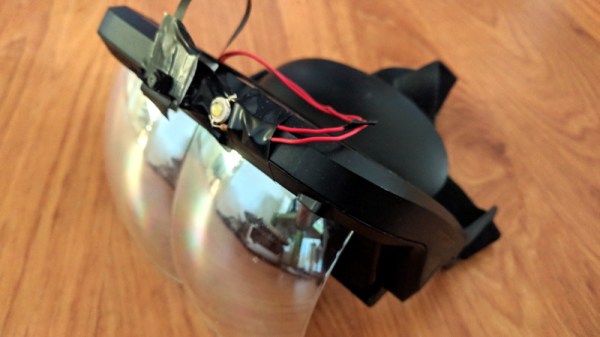
A serious setback to the aspiring AR hacker has been the fact that while the design is open, the lenses absolutely are not off the shelf components. [Smart Prototyping] aims to change that, and recently announced in a blog post that they will be offering Project North Star-compatible reflective lenses. They’re in the final stages of approving manufacture, and listed pre-orders for the lenses in their store along with downloadable 3D models for frames.

When Leap Motion first announced their open-source AR headset, we examined the intruiguing specifications and the design has since been published to GitHub.  At the time, we did note that the only option for the special lenses seemed to be to CNC them and then spring for a custom reflective coating.

If the lenses become affordable and mass-produced, that would make the design much more accessible. In addition, anyone wanting to do their own experiments with near-eye displays or HUDs would be able to use the frame and lenses as a basis for their own work, and that’s wonderful.

Bose Wants You To Listen Up For Augmented Reality

Perhaps it is true that if all you have is a hammer every problem you see looks like a nail. When you think of augmented reality (AR), you usually think of something like the poorly-received Google Glass where your phone or computer overlays imagery in your field of vision. Bose isn’t known for video, though, they are known for audio. So perhaps it isn’t surprising that their upcoming (January 2019) AR sunglasses won’t feature video overlays. Instead, the $200 sunglasses will tell you what you are looking at.

The thing hinges on your device knowing your approximate location and the glasses knowing their orientation due to an inertial measuring system. In other words, the glasses — combined with your smart device — know where you are and what you are looking at. Approximately. So at the museum, if you are looking at a piece of art, the glasses could tell you more information about it. There’s a video showing an early prototype from earlier this year, below.

Continue reading “Bose Wants You To Listen Up For Augmented Reality”

Faux Walkie-Talkie For Comedy Walking Tour Is A Rapid Prototyping Win

Chances are good that a fair number of us have been roped into “one of those” projects before. You know the type: vague specs, limited budget, and of course they need it yesterday. But you know 3D-printers and Raspberduinos and whatnot; surely you can wizard something together quickly. Pretty please?

He might not have been quite that constrained, but when [Sean Hodgins] got tapped to help a friend out with an unusual project, rapid prototyping skills helped him create this GPS-enabled faux-walkie talkie audio player. It’s an unusual device with an unusual purpose: a comedic walking tour of Vancouver “haunted houses” where his friend’s funny ghost stories are prompted by location. The hardware to support this is based around [Sean]’s useful HCC module, an Arduino-compatible development board. With a GPS module for localization and a VS1053 codec, SD card reader, and a small power amp for the audio end, the device can recognize when the user is within 50 meters of a location and play the right audio clip. The housing is a 3D-printed replica of an old toy walkie-talkie, complete with non-functional rubber ducky antenna.

[Sean]’s build looks great and does the job, although we don’t get to hear any of the funny stuff in the video below; guess we’ll have to head up to BC for that. That it only took two weeks start to finish is impressive, but watch out – once they know you’re a wizard, they’ll keep coming back. Continue reading “Faux Walkie-Talkie For Comedy Walking Tour Is A Rapid Prototyping Win”

Glasses For The Hearing Impaired?

If you don’t have hearing loss, it is easy to forget just how much you depend on your ears. Hearing aids are great if you can afford them, but they aren’t like glasses where they immediately improve your sense in almost every way. In addition to having to get used to a hearing aid you’ll often find increased noise and even feedback. If you’ve been to a theater lately, you may have noticed a closed caption display system somewhere nearby that you can sit within visual range of should you be hard of hearing. That limits your seat choices though, and requires you to split your attention between the stage and the device. The National Theatre of London is using Epson smart glasses to put the captions right in your individual line of vision (see video below).

The Epson glasses are similar to the Google Glass that caused such a stir a few years ago, and it seems like such a great application we are surprised it has taken this long to be created. We were also surprised to hear about the length of the project, amazingly it took four years. The Epson glasses can take HDMI or USB-C inputs, so it seems as though a Raspberry Pi, a battery, and the glasses could have made this a weekend project.

Continue reading “Glasses For The Hearing Impaired?”

Raspberry Pi Projection Mapping Crash Course

Projection mapping might not be a term you’re familiar with, but you’ve certainly seen the effect before. It’s when images are projected onto an object, usually one that has an interesting or unusual shape, to create an augmented reality display. Software is used to map the image or video to the physical shape it’s being projected on, often to surreal effect. Imagine an office building suddenly being “painted” another color for the Holidays, and you’ll get the idea.

This might seem like one of those things that’s difficult to pull off at the hobbyist level, but as it turns out, there’s a number of options to do your own projection mapping with the lowly Raspberry Pi. [Cornelius], an avid VJ with a penchant for projection mapping, has done the legwork and put together a thorough list of different packages available for the Pi in case you want to try your hand at the futuristic art form. Many of them are even open source software, which of course we love around these parts.

[Cornelius] starts by saying he’s had Pis running projection installations for as long as three years, and while he doesn’t promise the reader it’s always the best solution, he says its worth getting started on at least. Why not? If the software’s free and you’ve already got a Raspberry Pi laying around (we know you do), you just need a projector to get into the game.

There’s a lot of detail given in the write-up, including handy pro and con lists for each option, so you should take a close look at the linked page if you’re thinking of trying your hand at it. But the short version is that [Cornelius] found the paid package, miniMAD, to be the easiest to get up and running. The open source options, ofxPiMapper and PocketVJ, have a steeper learning curve but certainly nothing beyond the readers of Hackaday.

To make things easier, [Cornelius] even goes on to give the reader a brief guide on setting up ofxPiMapper, which he says shouldn’t take more than 30 minutes or so using its mouse and keyboard interface. It would be interesting to see somebody combine this with the Raspberry Pi integrated projector we saw a couple years back to make a highly portable mapping setup.

Bringing Augmented Reality To The Workbench

[Ted Yapo] has big ideas for using Augmented Reality as a tool to enhance an electronics workbench. His concept uses a camera and projector system working together to detect objects on a workbench, and project information onto and around them. [Ted] envisions virtual displays from DMMs, oscilloscopes, logic analyzers, and other instruments projected onto a convenient place on the actual work area, removing the need to glance back and forth between tools and the instrument display. That’s only the beginning, however. A good camera and projector system could read barcodes on component bags to track inventory, guide manual PCB assembly by projecting which components go where, display reference data, and more.

An open-sourced, accessible machine vision system working in tandem with a projector would open a lot of doors. Fortunately [Ted] has prior experience in this area, having previously written the computer vision code for room-scale dynamic projection environments. That’s solid experience that he can apply to designing a workbench-scale system as his entry for The Hackaday Prize.

Robot Maps Rooms With Help From IPhone

The Unity engine has been around since Apple started using Intel chips, and has made quite a splash in the gaming world. Unity allows developers to create 2D and 3D games, but there are some other interesting applications of this gaming engine as well. For example, [matthewhallberg] used it to build a robot that can map rooms in 3D.

The impetus for this project was a robotics company that used a series of robots around their business. The robots navigate using computer vision, but couldn’t map the rooms from scratch. They hired [matthewhallberg] to tackle this problem, and this robot is a preliminary result. Using the Unity engine and an iPhone, the robot can perform in one of three modes. The first is a user-controlled mode, the second is object following, and the third is 3D mapping.

The robot seems fairly easy to construct and only carries and iPhone, a Node MCU, some motors, and a battery. Most of the computational work is done remotely, with the robot simply receiving its movement commands from another computer. There’s a lot going on here, software-wise, and a lot of toolkits and software packages to install and communicate with one another, but the video below does a good job of showing what you’ll need and how it all works together. If that’s all too much, there are other robots with a form of computer vision that can get you started into the world of computer vision and mapping.

Continue reading “Robot Maps Rooms With Help From IPhone”