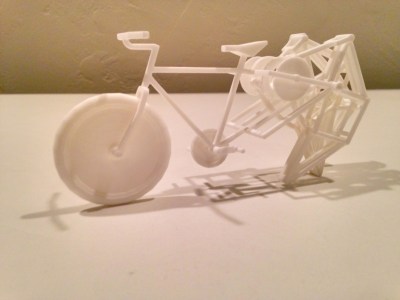
PicoRico Hacks String Encoder For Bike Suspension Telemetry

It’s simple, it’s elegant, and it works really really well. The PicoRico team built a telemetry system for a downhill bike. Off the top of your head how would you do this? Well, telemetry is easy… just add an IMU board and you’re golden. They went beyond that and have plans to go much further. In fact, the IMU was an afterthought. The gem of this build is a sensor that may go by several names: string encoder, draw wire sensor, stringpot, etc. But two things are for sure, they planned well for their hackathon build and they executed on that plan. This landed them as first-runners-up for the top award at the 2015 Disrupt Hackathon in New York, and the winners of the top Hackaday award at the event.

picorico-thumb[Chris], [Marek], and [Dorian] wanted to log all the telemetry data from [Chris’] downhill bike. One of the biggest challenges is to measure the force absorbed by the suspension on the front fork. The three had seen a few attempts at this before. Those used a retractable wire like what holds keys to a custodian’s belt, mated with a potentiometer to measure the change. This is where the term stringpot comes from. The problem is that your resolution and sensitivity aren’t very reliable with this setup.

That is a sensor problem, not a mechanical problem so they kept the retractable reel and replaced the pot with a much more reliable part. In its place an AMT203 absolute position sensor provides an epic level of sensing. According to the datasheet (PDF) this SPI device senses 12 bits of rotation data, can be zeroed over the SPI bus, and is accurate to 0.2 degrees. Unfortunately we didn’t get a good up-close shot of the installation but it is shown in the video. The encoder and retractor mount above the shocks, with the string stretching down to the skewer. When the shocks actuate, the string extends and retracts, turning the absolute encoder. Combine this with the IMU (and two other IMUs they plan to add) and you’ve got a mountain of data to plot and analyze. The videos after the break show a demo of the string encoder and an interview with the team.

picorico-packing-heavyThey came to play

It’s worth noting that the PicoRico team were in this to win it. They packed heavy for the 20-hour hackathon. Here’s a picture of all the gear they brought along with them to the event… in addition to the bike itself.

We see a solder station, Dremel (with drill press), impact driver, tap and die set, extension cords, boxes full of electronics, and more. This type of planning breaks down barriers often faced at hardware hackathons. You can download a software library; you can’t download a tool or building material that nobody has with them. This is the same lesson we learned from [Kenji Larsen] who, as part of his mentoring at the event, brought a mobile fabrication facility in a roller bag.

If you start getting into hackathons, and we hope you will, keep this in mind. Brainstorm as much as you can leading up to the event, and bring your trusted gear along for the ride.

Continue reading “PicoRico Hacks String Encoder For Bike Suspension Telemetry”

Bike Cinema

A Pedal Powered Cinema

When the apocalypse hits and your power goes out, how are you going to keep yourself entertained? If you are lucky enough to be friends with [stopsendingmejunk], you can just hop on his pedal powered cinema and watch whatever movies you have stored on digital media.

This unit is built around an ordinary bicycle. A friction drive is used to generate the electricity via pedal power. In order to accomplish this, a custom steel stand was fabricated together in order to lift the rear wheel off the ground. A 24V 200W motor is used as the generator. [stopsendingmejunk] manufactured a custom spindle for the motor shaft. The spindle is made from a skateboard wheel. The motor is mounted in such a way that it can be lowered to rub the skateboard wheel against the bicycle wheel. This way when the rear bicycle wheel spins, it also rotates the motor. The motor can be lifted out of the way when cruising around if desired.

The power generated from the motor first runs through a regulator. This takes the variable voltage from the generator and smooths it out to a nice even power signal. This regulated power then charges two Goal Zero Sherpa 100 lithium batteries. The batteries allow for a buffer to allow the movie to continue playing while changing riders. The batteries then power the Optomo 750 projector as well as a set of speakers.

Bicycle-Powered Wimshurst Machine

A lot of great pieces of real technology were inspired (or, at least, look like) pieces of technology from science fiction of the past. Like the smartphones of today have a surreal resemblance to the Star Trek communicators of the 60s, [Steve] took inspiration from a story about a bicycle racing in space and set out to make his own.

In the story, the bicycle wheels are replaced by electrostatic generators that power a type of (fictional) ion drive. Since an ion drive wouldn’t add much thrust to a bicycle operated on the Earth, [Steve] used the electrostatic generator he built to create a sparking light show. The generator is called a Wimshurst machine and has two counter-rotating discs which collect charge. The charge is dissipated across a spark gap which is placed where the bike light would normally go.

We don’t know if the sparks from the Wimshurst generator are enough for a proper headlight, but it’s definitely a cool effect. [Steve] also points out that it might also work as a bug zapper, but either way you should check out the video after the break to see it in action! While it’s not quite a tricorder it’s still a pretty impressive sci-fi-inspired build, and something that’s definitely unique in the bicycle realm.

There’s quite a collection of these Wimshurst projects beginning to come together. Here’s one made using a trio of soda bottles, and another example which used 3D printing.

Continue reading “Bicycle-Powered Wimshurst Machine”

Square Bicycle Design

Building A Square Bicycle

Inspired by [Michael Ubbesen Jakobsen’s] BauBike design, [Aaron Seiter] decided to try building his own.

The entire frame was made out of 1″ square steel tubing and welded together in no time at all. Actually intending to ride this bike, he had to make a few changes to the original BauBike design. Most importantly, he raised the seat up to allow for proper leg extension while pedaling.

The funny thing is most people on Reddit thought it wasn’t going to work, so shortly after posting the gallery to imgur, [Aaron] also uploaded a short video to YouTube to prove, yes, he can actually ride it. Stick around after the break to see it in action.

Continue reading “Building A Square Bicycle”

Chain Cleaner

DIY Automatic Chain Cleaning Machine

Spring is here and it’s time to pull the bikes out of the shed. One think that is often overlooked is bicycle maintenance. No one wants to be that guy walking his bike home after a part failure renders the bike unrideable. One portion of proper bike maintenance is cleaning the chain. A contaminated bike chain can wear quicker, not be as flexible, hinder shifting and increase wear to the drivetrain cogs. Tired of sitting there cleaning his chain with a tooth brush, [Ally] built a washing machine for bike chains.

This machine is quite simple, it’s a plastic box full of turpentine and dish detergent. The chain is submerged in the liquid and a lid is put on the box. At the local hobby store, [Ally] purchased a small gearbox and motor assembly. Powered by a 5vdc wall wart, the output shaft of the gearbox spins a crank that in-turn agitates the box, chain and cleaning liquid. After about 5 minutes the chain is free of grit and gunk. Not bad for a few dollars, spare parts and a little bit of time. Check out the video of it in action after the break.

While you’re waiting for your chain to be cleaned you should work on making your bike pedal in both directions.

Continue reading “DIY Automatic Chain Cleaning Machine”

Bike-Powered Everything

It’s hard to argue that bicycles aren’t super handy. They get you from point A to B in a jiffy with little effort. Since these machines are so simple and convenient, why not use them for things other than transportation? Well, [Job] set out to do just that.

[Job’s] starts with a standard single speed bike and adds a few parts. First, a stand is installed to the back axle. When in the down position, it lifts the rear wheel off of the ground and provides support so the bike does not tip over. When flipped up into the ‘up’ position the stand creates a rack for holding goods and the bike can be pedaled around in a normal manner.

dualpurposebike-midNext, a jack shaft made from a bike bottom bracket and crank is installed up front in between the top tube and down tube of the frame. On one side of the jack shaft is a sprocket and the other side is a large pulley. When converting to what [Job] calls ‘power production mode’, the chain going to the rear wheel is removed from the crank sprocket and replaced with a chain connected to the jack shaft.

With the rear stand down supporting the bike and the pedals now powering the jack shaft and large pulley, it is time to connect the bike to any sort of machine. A belt is slung around the pulley and connected to a matching pulley on a power-hungry machine. This dual-purpose bike has powered a rice thresher, peanut sheller, water pump, table saw and even a wood lathe!

[Job] set out to create a simple and inexpensive way to make a bike even more useful than just riding around town. We think he did just that. For more bike-powered stuff, check out this generator.

Cyclist Pulled Over For Headphones Builds Neighborhood Shaking Bicycle Boombox

Riding around with headphones on is not the safest of things; those people are trying to could hit you! [Victor Frost] was actually pulled over for doing it. Although the bicycle police didn’t ticket him, they did push him over the edge to pursuing a compromise that lets him listen to tunes and perhaps still hear the traffic around him.

The build puts 200 Watts of audio on his rear luggage rack. He used a couple of file totes as enclosures, bolting them in place and cutting one hole in each to receive the pair of speakers. The system is powered by two 6V sealed lead-acid batteries which are topped off by a trickle-charger when the bike is parked.

Looking through this log we almost clicked right past this one. It wasn’t immediately apparent that this is actually version four of the build, and these are completely different spins each time. The top-down view of plastic-tacklebox-wrapped-v3 is sure to make you grin. Video overviews of the first two versions are linked in [Victor’s] details section of the project page linked at the top of this post. The progress is admirable and fun time digging through. They’re all quite a bit different but bigger, better, and more self-contained with each iteration.

Okay, okay, maybe this isn’t going to shake the neighborhood… until he adds a Bass Cannon to it.