A Stylish Low Part Count Non-Contact Thermometer

A non-contact thermometer is a pretty common tool these days, and one that most of us probably have kicking around the lab. You can grab them online for as little as $10 USD, and while they’re nowhere near as capable as a thermal camera, they certainly have their uses. But even with their increased availability, there are at least two safe assumptions we can make about owners of said gadgets: they didn’t make it themselves, and they are probably pretty ambivalent about its aesthetics.

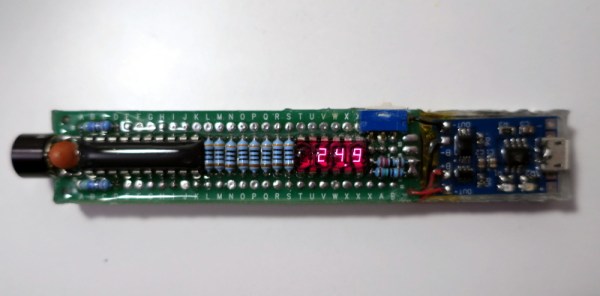
Which makes this project by [Ijon Tichy] particularly interesting. Not only is this a non-contact infrared thermometer that’s extremely easy to build should you be so inclined, but it’s actually quite attractive. In fact, if it wasn’t for the video of it in operation after the break, we would have assumed it was some kind of faux-retro cosplay prop. Even if you don’t have any use for an IR thermometer, you might just want to add one of these to your toolbox on principle.

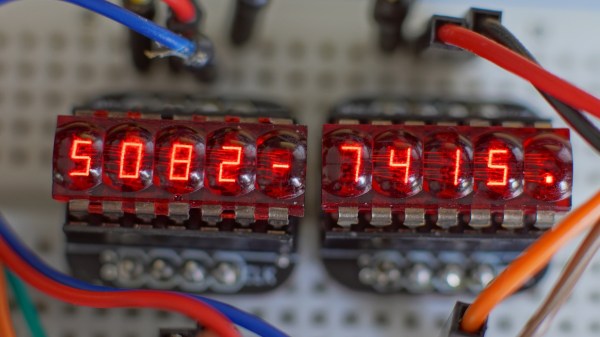
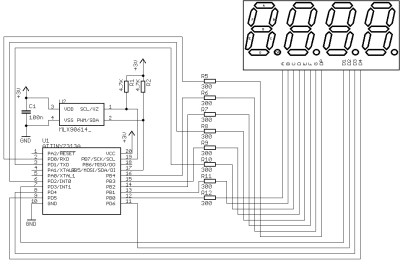
The main components of the thermometer are a MLX90614 sensor, a gorgeous HP QDSP-6040 bubble display, and a ATtiny2313 microcontroller to tie it all together. The rest are passive components, with the exception of the TP4056 charging module that got tacked on to handle the 200 mAh lithium-ion battery. All of the components are arranged neatly in a line down the length of the thermometer, which is assembled on a piece of perfboard. Rather than go with a 3D printed enclosure that would cover it all up, [Ijon] decided to encapsulate everything in a clear epoxy resin. It looks fantastic, though you’re going to want to triple check all those solder joints before pouring on your “enclosure”.

[Ijon] has provided the diagrams and source code you need to build your own version of this artisanal thermometer, but we think with a custom PCB and perhaps a less liquid enclosure that still shows off the goods, this could be a very popular gadget for the discerning hacker. As we’ve seen, even the most basic of tools can benefit from a stylish makeover.

Continue reading “A Stylish Low Part Count Non-Contact Thermometer”

Easy Bubble Watch Oozes Retro Charm

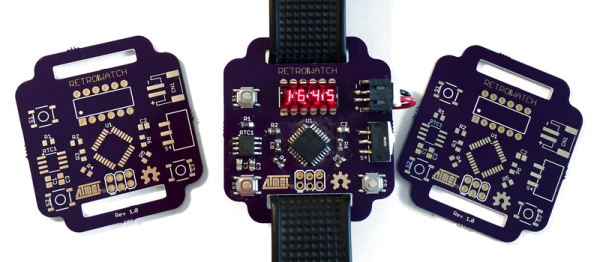
[Rafael] made a sweet little retro watch that’s a fantastic introduction to hardware DIY. If you’ve programmed an Arduino before, but you’ve never had a board made, and you are up for some SMD soldering, this might be for you. It’s got some small components, so ease off the coffee before soldering, but it’s nothing that you won’t be able to do. In the end, you’ll have something awesome.

Aesthetically, the centerpiece is the bubble display, which reminds us of the old HP calculator that our parents kept in the junk drawer, long after it had ceased to be relevant. It would return 3.9999999 for the square-root of 16, but we loved to play with it anyway. This watch will let you vicariously reclaim our childhood.

But that’s not all! It’s also an Arduino and RTC clock. Functions that are already implemented include clock, calendar, stopwatch, and “temperature”. (Temperature is from the AVR’s internal thermometer, which isn’t super-accurate and is probably just going to tell you how hot your wrist is anyway…) It’s got buttons, and tons of free flash space left over. It’s begging to be customized. You know what to do.

It’s not a smart watch, but it’s a great project. “The nostalgic retro bubble display is certain to flatter any hacker’s outfit.” Or something. OK, but we want one.

[via OSHpark’s Hackaday.io feed]

Bubble Displays Are Increasing In Resolution

PipeDreams 3 bubble display

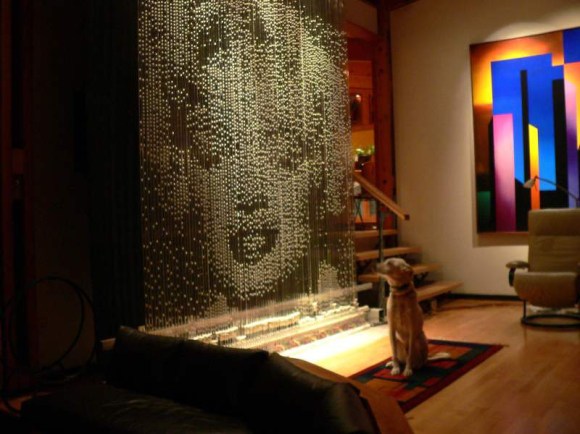
[Bruce] has created a pretty cool bubble display that is capable of showing recognizable photographs of people. This entire art installation is no slouch at 3-stories tall! This one resides at the Ontario Science Centre in Toronto, Canada. If you are unfamiliar with bubble displays, they consist of several clear vertical tubes filled with a liquid. A pneumatic solenoid valve mounted at the bottom of each tube allows a controlled amount of air to enter the tube at a very specific time. Since the air weighs less than the liquid, the air bubble travels up the tube of liquid. Interesting patterns can be made if these bubbles are timed correctly. This setup uses a Linux-based computer with custom control software to manipulate the valves.

[Bruce] didn’t start off making super-complex bubble displays. This is actually his 3rd go-around and with 96 individual tubes and capable of displaying raster images, it is the most complicated so far. His first creation consisted of 16 tubes, each larger in diameter than the most recent creation. With the larger diameter and less number of tubes came less resolution and the ability to only display simple shapes. Version 2 had twice as many tubes, 32 this time. In addition to doubling the tube quantity [Bruce] also colored the fluid in the tubes, not all the same color but all the colors of the rainbow, from red to violet. Still, this version could not show raster images. It appears to us that the third time’s the charm! Video after the break….

Continue reading “Bubble Displays Are Increasing In Resolution”

A Tiny Bubble Display Alarm Clock

For one reason or another, we’re starting to see a lot of projects featuring some old seven-segment HP bubble displays. Yes, those displays once relegated to ancient electronic calculators are making a comeback for reasons we can’t understand why, other than speculation that someone found a bunch of NOS displays. [Markus] picked up a few of these olde tymie displays and built a very nice bubble display alarm clock.

To keep things simple, [Markus] didn’t go the usual ATMega with RTC route. Instead, he’s using an MSP430, a 32kHz crystal, and a few buttons to construct this tiny alarm clock. It’s powered by a single AAA battery, and in a nice change of pace from fancy, professionally made boards, [Markus] built this on some perfboard with a little bit of enameled wire.

It’s a neat little clock, and with the speaker and most likely extreme battery life thanks to the MSP430, a wonderful portable, classic-looking alarm clock. Video of [Markus] manipulating the time below.

Continue reading “A Tiny Bubble Display Alarm Clock”

3D Bubble Display

3dbubbledisplay

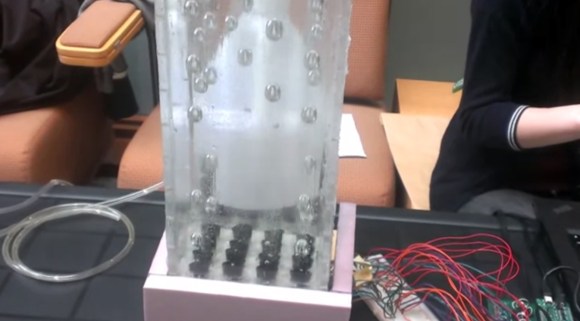
[Craig Shultz], a mechatronics grad student at Northwestern University, sent us a video of his group’s project from last winter: a 3D bubble display. We’ve seen some pretty impressive and innovative bubble displays around here—most recently the 60-tube RGB LED build—but [Craig’s] is the first we’ve seen that adds some depth to the project.

For the most part, its construction is what you’d expect: an acrylic case enclosing the 4×4 arrangement of tubes, 16 valves 16 individually controlled solenoids, and some small air pumps; all driven by a PIC microcontroller. In the video, however, you’ll have to strain your eyes if you want to see the tubes, which is a clever design choice on [Craig’s] part to showcase the display’s depth. Each of the bubbles was visually separated by pairing glycerin with a tubing material that had a similar index of refraction, Pyrex. As a result, the tubes blend seamlessly into the fluid. Check out the video after the break.

Continue reading “3D Bubble Display”

An Improved Bubble Display With RGB LEDs

Making a bubble display is quite an undertaking, but [Jay] takes advantage of iterative design to construct this impressive (and at 60 tubes, massive) bubble display. The display functions by dispensing bubbles to serve as illuminated pixels in each tube as they rise through the fluid. His build log steps through the display’s construction with a keen attention to detail and above all, patience.

Rather than diving right in and slapping some tubes together, [Jay] took the time to research other bubble display projects, including one we featured a few years back that grew out of yet another HackaDay article. His prototypes started off small to test potential features: whether to use water or glycerin, timing for the air pumps and bubble size, and several others. [Jay] even filled the log with videos of every test, so you can watch the problems and solutions unfold at each step.

The finished display boasts sixty 30″ tall tubes, making it 64″ wide. [Jay] also installed RGB LEDs at every edge where the tubes meet to better distribute the light. You can watch one of the many videos of the display at work below.

Continue reading “An Improved Bubble Display With RGB LEDs”

Displaying Bubbles In Mineral Oil

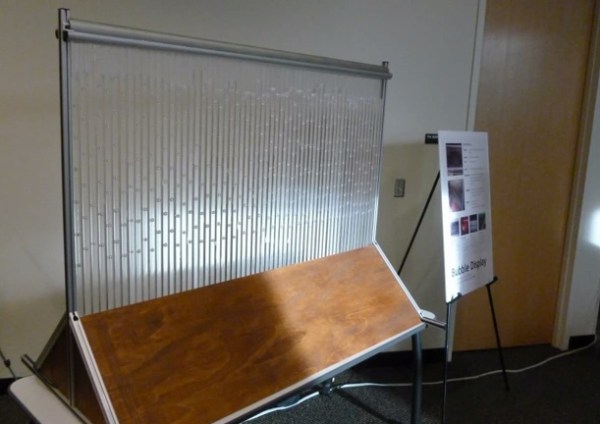
After he saw a ‘falling water display,’ [Matt] figured he could turn that idea on its head. He built a display that uses bubbles for pixels. Even though the build isn’t complete, we love the results so far.

[Matt] began his build constructing a tall, thin water tank out of acrylic. Eight solenoids were mounted in the base of the tank, attached to an aquarium air supply, plastic tubing, and one way valves. The first run of the bubble display didn’t go too well, but after adding dividers between each column the display started working.

With the dividers, [Matt] no longer had to worry about bubbles colliding or moving any direction but up. The bubbles weren’t moving consistently, so he replaced the water with mineral oil. Oil made a huge improvement, but the bubbles still float up at different speeds. [Matt] ascribes this to the unregulated air supply, but we’re thinking this problem could be mitigated with glycerine like the previous bubble display we saw.

It may still have some problems, but we love the result. Check out the video of bubbles in mineral oil after the break.

Continue reading “Displaying Bubbles In Mineral Oil”